
Injector operation check
- Make
- Fiat
- Model
- Bravo Factory Service Manual
- Year
- 2007–2014
- Section
- Petrol injection system › Injector operation check
Injector operation check
| STEP | CHECK TO BE PERFORMED | REMEDIAL ACTION IF THE CHECK IS NOT OK |
|---|---|---|
| 1 | Injection signal check
| Move on to Step 2 |
| 2 | Injection wiring check
See E5030 PETROL ENGINES ELECTRONIC MANAGEMENT Move on to Step 3 | Restore the correct wiring between the engine control unit and the injectors. Replace the engine management control unit |
| 3 | Injector supply check
See E5030 PETROL ENGINES ELECTRONIC MANAGEMENT Move on to Step 4 | Restore the correct supply for the injectors |
| 4 | Injector resistance check
| Replace the injector Op. 1056B70 INJECTOR (ONE) - R + R WITH FUEL MANIFOLD PIPE REMOVED - INCLUDES SEAL REPLACEMNT |
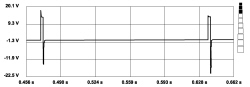
Injection signal
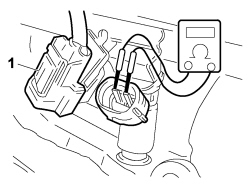
1- Injector connector
| STEP | CHECK TO BE PERFORMED | REMEDIAL ACTION IF THE CHECK IS NOT OK |
|---|---|---|
| 1 | Injection signal check Prepare the diagnostic equipment for a voltage graph assimilation. Select the "VOLTMETER" function from the "INSTRUMENT" menu with the time set at 1 second. Connect the probes between the pins of the injector that is not working (using disconnector AD 233 N° 1806387000). Press the START button on the diagnostic equipment to begin downloading a graph. Let the engine be driven and check that the signal corresponds to the enclosed graph | Renew the wiring between the engine management control unit and the injectors. If the signal is interrupted at the control unit output replace the engine management control unit |
| 2 | Injector power supply check Check that the injectors are correctly supplied Move on to Step 3 | Renew the 15A fuse F22 in the engine compartment junction unit after having identified the cause of the problem. Restore the correct power supply for the injectors |
| 3 | Injector resistance check Disconnect the injector connector Connect the Examiner in ohmmeter mode between the injector terminals and then check the resistance: the value should be 12 Ohm ± 10% at 20°C | Replace the injector Op. 1056B70 INJECTOR (ONE) - R + R WITH FUEL MANIFOLD PIPE REMOVED - INCLUDES SEAL REPLACEMNT |
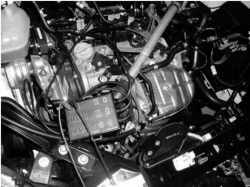
Disconnector AD 233 connection
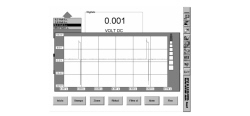
Injection signal
Parts & tools for this job For 2007 Fiat Bravo
- PARTFuel filterSearch: Fiat Bravo 2007 fuel filter
- TOOLFuel pressure test kitSearch: fuel pressure test kit
- TOOLFuel line disconnect toolSearch: fuel line disconnect tool
Links open Amazon search results in a new tab. As an Amazon Associate I earn from qualifying purchases.