
Introduction - petrol fuel injection system
- Make
- Fiat
- Model
- Bravo Factory Service Manual
- Year
- 2007–2014
- Section
- Petrol injection system › Introduction - petrol fuel injection system
INTRODUCTION - PETROL FUEL INJECTION SYSTEM
SPECIFICATIONS
GENERAL SPECIFICATIONS
The Bosch Motronic ME7.3H4 system (microhybrid technology control unit) with a motorised throttle is an ignition system which incorporates timed, sequential electronic injection.
The fuel supply system is the returnless type.
The control unit electronically manages the air flow rate at the rotation speed set by the electronic throttle, regulates the fuel injection so that the (air/fuel) ratio is always within optimum values, calculating the moment of ignition, in order to allow the smooth operation of the engine when the environmental parameters and loads applied vary.
The ignition system is solid-state with a coil for each cylinder. The power modules are housed inside the control unit.
The self-adaptive engine management system can recognise the changes that take place in the engine. It compensates for them using the self-adaptive functions that correct the fuel mixture and air flow plans mapped in the control unit.
There are two adaptive functions, in particular, for the fuel mixture plan, depending on whether the evaporation control solenoid valve is open or closed, plus an idle adaptation plan: the latter is capable of compensating effectively for any air seepage.
The continuous self-adaptation of the fuel mixture plan makes it possible to ensure the correct amount of fuel in all temperature and altitude conditions.
As a result of this, after every intervention it is necessary to drive the vehicle for at least 15 minutes in various operating conditions in order for any changes that have taken place in the system to be memorised in the control unit and to end the adaptation.
The main system functions are as follows:
- injection time adjustment;
- ignition advance adjustment;
- cold starting check;
- enrichment during acceleration check;
- fuel cut-off during over-run;
- idle speed management (also dependent on battery voltage);
- restriction of the maximum engine speed;
- combustion control with Lambda sensor;
- petrol vapour recovery;
- fan control;
- climate control system engagement/disengagement;
- self-diagnostics.
There is also a special function that manages the connection with the body computer via a two-way signal for the CAN line. This includes:
- engine temperature for instrument panel (output);
- battery voltage (output);
- engine rpm (output) for instrument panel;
- engine overheating warning light for instrument panel (output);
- engine oil pressure warning light for panel (output);
- vehicle speed (input) + mileometer (input);
- Fiat code anti-theft device (input/output);
- key status;
- consumption signal (output) for trip computer.
- fuel level signal (input)
Injection system
The essential conditions to be met by the air-fuel mixture for the efficient operation of engines with controlled ignition systems are mainly as follows:
- the metering (air/fuel ratio) must be kept as close as possible to the stoichiometric value to ensure that combustion is as fast as possible in order to avoid fuel wastage
- the mixture, consisting of petrol vapours, must be homogeneous, that is distributed throughout the air as finely and uniformly as possible.
The injection/ignition system uses an indirect measuring system known as "SPEED DENSITY-LAMBDA".
In other words, angular rotation speed, intake air density and control of mixture strength (feedback control).
In practice, the system uses the ENGINE SPEED data (rpm) and the AIR DENSITY (pressure and temperature) to measure the quantity of air drawn in by the engine.
The quantity of air drawn in by each cylinder, for every engine cycle, also depends on the unit capacity and the volumetric efficiency as well as on the density of the intake air.
The density of the air refers to the air drawn in by the engine and is calculated according to the absolute pressure and temperature, both measured in the intake manifold.
Volumetric efficiency is the parameter that measures cylinder filling efficiency, measured on the basis of experiments conducted on the engine for the entire operating range and then stored in the electronic control unit memory.
Having established the quantity of intake air, the system must provide the amount of fuel dictated by the desired mixture strength.
The end of injection impulse or delivery timing is stored in a map in the control unit memory and varies according to the engine speed and the pressure in the intake manifold.
In practice, it involves processing carried out by the electronic control unit to manage the timed, sequential opening of the four injectors, one per cylinder, for the length of time strictly necessary to make the air/petrol mixture as close as possible to the stoichiometric ratio.
The fuel is injected directly into the manifold, near the inlet valves, at a pressure of around 3.5 bar.
The speed (rpm) and the density of the air (pressure and temperature) are used for measuring the quantity of intake air which, when established, is used for metering the amount of fuel needed for the desired mixture strength.
The other sensors in the system (coolant temperature, throttle valve position, battery voltage, etc.) allow the electronic control unit to correct the basic strategy for all the engine operating conditions.
It is vital for the air/fuel ratio to be close to the stoichiometric value for the correct and prolonged operation of the catalytic converter and for reducing pollutant emissions.
Ignition system
The ignition circuit is solid-state inductive discharge type, i.e. without an HT distributor, with power modules located inside the injection-ignition electronic control unit.
The primary winding of each coil is connected to the power relay (thereby receiving battery voltage) and to the pins of the electronic control unit for earth connection.
After the starting stage, the electronic unit manages the basic advance taken from special maps in accordance with:
- engine rpm
- absolute pressure value (mmHg) measured in the intake manifold.
This advance setting is corrected according to the engine coolant temperature, intake air, detonation and throttle position.
The spark plugs for the cylinders are connected directly to the coil secondary winding terminals (one per spark plug).
OPERATION
Diagram showing information entering/leaving the control unit
The information entering/leaving the control unit is illustrated in the diagram below.
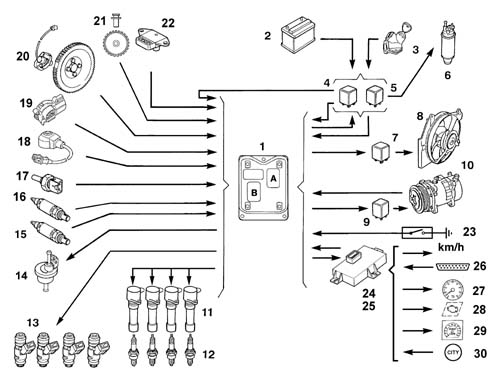
1, Engine management control unit
2, Battery
3, Ignition switch
4, Engine control system relay
5, Electric fuel pump relay
6, Fuel pump
7, Radiator fan relay(s)
8, Radiator fan
9, Compressor engagement relay
10, Compressor
11, Ignition coils
12, Spark plugs
13, Injectors
14, Charcoal filter scavenging solenoid
15, Lambda sensor (pre-catalyser)
16, Lambda sensor (post-catalyser)
17, Coolant temperature sensor
18, Detonation sensor
19, Throttle control actuator and throttle position sensor
20, Rpm and TDC sensor
21, Injection timing sensor
22, Air temperature/absolute pressure sensor
23, Oil pressure switch
24, Body computer:
25, CODE control unit (via CAN)
26, Diagnostic equipment connection (via CAN)
27, Rev counter (via CAN)
28, System failure lamp (via CAN)
29, Speedometer (via CAN)
30, City button for power steering (via CAN)
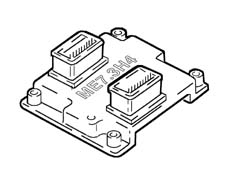
SELF-LEARNING
The control unit implements the self-learning logic under the following conditions: *- removing/refitting or replacing the injection control unit *- removing/refitting or replacing the throttle casing
The values stored by the control unit are retained when the battery is disconnected.
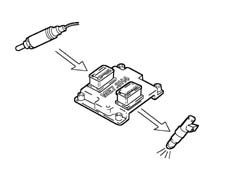
SYSTEM SELF-ADJUSTMENT
The control unit is equipped with a self-adjustment function that is designed to recognize the changes that take place in the engine due to the processes of bedding in and ageing of both the components and the engine itself in time.
These changes are memorised in the form of modifications to the basic map and are designed to adapt the operation of the system to the gradual alterations in the engine and the components, compared with when they were new.
This self-adjustment function also makes it possible to compensate for the inevitable differences in any replacement components (owing to production tolerances).
On the basis of exhaust gas analysis, the control unit modifies the basic map in relation to engine specifications when new.
The self-adjustment parameters are not deleted if the battery is disconnected.
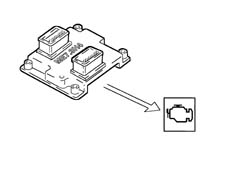
AUTODIAGNOSIS AND RECOVERY
The control unit auto-diagnostic system checks that the system is working properly and signals any irregularities by means of an MIL warning light in the instrument panel with a standardised icon and colour, as laid down by European regulations.
This warning light indicates engine management faults and also faults detected by EOBD diagnostic strategies.
The MIL warning light operating logic is as follows.
The warning light comes on with the ignition on and remains on until the engine is started up; the control unit autodiagnostic system checks the signals coming from the sensors and compares them with the permitted data limits.
Fault indication during start up:
- the failure of the warning light to go out when the engine has been started indicates that there is an error memorized in the control unit.
Fault indication during operation:
- the warning light comes on in flashing mode to indicate possible catalytic converter damage due to misfiring.
- the warning light comes on in constant mode to indicate the presence of engine management or EOBD diagnostic errors.
The control unit defines the recovery settings on each specific occasion according to which components are faulty.
The recovery parameters are managed by non-faulty components.
SYSTEM CONTROLS AND MANAGEMENT
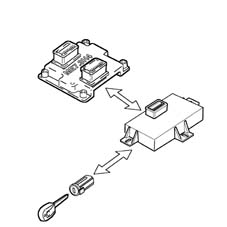
Fiat code recognition
The moment the control unit receives the MAR signal, it converses with the body computer to obtain the go-ahead for starting.
The communication takes place via the two-way CAN line that connects the two control units.
Cold starting check
The following occurs in cold starting conditions:
- a natural weakening of the mixture (which causes poor turbulence of the fuel particles at low temperatures)
- reduced evaporation of the fuel
- fuel condensation on inner walls of the intake manifold
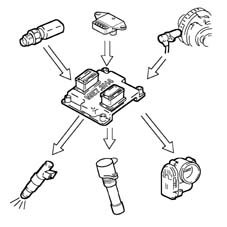
- higher lubrication oil viscosity.
The electronic control unit detects this condition and corrects the injection time on the basis of:
- coolant temperature
- intake air temperature
- battery voltage
- engine rpm.
The ignition advance is determined solely on the basis of rpm and coolant temperature.
The rotation speed decreases proportionally as the engine temperature increases, until the nominal value is reached when the engine has warmed up.
Combustion - lambda sensor check
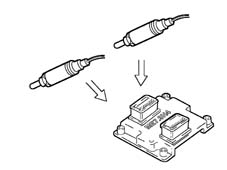
In EOBD systems, the Lambda sensors are all the same type and are located upstream of the catalytic conversion system and downstream of the converter.
The pre-converter sensor controls 1st loop mixture strength (upstream sensor closed loop).
The post-converter sensor is used for the fault diagnosis of the catalyser and for modulating the 1st loop control parameters.
The second loop is therefore adaptive to make up for production discrepancies and slight drift that pre-catalyser sensor responses could experience due to ageing and contamination.
This control is known as 2nd loop control (post-catalyser sensor closed loop).
Detonation control
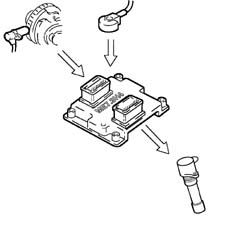
The control unit detects the presence of detonation (engine knock) by processing the signal coming from the relevant sensor.
The control unit continuously compares the signals coming from the sensor with a threshold which is, in turn, continually updated to take into account background noise and engine ageing.
The control unit can therefore detect the presence of detonation (or the onset of detonation) in each individual cylinder and reduces the ignition advance in the cylinder involved (in steps of 3° up to a maximum of 6°) until the phenomenon disappears. Later on, the advance is gradually restored to the basic value (in steps of 0.8°).
In acceleration conditions, a higher threshold is used in order to take into account the increased noise of the engine under such circumstances.
The detonation control logic also has a self-adjustment function which memorises the reductions in the advance that are continuously repeated in order to adapt the map to the different conditions that may affect the engine.
Enrichment during acceleration check
During this stage, the control unit increases the amount of fuel supplied to the engine (to produce the maximum torque), according to the signals coming from the following components:
- throttle potentiometer
- rpm and TDC sensor
The basic injection time is multiplied by a coefficient depending on the temperature of the engine coolant, the opening speed of the accelerator throttle and the increase in pressure in the intake manifold.
If sharp variation in the injection time is calculated when the injector is already closed, the control unit reopens the injector (extra pulse) in order to be able to adjust the mixture strength as quickly as possible; the subsequent injections are already increased on the basis of the coefficients mentioned previously.
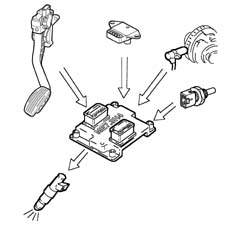
Fuel supply - electric fuel pump check
The control unit supplies the pump:
- with the key turned to MAR for 0.8 secs.
- with the key at AVV and the engine speed > 22.8 rpm
The control unit cuts off fuel supply to pump:
- with the ignition key in the STOP position
- with the engine speed < 22.8 rpm.
The returnless fuel supply system ensures a constant petrol pressure of 3.5 bar.
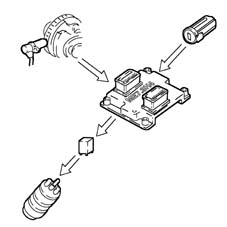
Connection with climate control system
When there is a request for power due to the compressor having been switched on, the control unit operates the motorised throttle to increase the air flow rate.
The control unit temporarily cuts off the supply to the compressor:
- during starting
- switching it off beyond 6200 rpm
- switching it off when the engine temperature is > 112°C.
- during take off with the accelerator fully depressed.
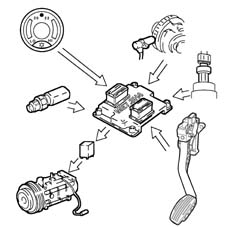
Recognition of cylinder position
The engine timing sensor, together with the engine rpm and top dead centre (TDC) signal, allows the control unit to recognise cylinder sequence when implementing timed injection.
This signal is produced by a Hall effect sensor, positioned on the cylinder head near the phonic wheel on the inlet camshaft.
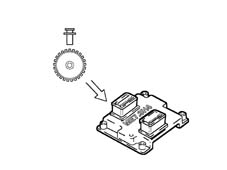
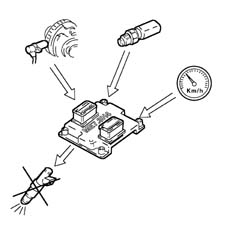
Fuel cut-off during over-run
When the accelerator pedal is released and beyond a pre-set engine speed level, the control unit: *- cuts off the supply to the injectors *- reactivates the supply to the injectors at 1300 - 1500 rpm
In the absence of fuel, the number of revs decreases at a rate determined by the vehicle driving conditions.
Before the idle speed is reached, the progress of the engine speed decrease is checked.
If the rpm decrease exceeds a given rate, the fuel supply is partly restored so that the speed drops smoothly down to the idle speed.
The levels for restoring the supply and for cutting off the fuel vary according to:
- engine coolant temperature
- vehicle speed
- engine rpm.
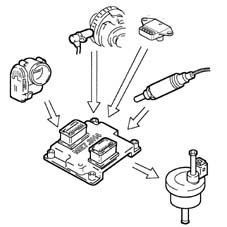
Fuel vapour recovery
Fuel vapours (pollutants) collected in the activated carbon filter (canister) are directed to the intake ducts to be burnt.
This is done by a solenoid controlled by the control unit only when the engine operating conditions allow.
The control unit compensates for this additional amount of fuel with a reduction in the delivery to the injectors.
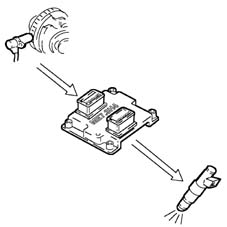
Maximum rpm check
According to the rpm level reached by the engine, the control unit:
- cuts off the supply to the injectors beyond 7000 rpm;
- allows injector control to resume below 7000 rpm.
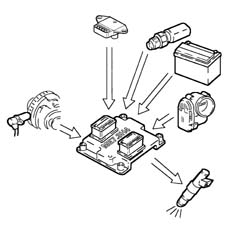
Injection time adjustment
The control unit calculates the injector opening times and controls them with extreme precision and speed, according to the:
- engine load (number of revs and air flow rate)
- battery voltage
- engine coolant temperature.
The injection is the timed, sequential type for each cylinder and takes place corresponding to the optimum "start of injection" point, with the "end of injection" point remaining fixed.
Ignition advance adjustment
Thanks to a map stored in its memory, the control unit is capable of calculating the ignition advance, according to:
- the engine load (minimum, partial, full, according to the number of revs and the air flow rate)
- the intake air temperature
- the engine coolant temperature.
The ignition can be selectively delayed at the cylinder with the greatest demand, which is determined by a combination of values recorded by the rpm and timing sensors.
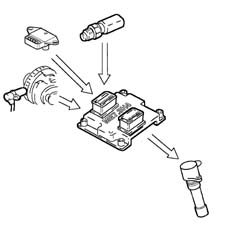
Idle speed check
The control unit detects idling status when the accelerator pedal is released.
To control the idle speed, depending on the consumers switched on and the brake/clutch pedal signals, the control unit controls the position of the motorised throttle.
The idle speed when warm is 700 ± 50 rpm.
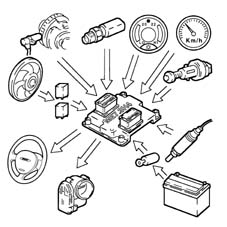
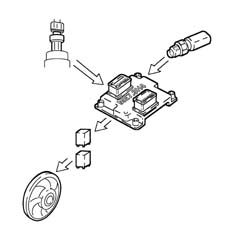
Radiator cooling fan check
Depending on the temperature of the coolant, the control unit controls the engagement of the fan:
- 1st speed activation temperature 97°C
- 2nd speed activation temperature 101°C
There is then a further check (linear sensor signal) which switches on the fan at the 1st or 2nd speed depending on the pressure of the refrigerant gas when the air conditioning system is switched on.
When no coolant temperature signal is present, the control unit implements the recovery function by activating the fan at the 2nd speed until the error disappears.
COMPOSITION
VIEW OF ASSEMBLY
The main system components are illustrated in the diagram below.
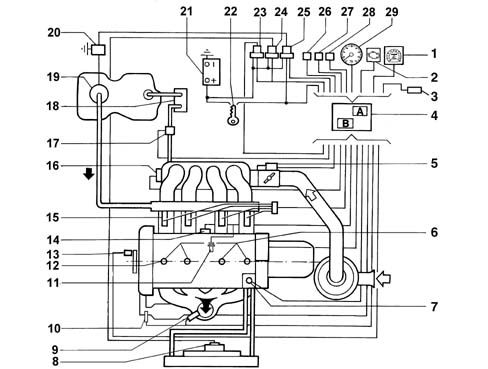
1, Speedometer (via CAN)
2, System failure lamp (via CAN)
3, CITY button (via CAN)
4, Engine management control unit
5, Throttle control actuator and throttle position sensor
6, Ignition coils
7, Coolant temperature sensor
8, Radiator fan
9, Lambda sensor (upstream)
10, Lambda sensor (downstream)
11, Injection timing sensor
12, Spark plugs
13, Rpm and TDC sensor
14, Detonation sensor
15, Injectors
16, Air temperature/absolute pressure sensor
17, Charcoal filter scavenging solenoid
18, Activated carbon filter
19, Drip tray (including electric pump, pressure regulator, filter, level sensor)
20, Inertia switch
21, Battery
22, Ignition switch
23, Engine control system relay
24, Electric fuel pump relay
25, Radiator fan relay(s)
26, Climate control connection
27, CODE connection (via CAN)
28, Diagnostic equipment connection (via CAN)
29, Rev counter (via CAN)
ME 7.3 H4 injection/ignition control unit
Specifications
The control unit is fitted in the engine compartment above the throttle casing and is capable of withstanding high temperatures.
The control unit memory is the flash EPROM type, i.e. it can be reprogrammed from the outside without affecting the hardware.
Replacement of the injection control unit or the throttle body requires the self-learning procedure to be run.
Control unit pin out
The diagram below illustrates
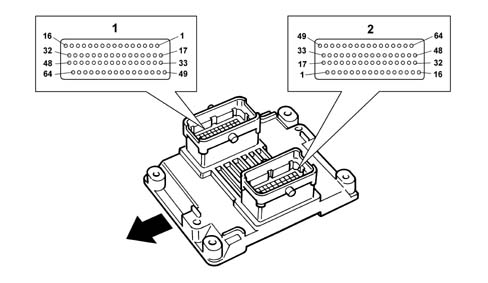
ENGINE SIDE connector (1)
1, Not connected
2, Cylinder 3 injector control
3, Not connected
4, Not connected
5, Not connected
6, Pressure sensor
7, + 5 V Sensors
8, Pre-catalyser Lambda sensor signal (+)
9, Engine timing sensor earth
10, Engine rpm sensor
11, Throttle valve actuator earth
12, Not connected
13, Not connected
14, Not connected
15, Cylinder 4 coil control
16, Cylinder 2 coil control
17, Post-catalyser Lambda sensor signal (+)
18, Cylinder 2 injector control
19, Not connected
20, Not connected
21, Detonation sensor signal
22, Not connected
23, Throttle 1 potentiometer signal input
24, Not connected
25, Pre-catalyser Lambda sensor earth
26, Air pressure and temperature sensor earth
27, Not connected
28, Throttle valve actuator (positive)
29, Not connected
30, Not connected
31, Cylinder 3 coil control
32, Cylinder 1 coil control
33, Charcoal filter scavenging solenoid
34, Cylinder 4 injector control
35, Not connected
36, Engine timing sensor signal
37, Detonation sensor earth
38, Engine temperature sensor signal
39, Throttle 2 potentiometer signal input
40, Not connected
41, Post-catalyser Lambda sensor earth
42, Engine rpm sensor
43, Throttle valve actuator earth
44, Not connected
45, Not connected
46, Not connected
47, Not connected
48, Not connected
49, Pre-catalyser Lambda sensor heater
50, Not connected
51, Cylinder 1 injector control
52, Not connected
53, Not connected
54, Air conditioner pressure sensor
55, Air temperature sensor
56, Throttle 1 and 2 potentiometers power supply (+5V)
57, Post-catalyser Lambda sensor signal
58, Throttle 1 and 2 potentiometers earth
59, Not connected
60, Throttle valve actuator positive
61, Not connected
62, Not connected
63, Not connected
64, Not connected
VEHICLE SIDE connector (2)
1, Not connected
2, K line
3, Not connected
4, Accelerator pedal 2 potentiometer power supply (+5V)
5, Accelerator pedal 2 potentiometer earth
6, Not connected
7, Clutch switch signal
8, Cruise Control set-
9, Cruise Control set+
10, Not connected
11, CAN (HIGH)
12, Not connected
13, Not connected
14, Fan 1st speed control relay
15, Not connected
16, Not connected
17, Supply from main relay
18, Direct supply (+30)
19, Main control relay
20, Not connected
21, Accelerator pedal 1 potentiometer power supply (+5V)
22, Accelerator pedal 1 potentiometer earth
23, Not connected
24, Not connected
25, Brake pedal switch signal
26, Not connected
27, Not connected
28, Not connected
29, Not connected
30, Fan 2nd speed control relay
31, Failure warning light ''on'' signal
32, Not connected
33, Main relay power supply
34, Not connected
35, Not connected
36, Not connected
37, Accelerator 2 potentiometer signal input
38, Not connected
39, Not connected
40, Air conditioning engagement request
41, Cruise Control resume
42, Oil pressure signal
43, CAN (LOW)
44, Not connected
45, Not connected
46, Air conditioning compressor engagement control relay
47, Not connected
48, Not connected
49, Direct power supply from main relay
50, Not connected
51, Signal from ignition switch (+15/54)
52, Not connected
53, Air conditioner pressure sensor power supply
54, Accelerator 1 potentiometer signal input
55, Not connected
56, Not connected
57, Second brake switch
58, Cruise Control on-off
59, Not connected
60, Not connected
61, Not connected
62, Petrol pump control relay
63, Not connected
64, Not connected
Injectors
Specifications
The twin jet injectors (with the spray at an angle in relation to the injector axis) are specially designed for engines with 4 valves per cylinder and make it possible to direct the jets towards the two inlet valves.
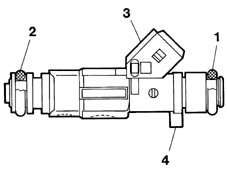
The injectors are top-feed, i.e. fuel is fed in through the top of the casing, which also houses the electrical winding connected to the terminals of connector (3).
When the current passes through the winding, the magnetic field created attracts the plunger, opening the injector and causing the flow of fuel.
There are two seals, one on the fuel manifold side (1) and one on the intake manifold side (2).
A notch (4) determines the angular position of the injector and the correct direction of the jets in relation to the inlet valves.
Electrical properties
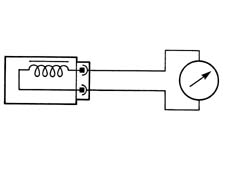
The injector resistance may be measured by detaching the connector and connecting an ohmmeter, as shown in the diagram.
Resistance value: 14.5 ± 5% ohm.
Operation
The jets of fuel leave the injector at a differential pressure of 3.5 bar, atomising instantly to form two propagation cones.
The injector operating logic is timed and sequential. In other words, the four injectors are operated depending on the engine cylinder inlet sequence, whilst the delivery for each cylinder can begin during the expansion stage until the inlet stroke has already started.
FUEL MANIFOLD
The fuel manifold, which distributes the fuel to the injectors, incorporates the seats for the injectors and the air bleed valve.
The fuel intake is achieved through a quick coupling.
Since the system is returnless, there is no fuel recirculation pipe.
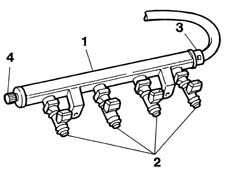
1, Fuel manifold
2, Injector
3, Fuel supply connector
4, Bleed valve
Engine coolant temperature sensor
Specifications
This is fitted to the thermostat cup and detects coolant temperature by means of an NTC thermistor with negative resistance coefficient.
The variation in the resistance depending on the temperature is illustrated in the table below.
| °C | Ω |
|---|---|
| -20 | 15971 |
| -10 | 9620 |
| 0 | 5975 |
| 10 | 3816 |
| 20 | 2502 |
| 25 | 2044 |
| 30 | 1679 |
| 40 | 1152 |
| 50 | 807 |
| 60 | 576 |
| 70 | 418 |
| 80 | 309 |
| 90 | 231 |
| 100 | 176 |
Operation
The reference voltage is 5V for the NTC element for the injection system. Because the control unit input circuit is designed as a voltage divider, this voltage is distributed between a resistance present in the control unit and the sensor NTC resistance.
The control unit can therefore assess sensor resistance changes via changes in the voltage and thus obtain temperature information.
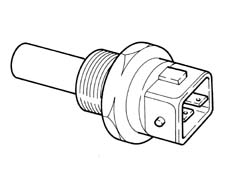
Composition
The composition of the sensor is illustrated in the diagram below
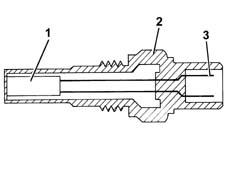
1, NTC resistance
2, Sensor casing
3, Electrical connector
Knock sensor
Specifications
The piezoresistive knock sensor is fitted on the crankcase and measures the intensity of vibrations caused by knock in the combustion chambers.
This phenomenon has mechanical repercussions on a piezoelectric crystal that sends a signal to the control unit which, on the basis of this signal, reduces the ignition advance until the phenomenon disappears. Later on, the advance is gradually restored to the basic value.
Electrical specifications: resistance 532-588 ohm at 20°C.
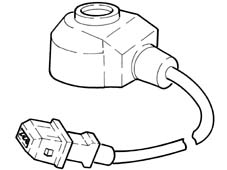
Operation
The molecules of a quartz crystal are electrically polarised.
In rest condition (A), the molecules do not display any particular orientation.
When the crystal is subject to pressure or impact (B), the degree of alignment is directly proportional to the pressure acting on the crystal.
This orientation generates a voltage at the crystal terminals.
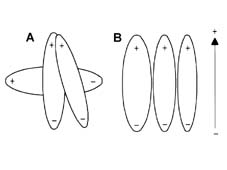
A. Rest position
B. Position under pressure
Rpm sensor
Specifications
It is fitted on the crankcase facing the phonic wheel on the crankshaft pulley.
It is inductive, i.e. its operation is determined by magnetic field changes generated by the teeth passing in front of the phonic wheel (60-2 teeth).
The injection control unit uses the rpm sensor signal to:
- determine the rotation speed
- determine the crankshaft angular position.
Electrical specifications: resistance 1134-1386 ohm at 20°C.
The recommended distance (gap) between the end of the sensor and the phonic wheel for obtaining correct signals should be 0.5 - 1.5 mm.
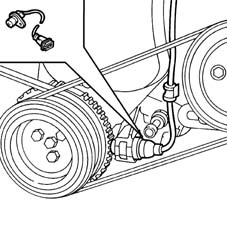
Composition
The sensor takes the form of a tubular case (1) containing a permanent magnet (3) and electrical winding (2).
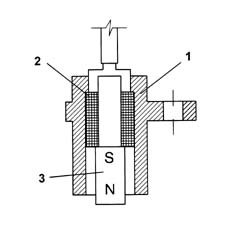
Operation
Due to the passage of the phonic wheel teeth, the magnetic flux set up by magnet (3) undergoes fluctuations due to changes in the gap.
These fluctuations set up an electromotive force in winding (2) and a voltage is set up at the terminals that alternates between positive (tooth facing sensor) and negative (gap facing sensor).
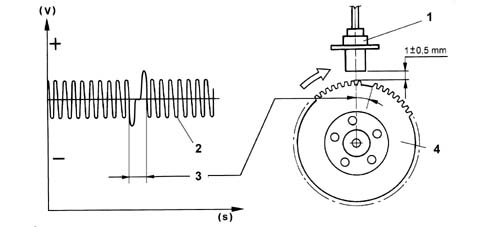
1, Sensor
2, Output signal
3, Signal corresponding to two missing teeth
4, Crankshaft pulley with phonic wheel
The sensor peak output voltage depends, all else being equal, on the distance between the sensor and the phonic wheel teeth (gap).
There are sixty teeth on the phonic wheel, two having been removed to produce a reference: the passing of the wheel therefore corresponds to an angle of 6° (360° divided by 60 teeth).
The synchronism point is recognised at the end of the first tooth following the gap left by the two missing teeth: when this passes beneath the sensor, the motor has piston pair 1-4 at 114° before TDC.
Accelerator pedal potentiometer
Specifications
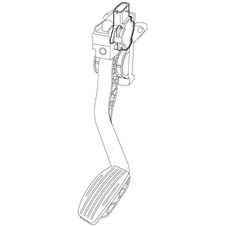
The accelerator pedal is equipped with two built-in potentiometers: *- a main one *- a stand-by one.
The injection control unit implements the following recovery strategies under the following conditions:
- if one of the two potentiometers fails, this allows the throttle to be opened to a maximum of 40° over a long time period;
- if both potentiometers fail completely, throttle opening is prevented.
Operation
The sensor consists of a case secured to the accelerator pedal mounting. This contains an axially-located shaft connected to a dual-track potentiometer.
A coil spring on the shaft ensures the correct amount of resistance to pressure while a second spring ensures return following release.
Operating field from 0° to 70°; mechanical stop at 88°.
Throttle body
Specifications
This is fitted on the intake chamber and regulates the amount of air taken in by the engine.
According to the signal received from the accelerator pedal potentiometer, the injection control unit controls the throttle opening by means of a direct current motor built into the throttle body.
Throttle opening takes place from 0° to 80°, i.e. including idle speed adjustment range. - The throttle body is equipped with two built-in potentiometers, each of which controls the other.
If both potentiometers should fail or in the case of a power cut, the control unit reduces drive torque on the basis of accelerator pedal position.
- with the pedal fully depressed, it cuts off fuel to one or more pistons until a maximum speed of 2500 rpm is reached
- in the intermediate positions, it cuts off the supply to one or more pistons until a speed of less than 2500 rpm is reached.
The self-learning procedure must be carried out if the injection control unit or the air chamber or the throttle body is replaced.
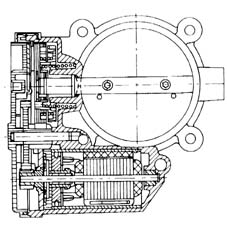
Operation
The opening of the throttle is managed by an electrically-operated motor.
The ME73H4 system operates the motorised throttle according to accelerator pedal demand; a potentiometer connected to it sends a voltage signal to the control unit, where the signal is processed and causes the throttle to open to different extents.
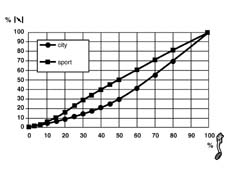
On SPORT versions, the system is capable of governing the movement of the throttle in accordance with two maps: one more sporty and the other more comfortable.
In addition to altering the electric steering power assistance, the driver can use the CITY button to change the response of the engine to the action of the accelerator pedal.
Specifically:
- with the CITY function on, the response of the throttle movement is smoother.
- with the CITY function off, the response of the throttle movement is quicker.
Engagement modes:
- press the CITY button;
- release the accelerator pedal.
The control unit activates the management
The throttle opening law is illustrated in the graph below.
INTAKE AIR TEMPERATURE AND PRESSURE SENSOR
Specifications
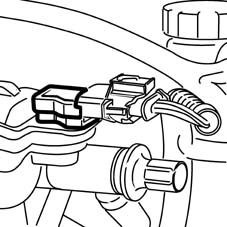
The pressure and intake air temperature sensor is an integral component which is designed to measure the air pressure and temperature inside the intake manifold.
Both pieces of information are used by the injection control unit in defining the quantity of air drawn in by the engine and are then used for calculating the injection time and the ignition point.
The sensor is fitted on the intake manifold.
Composition
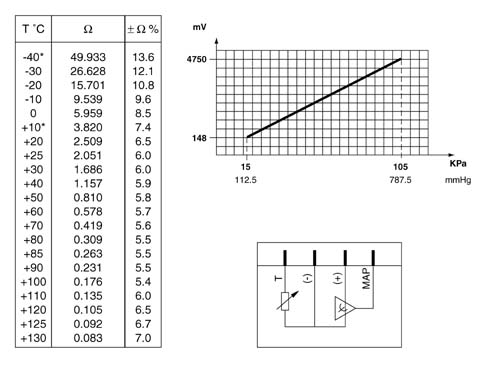
The air temperature sensor consists of an NTC thermistor (Negative Temperature Coefficient). The sensor resistance decreases as the temperature increases.
The control unit input circuit shares the 5 Volt reference voltage between the sensor resistance and a fixed reference value, producing a voltage that is proportional to the resistance and consequently to the temperature.
The sensitive element of the pressure sensor is made up of a Wheatstone bridge screen-printed onto a ceramic diaphragm. On one side of the diaphragm is the absolute reference vacuum, while on the other side is the vacuum from the intake manifold.
The (piezoresistant) signal, coming from the distortion suffered by the diaphragm, before being sent to the engine management control unit, is amplified by an electronic circuit contained in the mounting that houses the ceramic diaphragm.
With the engine off, the diaphragm bends according to atmospheric pressure. Exact reference information on altitude can therefore be obtained with the key on.
During engine operation, the vacuum exerts a mechanical action on the sensor diaphragm, which bends to alter the resistance value.
Because the power supply from the control unit is maintained strictly constant (5V), the output voltage changes when the resistance value is altered.
Electrical properties
The electrical properties of the sensor are illustrated in the diagram below.
IGNITION COILS
Composition
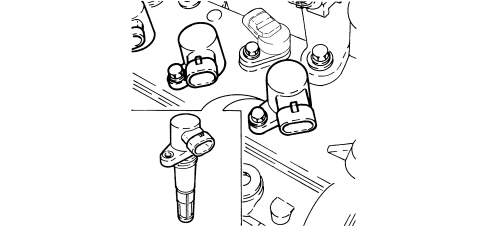
The coils are connected directly to the spark plugs and are the "cigar" type, comprising a magnetic internal core made up of a segmented silicon steel pack arranged along the axis of the coil and secondary and primary coils, which contain the electrical windings, coaxial to the magnetic core.
The windings are housed in a pressed plastic container fitted with a low voltage connector and bush for fastening to the cylinder head and they are insulated through immersion in an epoxide resin which has excellent dielectric, mechanical and also thermal properties, as the coils are exposed to high temperatures. The proximity of the primary winding to the magnetic core reduces the magnetic flux losses, ensuring the maximum coupling on the secondary winding.
Electrical specifications:
Primary circuit resistance: 0.5 ohms +/- 10% at 23°C
Secondary circuit resistance: 6300 ohms +/- 10% at 23°C.
SPECIFICATIONS
GENERAL SPECIFICATIONS
The Bosch Motronic ME7.9.10 system with a motorized throttle belongs to the category of ignition systems which have built-in, phased, sequential electronic injection.
The control unit electronically manages the air flow rate at the rotation speed set by the electronic throttle, regulates the fuel injection so that the (air/fuel) ratio is always within optimum values, calculating the moment of ignition, in order to allow the smooth operation of the engine when the environmental parameters and loads applied vary.
The ignition system is static advance with a single coil with three outlets. The power modules are housed inside the control unit.
The self-adaptive engine management system can recognise the changes that take place in the engine. It compensates for them using the self-adaptive functions that correct the fuel mixture and air flow plans mapped in the control unit.
There are two adaptive functions, in particular, for the fuel mixture plan, depending on whether the evaporation control solenoid valve is open or closed, plus an idle adaptation plan: the latter is capable of compensating effectively for any air seepage.
The continuous self-adaptation of the fuel mixture plan makes it possible to ensure the correct amount of fuel in all temperature and altitude conditions.
As a result of this, after every intervention it is necessary to drive the vehicle for at least 15 minutes in various operating conditions in order for any changes that have taken place in the system to be memorised in the control unit and to end the adaptation.
The main system functions are as follows:
- injection time adjustment;
- ignition advance adjustment;
- cold starting check;
- enrichment check during acceleration;
- fuel cut-off during over-run;
- idle speed management (also dependent on battery voltage);
- restriction of the maximum engine speed;
- combustion control with Lambda sensor;
- petrol vapour recovery;
- fan control;
- climate control system engagement/disengagement;
- self-diagnosis;
- slider on-off control;
- continuous variable valve timing control;
- calculation of the vehicle speed;
- automatic management of engine starting.
There is also a special function that manages the connection with the body computer via a two-way signal for the CAN line. This includes:
- engine temperature for instrument panel (output);
- battery voltage (output);
- engine rpm (output) for instrument panel;
- engine overheating warning light for instrument panel (output);
- engine oil pressure warning light for instrument panel (output);
- vehicle speed (output) + mileometer (input/output);
- Fiat code anti-theft device (input/output);
- key status;
- consumption signal (output) for trip computer;
- fuel level signal (input)
Injection system
The essential conditions to be met by the air-fuel mixture for the efficient operation of engines with controlled ignition systems are mainly as follows:
- the metering (air/fuel ratio) must be kept as close as possible to stoichiometric value to ensure that combustion is as fast as possible avoiding fuel wastage
- the homogenity of the mixture, composed of fuel vapour, is diffused in the air as finely and uniformly as possible to ensure good condition and efficiency of catalytic converter timing.
The injection/ignition system uses an indirect measuring system known as "SPEED DENSITY-LAMBDA".
In other words, angular rotation speed, intake air density and control of mixture strength (feedback control).
In practice, the system uses the ENGINE SPEED data (rpm) and the AIR DENSITY (pressure and temperature) to measure the quantity of air drawn in by the engine.
The quantity of air drawn in by each cylinder, for every engine cycle, also depends on the unit capacity, the volumetric efficiency, and the turbocharging, as well as on the density of the intake air.
The density of the air refers to the air drawn in by the engine and is calculated according to the absolute pressure and temperature, both measured in the intake manifold.
With the engine management system, based on management of the drive torque, the amount of fuel is calculated by taking into account the factors that determine an increase or decrease.
Volumetric efficiency is the parameter that measures the cylinder filling coefficient, measured on the basis of experiments conducted on the engine for the entire operating range and then stored in the electronic control unit memory.
Having established the quantity of intake air, the system must provide the amount of fuel dictated by the desired mixture strength.
The end of injection impulse or delivery timing is stored in a map in the control unit memory and varies according to the engine speed and the pressure in the intake manifold.
In practice, it involves processing carried out by the electronic control unit to manage the timed, sequential opening of the four injectors, one per cylinder, for the length of time strictly necessary to make the air/petrol mixture as close as possible to the stoichiometric ratio.
The fuel is injected directly into the manifold, near the inlet valves, at a pressure of around 3.5 bar.
The speed (rpm) and the density of the air (pressure and temperature) are used for measuring the quantity of intake air which, when established, is used for metering the amount of fuel needed for the desired mixture strength.
The other sensors in the system (coolant temperature, throttle valve position, battery voltage, etc.) allow the electronic control unit to correct the basic strategy for all the engine operating conditions.
Ignition system
The ignition circuit is solid-state inductive discharge type, i.e. without an HT distributor, with power modules located inside the injection-ignition electronic control unit.
The primary winding of each coil is connected to the power relay (thereby receiving battery voltage) and to the pins of the electronic control unit for earth connection.
After the starting stage, the electronic unit manages the basic advance taken from special maps in accordance with:
- engine rpm
- absolute pressure value (mmHg) measured in the intake manifold;
- engine temperature.
Ignition advance is corrected by torque management strategy, as in the case of fuel injection.
The spark plugs for the cylinders are connected directly to the coil secondary winding terminals (one per spark plug).
OPERATION
Diagram showing information entering/leaving the control unit
The information entering/leaving the control unit is illustrated in the diagram below.
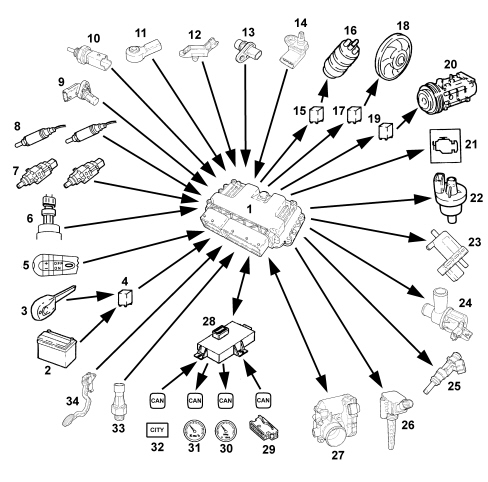
1, Engine management control unit with air pressure sensor
2, Battery
3, Ignition switch
4, Engine control system relay
5, Cruise Control lever
6, Linear pressure sensor
7 - Brake pedal and clutch pedal switches
8, Lambda sensor upstream and downstream of the converter
9, Timing sensor
10, Engine coolant temperature sensor
11, Knock sensor
12, Turbo pressure sensor
13, Engine rpm and TDC sensor
14, Intake air temperature and pressure sensor
15, Electric fuel pump relay
16, Fuel pump
17, Radiator fan relay
18, Radiator fan
19, Compressor engagement relay
20, Air conditioning compressor
21, Injection system fault warning light
22, Fuel vapour solenoid
23, Waste gate solenoid
24, Shut-off solenoid
25, Injectors
26, Ignition coils
27, Throttle control actuator and throttle position sensor
28, Body computer (connected to C-CAN)
29, Diagnostic equipment connection (via CAN)
30, Rev counter (via CAN)
31, Speedometer (via CAN and ABS control unit)
32, Power steering button (via CAN)
33, Switch for oil pressure warning light
34, Accelerator pedal sensor
SELF-LEARNING
The control unit implements the self-learning logic under the following conditions:
- removing-refitting or replacement of the injection control unit
- removing-refitting or replacement of the throttle body
The values stored by the control unit are retained when the battery is disconnected.
SYSTEM SELF-ADJUSTMENT
The control unit is equipped with a self-adjustment function that is designed to recognize the changes that take place in the engine due to the processes of bedding in and ageing of both the components and the engine itself in time.
These changes are memorised in the form of modifications to the basic map and are designed to adapt the operation of the system to the gradual alterations in the engine and the components, compared with when they were new.
This self-adjustment function also makes it possible to compensate for the inevitable differences in any replacement components (owing to production tolerances).
On the basis of exhaust gas analysis, the control unit modifies the basic map in relation to engine specifications when new.
The following self-adaption strategies are provided in the control unit:
- mixture strength control multiplied coefficient, takes into account the mixture strength leaning to the probe drift, injectors, air chamber and continually updates while the engine is operating.
- mixture strength control additive coefficient, corrects injector leaks and updates when idling.
The self-adjustment parameters are not deleted when the battery is disconnected.

AUTODIAGNOSIS AND RECOVERY
The control unit auto-diagnostic system checks that the system is working properly and signals any irregularities by means of an MIL warning light in the instrument panel with a standardised icon and colour, as laid down by European regulations.
This warning light indicates engine management faults and also faults detected by EOBD diagnostic strategies.
The MIL warning light operating logic is as follows.
The warning light comes on with the ignition on and remains on until the engine is started up; the control unit autodiagnostic system checks the signals coming from the sensors and compares them with the permitted data limits.
Fault indication during start up:
- the failure of the warning light to go out when the engine has been started indicates that there is an error memorized in the control unit.
Fault indication during operation:
- the warning light comes on in flashing mode to indicate possible catalytic converter damage due to misfiring.
- the warning light comes on in constant mode to indicate the presence of engine management or EOBD diagnostic errors.
The control unit defines the recovery settings on each specific occasion according to which components are faulty.
The recovery parameters are managed by non-faulty components.
The recovery strategies that can be activated from the control unit are:
- limp home following throttle body error
- limp home following accelerator pedal error
- turbocharging; the throttle is closed when there is a rise in the turbocharging pressure during the transient stages of acceleration with the target pressure and the measured pressure differential greater than 200 mbar, while a turbocharging pressure limit is activated if there is an error with the accelerator pedal or throttle actuator.
European regulations require the EOBD system to use the following strategies relating to the engine subsystems that have a direct impact on emissions:
- fuel supply system (fuel system diagnosis), to detect any malfunctions on the fuel line.
- Lambda diagnosis to detect operating errors in the probe upstream of the converter.
- converter diagnosis to detect deterioration via indirect measuring of the oxygen storage capacity.
- diagnosis relating to irregular ignition (misfire diagnosis) that stops the converter functioning correctly, potentially causing irreversible damage.

SYSTEM CONTROLS AND MANAGEMENT
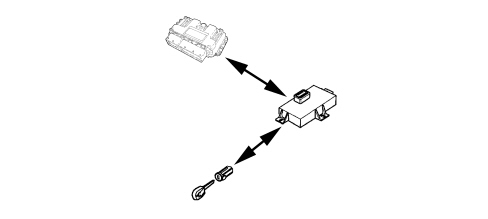
Fiat code recognition
The moment the control unit receives the MAR signal, it converses with the body computer to obtain the go-ahead for starting.
The starter motor is controlled directly by the key and not by the control unit.
The communication takes place through the CAN line.
As in the last example, the W recovery line is not used again.
Cold starting check
The following occurs in cold starting conditions:
- a natural weakening of the mixture (which causes poor turbulence of the fuel particles at low temperatures)
- reduced evaporation of the fuel
- fuel condensation on inner walls of the intake manifold
- higher lubrication oil viscosity.
The electronic control unit detects this condition and corrects the injection time on the basis of:
- coolant temperature
- intake air temperature
- battery voltage
- engine rpm.
The ignition advance is determined solely on the basis of rpm and coolant temperature.
Below a set calibration (from approx. 15°C to approx. 25 °C) the ''multispark'' ignition mode is enabled
This strategy, achieved by controlling the coils to obtain a quick series of sparks, facilitates combustion of the mixture.
The rotation speed decreases proportionally as the engine temperature increases, until the nominal value is reached when the engine has warmed up.
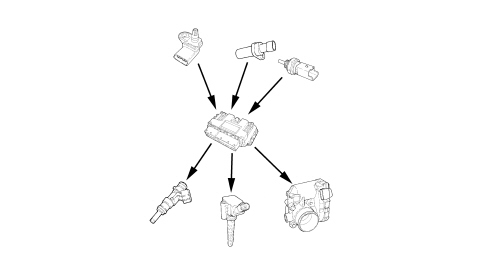
Combustion - lambda sensor check
In EOBD systems, the Lambda sensors are all the same type and are located upstream of the catalytic conversion system and downstream of the converter.
The pre-converter sensor controls 1st loop mixture strength (upstream sensor closed loop).
The post-converter sensor is used for the fault diagnosis of the converter and for modulating the 1st loop control parameters.
The second loop is therefore adaptive to make up for production discrepancies and slight drift that pre-converter sensor responses could experience due to ageing and contamination.
This control is known as 2nd loop control (post-converter sensor closed loop).
Control of the first loop mixture strength is activated when the pre-converter Lambda sensor is able to supply a reliable signal a certain time after engine ignition.
Sensor activation time depends on the initial temperature of the engine.
Control of the second loop is activated with a much higher temperature than that of the first loop: if control of the first loop mixture strength occurs 80 seconds after engine ignition, control of the second loop mixture strength occurs after 450 seconds.
Post-converter sensor voltage is around 630 mV and is constant (when it starts to fluctuate the converter is worn).

Detonation control
The control unit detects the presence of detonation (engine knock) by processing the signal coming from the relevant sensor.
The control unit continuously compares the signals coming from the sensor with a threshold which is, in turn, continually updated to take into account background noise and engine ageing.
The control unit can therefore detect the presence of detonation (or the onset of detonation) in each individual cylinder and reduces the ignition advance in the cylinder involved (in steps of 3° up to a maximum of 6°) until the phenomenon disappears. Later on, the advance is gradually restored to the basic value (in steps of 0.8°).
In acceleration conditions, a higher threshold is used in order to take into account the increased noise of the engine under such circumstances.
The detonation control logic also has a self-adjustment function which memorises the reductions in the advance that are continuously repeated in order to adapt the map to the different conditions that may affect the engine.
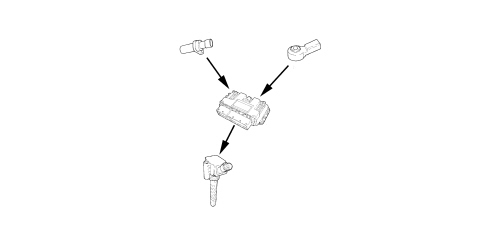
Enrichment check during acceleration
During this stage, the control unit increases the amount of fuel supplied to the engine (to produce the maximum torque), according to the signals coming from the following components:
- accelerator pedal potentiometer and throttle position.
- rpm and TDC sensor
The basic injection time is multiplied by a coefficient depending on the temperature of the engine coolant, the opening speed of the accelerator throttle and the increase in pressure in the intake manifold.
If sharp variation in the injection time is calculated when the injector is already closed, the control unit reopens the injector (extra pulse) in order to be able to adjust the mixture strength as quickly as possible; the subsequent injections are already increased on the basis of the coefficients mentioned previously.
ASR and ESP management requires the control unit to reduce the torque and therefore the ignition time together with action on the throttle and on the ignition advances.
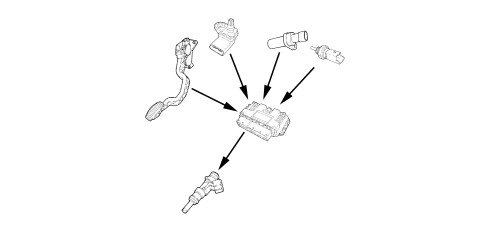
Fuel supply check - electric fuel pump
The control unit supplies the pump:
- with the key turned to MAR for 0.8 secs.
- with the key at AVV and the engine speed > 20 rpm
The control unit cuts off fuel supply to pump:
- with the ignition key in the STOP position
- with the engine speed < 40 rpm.
The fuel supply system with recirculation ensures a constant pressure differential of 3.5 bar.
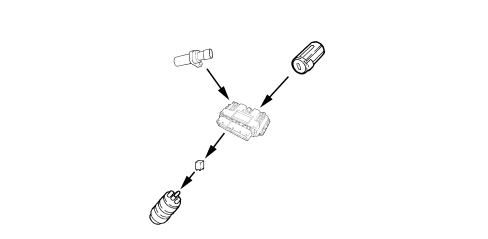
Connection with climate control system
The climate control system is always managed with torque control, increasing the torque required by the user to that necessary for compressor operation:
- when the torque is less than the calibrated threshold, according to engine rpm, the user request is enabled;
- when the torque is greater than the calibrated threshold, according to engine rpm, and the speed lower than 10 km/h, the user request is not enabled.
The control unit temporarily cuts off the supply to the compressor:
- during starting
- turning it off with engine temperature > 115 °C and reactivating with a hysteresis of 5.3°C.
- during take off with the accelerator fully depressed.
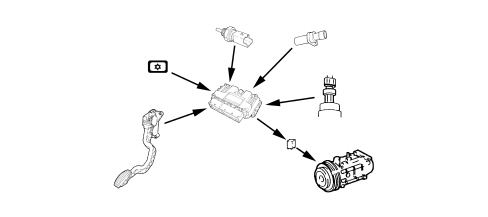
Recognition of cylinder position
The engine timing sensor, together with the engine rpm and top dead centre (TDC) signal, allows the control unit to recognise cylinder sequence when implementing timed injection.
This signal is produced by a Hall effect sensor, positioned on the cylinder head near the phonic wheel formed on the inlet camshaft.
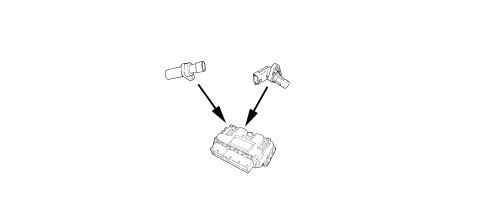
Fuel cut-off during over-run
When the accelerator pedal is released and beyond a pre-set engine speed level, the control unit:
- cuts off the supply to the injectors
- reactivates the supply to the injectors at 1200 rpm in first gear and at 1000 rpm in other gears.
In the absence of fuel, the number of revs decreases at a rate determined by the vehicle driving conditions.
Before the idle speed is reached, the progress of the engine speed decrease is checked.
If it is above a certain value, the fuel supply is partly restored so that there is a "gentle accompaniment" towards the idle speed.
The levels for restoring the supply and for cutting off the fuel vary according to:
- engine coolant temperature
- vehicle speed
- engine rpm.
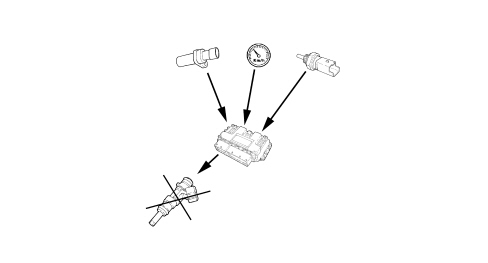
Fuel vapour recovery
Fuel vapours (pollutants) collected in the activated carbon filter (canister) are directed to the intake ducts to be burnt.
This is done by a solenoid controlled by the control unit only when the engine operating conditions allow.
The control unit compensates for this additional amount of fuel with a reduction in the delivery to the injectors.
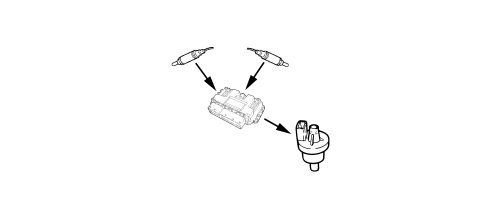
Maximum rpm check
The control of the maximum number of revs is carried out by the control unit, limiting the engine torque through the motorized throttle.
In the first place, the control unit cuts off fuel delivery by modulating the ignition times and closes the motorised throttle if this is not sufficient.
On this 150 CV version the maximum rpm is 6500.
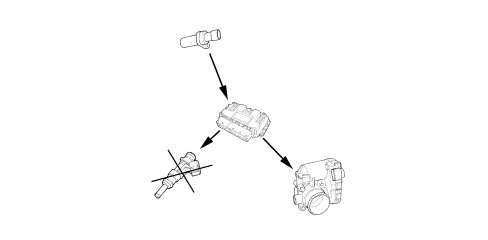
Injection time adjustment
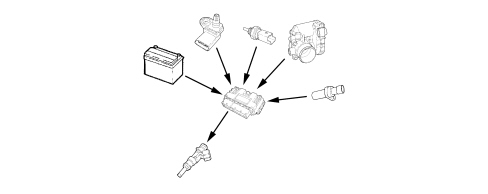
The control unit calculates the injector opening times and controls them with extreme precision and speed, according to the:
- engine load (number of revs and air flow rate)
- battery voltage
- engine coolant temperature.
The airflow is calculated by taking into consideration the parameters recorded from the temperature and air pressure sensor fitted on the air chamber. Air pressure entering the throttle body and the air pressure via the sensor on the control unit are also corrective factors in the calculation of the flow.
The injection is timed and sequential for each cylinder and takes place corresponding to the optimum start of injection point, with the end of injection point remaining fixed.
Ignition advance adjustment
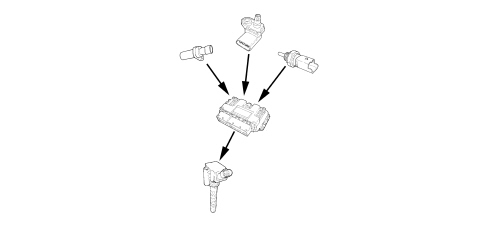
Thanks to a map stored in its memory, the control unit is capable of calculating the ignition advance, according to:
- the engine load (minimum, partial, full, according to the number of revs and the air flow rate)
- the intake air temperature
- the engine coolant temperature.
The ignition can be selectively delayed at the cylinder with the greatest demand, which is determined by a combination of values recorded by the rpm and timing sensors.
Idle speed check
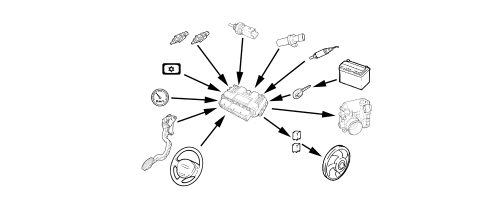
The control unit detects idling status when the accelerator pedal is released.
To control the idle speed, depending on the consumers switched on and the brake/clutch pedal signals, the control unit controls the position of the motorised throttle.
The idle speed when warm is 750 ± 50 rpm
On the basis of an electrical balancing strategy, the control unit increases the idle speed when the battery voltage is reduced to the calibrated threshold value.
Radiator cooling fan check
Depending on the temperature of the coolant, the control unit controls the engagement of the fan:
- 1st speed activation temperature 97°C
- 2nd speed activation temperature 102°C
There is then a further check (linear pressure sensor signal) which switches on the fan at the 1st or 2nd speed depending on the pressure of the refrigerant gas when the air conditioning system is switched on.
When no coolant temperature signal is present, the control unit implements the recovery function by activating the fan at the 2nd speed until the error disappears.
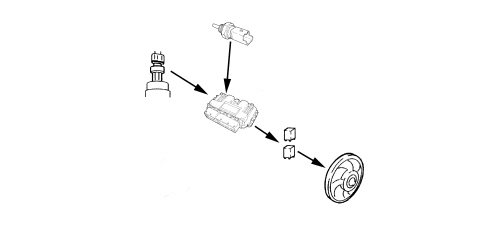
Engine starting
During start-up, the control unit monitors engine temperature and establishes a suitable injection time and ignition advance.
Above a threshold of 20 rpm and with engine timing detected, the control unit controls the injectors and the coils in timed sequence to reduce unburnt hydrocarbon exhaust emissions.
If the engine will not start, the control unit reduces the amount of fuel using a multiplied factor in order to reduce the possibility of flooding the engine.
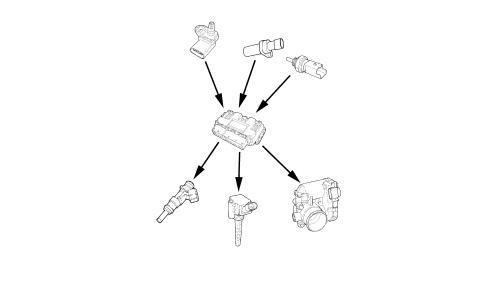
Torque control
The control unit for managing the various operating strategies is mainly based on control of engine torque.
There are two torque delivery rules:
- torque delivery with mechanical rule, for high engine loads, in practice when the measured throttle position is greater than the full load position (95% of load)
- torque delivery with controlled rule (this mode is used when mixture strength control is activated).
The control unit measures the required torque via the accelerator pedal and, after having adapted the calculations, acts on the ignition advances, on throttle opening and on injection times.
There are three main tables for calculting the engine torque:
- low loads calculation table
- high loads calculation table
- reverse gear calculation table.
On this version with the SPORT function another three tables are taken into consideration when calculating the engine torque:
- low load with SPORT function activated calculation table
- high load with SPORT function activated calculation table
- reverse gear with SPORT function activated calculation table.
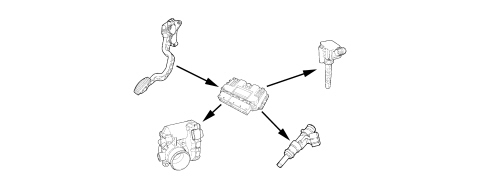
Car handling
The handling strategy includes all those actions performed by the control unit to make the longitudinal oscillations that are caused by the car dynamic transient stages softer and more gradual, so that using the vehicle is as comfortable as possible.
Transient stages include acceleration and deceleration, whether abrupt or not, due to action on the accelerator and from gear shifts.
The control unit detects the acceleration and deceleration transient stages via the accelerator sensor and the clutch and brake pedal switches, therefore intervening in torque management via the TIP-UP and TIP-DOWN calculation modules
Depending on the situations, the control unit imposes a torque speed control, acting on ignition advances and if it is not enough it implements a slow torque control, acting on throttle opening and as a result, on injection times.
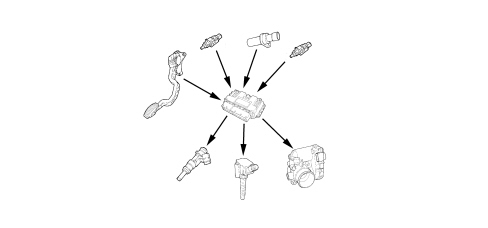
Turbocharging control
Turbocharger pressure management
The control unit directly controls the engine torque, also taking account of the turbocharging, directly controlling the Waste-Gate actuator to reach a mapped pressure target in the intake port openings according to:
- engine load
- ambient pressure
- turbocharger pressure
In particular, when the desired pressure reaches a calculated threshold, the control unit starts to adjust the exhaust gas flow through the Waste-Gate. This introduces a feedback that guarantees system stability.
As well as the desired pressure, the power supplied to the compressor to achieve it is calculated. This power must be supplied from the turbine and therefore the exhaust gas flow is regulated to guarantee that this power is reached.
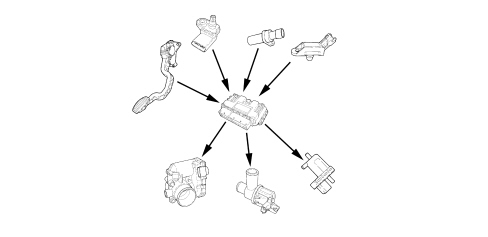
Shut-off solenoid valve management
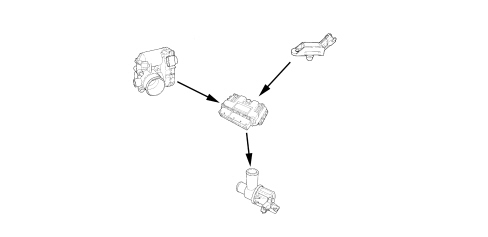
In systems with a turbocharger, when the throttle is closed quickly (in overrun) excess pressure is produced in the duct upstream of the throttle. This tends to slow the compressor impeller, leading to strong vibrations and noise.
The shut-off valve allows air recirculation from downstream to upstream of the compressor, reducing the duct pressure.
The control unit directly controls the shut-off valve depending on:
- engine load
- atmospheric pressure
- turbocharger pressure
NORMAL/SPORT operation check (overboost)
When the NORMAL/SPORT button is pressed, in addition to the differentiated electric steering, softer at low speeds and harder at high speeds, the overboost function is also activated.
The NORMAL/SPORT button is connected along a discreet line to the Electric Steering Node therefore the SPORT or NORMAL status information is made available to the engine management control unit via the C-CAN.
To manage the overboost function the engine management control unit mainly takes into account the position of the accelerator pedal and consequently acts on the waste gate valve regulating the pressure of the turbocharger and adjusting the motorized throttle opening.
The overboost function remains activated for a maximum of 80 seconds.
The main features of the NORMAL and SPORT functions are described below.
NORMAL function engaged
- Maximum torque: 206 Nm
- Max power: 150 CV
- Driving strategy: soft
- Consumption contained at high engine loads
SPORT function engaged
- Maximum torque: 230 Nm
- Max power: 150 CV
- Driving strategy: sporty
- Consumption greater at high engine loads
The management of the overboost should not be understood as a pressure causing damage to the turbine, but as the possibility of providing greater pressure than the maximum at that moment.
Supercharging recovery
During the supercharging pressure increase in acceleration transitions, if the difference between the target pressure and the pressure measured is more than 200 mbar the throttle is closed.
If there is an error at the accelerator pedal or the throttle actuator a supercharging pressure restriction is activated.
In order to guarantee the protection of the turbocharger the engine management control unit evaluates the temperature of the exhaust gases, using a mapped calculation model, because an excessive increase could cause damage to the turbine.
Cruise control
Depending on the position of the cruise control lever, the control unit directly manages the quantity of fuel injected in order to control and maintain the vehicle speed which has been memorised.
A warning light on the control panel, activated by the control unit, indicates system operation or deactivation status.
For Cruise Control operation
See descriptions 5580A CRUISE CONTROL SYSTEM
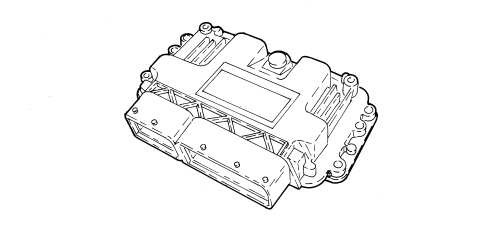
ME 7.9.10 INJECTION-IGNITION CONTROL UNIT
Specifications
The control unit is fitted in the engine compartment on the flame bulkhead.
The control unit memory is the flash EPROM type, i.e. it can be reprogrammed from the outside without affecting the hardware.
Replacement of the injection control unit or the throttle body requires the self-learning procedure to be run.
Control unit pin out
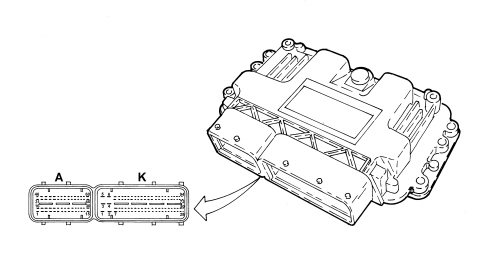
Engine side connector "A"
1, Lambda sensor heater control (-) downstream of converter
2, Cylinder no. 3 injector control
3, Fuel vapour solenoid control (-)
4, Cylinder no. 2 injector control (-)
5, Shut-off valve control
6, Not connected
7, Not connected
8, Not connected
9, Aspirated air temperature/pressure sensor and turbo pressure sensor +5V power supply
10, Motorised valve potentiometer +5V power supply
11, Timing sensor +5V power supply
12, Timing sensor signal
13, Motorised throttle potentiometer reference earth
14, Not connected
15, Not connected
16, Lambda sensor heater control (-) upstream of converter
17, Cylinder no. 1 injector control (-)
18, Not connected
19, Cylinder no. 4 injector control
20, Not connected
21, Turbo pressure sensor signal
22, Motorised throttle potentiometer signal
23, Not connected
24, Intake air temperature signal
25, Intake air pressure signal
26, Not connected
27, Not connected
28, Timing sensor reference earth
29, Engine temperature sensor reference earth
30, Not connected
31, Ignition coil control cylinder 1
32, Not connected
33, Not connected
34, Not connected
35, Engine oil pressure switch
36, Detonation sensor earths
37, Rpm sensor (-)
38, Rpm sensor (+)
39, Not connected
40, Not connected
41, Not connected
42, Motorised throttle potentiometer signal
43, Engine temperature sensor signal
44, Aspirated air temperature/pressure sensor and turbo pressure sensor reference earth
45, Not connected
46, Ignition coil control cylinder 3
47, Ignition coil control cylinder 4
48, Ignition coil control cylinder 2
49, Motorised throttle actuator power supply (+)
50, Motorised throttle actuator power supply (-)
51, Detonation sensor signal
52, Lambda sensor reference earth upstream of the converter
53, Lambda sensor signal downstream of the converter
54, Lambda sensor earth downstream of the converter
55, Lambda sensor signal upstream of the converter
56, Not connected
57, Not connected
58, Not connected
59, Not connected
60, Not connected
Vehicle side “K” connector
1, Engine system earth on battery negative
2, Engine system earth on battery negative
3, 12V power supply from F17 (10A)
4, Engine system earth on battery negative
5, 12V power supply from F17 (10A)
6, 12V power supply from F17 (10A)
7, Linear pressure sensor reference earth
8, Not connected
9, Not connected
10, Not connected
11, Air conditioning compressor relay feed
12, Engine cooling fan relay control 2nd speed
13, Engine cooling fan relay control 1st speed or single speed
14, Not connected
15, Not connected
16, Not connected
17, Not connected
18, Not connected
19, Waste gate solenoid control (-)
20, Not connected
21, Not connected
22, Not connected
23, Not connected
23, Not connected
24, Not connected
25, Not connected
26, Not connected
27, Accelerator pedal 2 potentiometer power supply 5V
28, Linear pressure sensor 5V power supply
29, Potentiometer reference earth on accelerator pedal 2
30, Potentiometer reference earth on accelerator pedal 1
31, Not connected
32, Not connected
33, Not connected
34, Not connected
35, Not connected
36, Not connected
37, Not connected
38, Not connected
39, Not connected
40, Not connected
41, Not connected
42, Not connected
43, Not connected
44, Not connected
45, Not connected
46, Not connected
47, Not connected
48, Not connected
49, Potentiometer 5V power supply on accelerator pedal 1
50, Not connected
51, Not connected
52, Not connected
53, Not connected
54, Not connected
55 Signal from accelerator pedal potentiometer 2
56, Not connected
57, Linear pressure sensor signal
58, Not connected
59, Not connected
60, Not connected
61, RESUME signal from Cruise Control lever
62, Not connected
63, Clutch pedal switch signal
64, Air conditioning engagment request
65, Not connected
66, Not connected
67, Not connected
68, Fuel pump relay control
69, Not connected
70, Positive power supply from F18 (10A)
71, MIL warning light control
72, Engine management system main relay control
73, Not connected
74, Not connected
75, Not connected
76, Not connected
77, Not connected
78, Not connected
79, Signal from accelerator pedal potentiometer 1
80, Not connected
81, Not connected
82, Brake light switch signal
83, Not connected
84, "+" signal from Cruise Control lever
85, ON/OFF signal from Cruise Control lever
86, "-" signal from Cruise Control lever
87, Brake light switch signal
88, C-CAN-L terminal CAN network
89, C-CAN-H CAN network
90, Not connected
91, K line
92, Not connected
93, Not connected
94, Not connected
INJECTORS
Specifications
The twin jet injectors (with the spray at an angle in relation to the injector axis) are specially designed for engines with 4 valves per cylinder and make it possible to direct the jets towards the two inlet valves.
The injectors are the top-feed type, i.e. fuel is fed in through the top of the casing, which also houses the electrical winding connected to the terminals of connector (3).
When the current passes through the winding, the magnetic field created attracts the plunger, opening the injector and causing the flow of fuel.
There are two seals, one on the fuel manifold side (1) and one on the intake manifold side (2).
A notch (4) determines the angular position of the injector and the correct direction of the jets in relation to the inlet valves.
Inspection of the jets will show different openings, in total 10 divided into 2 sections of 5, in practice there are 10 small diffusion cones that together make 2 diffusion cones directed to the 2 intake valves.
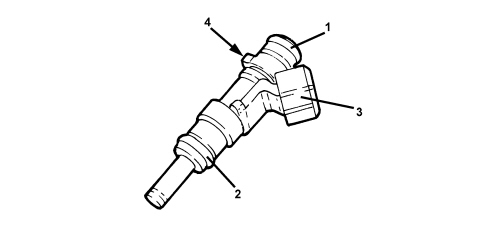
Electrical properties
The injector resistance may be measured by detaching the connector and connecting an ohmmeter, as shown in the diagram.
Resistance value: 14.5 ± 5% ohm.
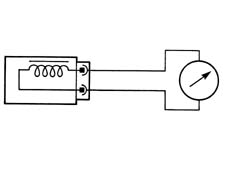
Electrical connections

Pin 1, Power supply + 12V
Pin 2, Control to earth from control unit
Operation
The jets of fuel leave the injector at a differential pressure of 3.5 bar, atomising instantly to form two propagation cones.
The injector operating logic is timed and sequential. In other words, the four injectors are operated depending on the engine cylinder inlet sequence, whilst the delivery for each cylinder can begin during the expansion stage until the inlet stroke has already started.
The injected fuel quantity depends on plunger opening time that in turn depends on electromagnet power supply time.
This time, known as "injection time" is calculated from the control unit in different engine operating conditions.
FUEL MANIFOLD
The fuel manifold, which distributes the fuel to the injectors, incorporates the seats for the injectors and the differential pressure regulator.
The fuel supply and return are carried out through rapid attachment.
The pressure regulator ensures the right fuel supply pressure in ratio to the air chamber pressure.
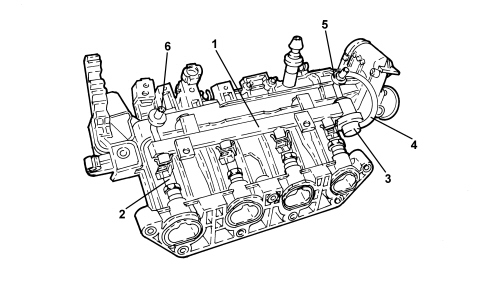
1, Fuel manifold
2, Injector
3, Differential pressure regulator
4, Air pipe
5, Connector for fuel supply quick coupling
6, Connector for fuel return quick coupling to tank
ENGINE COOLANT TEMPERATURE SENSOR
Specifications
This is fitted to the thermostat and detects coolant temperature by means of an NTC thermistor with negative resistance coefficient.
The variation in the resistance depending on the temperature is illustrated in the table below.
| °C | Ω |
|---|---|
| -20 | 15971 |
| -10 | 9620 |
| 0 | 5975 |
| 10 | 3816 |
| 20 | 2502 |
| 25 | 2044 |
| 30 | 1679 |
| 40 | 1152 |
| 50 | 807 |
| 60 | 576 |
| 70 | 418 |
| 80 | 309 |
| 90 | 231 |
| 100 | 176 |
Electrical properties
- Power supply: 5V
- Maximum current: 2.5 mA
- Maximum power at 25°C: 15 mV

Pin 1, Signal
Pin 2, Earth
Operation
The reference voltage is 5V for the NTC element for the injection system. Because the control unit input circuit is designed as a voltage divider, this voltage is distributed between a resistance present in the control unit and the sensor NTC resistance.
The control unit can therefore assess sensor resistance changes via changes in the voltage and thus obtain temperature information.

Composition
The composition of the sensor is illustrated in the diagram below
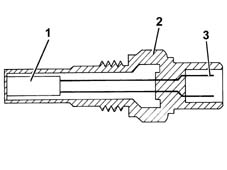
1, NTC resistance
2, Sensor casing
3, Electrical connector
DETONATION SENSOR
Specifications
The piezoresistive knock sensor is fitted on the crankcase and measures the intensity of vibrations caused by knock in the combustion chambers.
This phenomenon has mechanical repercussions on a piezoelectric crystal that sends a signal to the control unit which, on the basis of this signal, reduces the ignition advance until the phenomenon disappears. Later on, the advance is gradually restored to the basic value.
Electrical specifications: resistance 4.9 MΩ ± 20%.

Electrical connections

Pin 1, Signal
Pin 2, Earth
Operation
The molecules of a quartz crystal are electrically polarised.
In rest condition (A), the molecules do not display any particular orientation.
When the crystal is subject to pressure or impact (B), the degree of alignment is directly proportional to the pressure acting on the crystal.
This orientation generates a voltage at the crystal terminals.
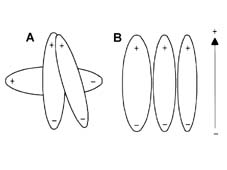
A. Rest position
B. Position under pressure
RPM SENSOR
Specifications
It is fitted on the crankcase front cover facing the phonic wheel built into the crankshaft pulley.
It is inductive, i.e. its operation is determined by magnetic field changes generated by the teeth passing in front of the phonic wheel (60-2 teeth).
The injection control unit uses the rpm sensor signal to:
- determine the rotation speed
- determine the crankshaft angular position.
Electrical specifications: resistance 1134 ÷ 1386 Ω to 20°C.
The recommended distance (gap) between the end of the sensor and the phonic wheel for obtaining correct signals should be 0.5 - 1.5 mm.

Composition
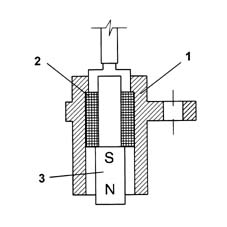
The sensor takes the form of a tubular case (1) containing a permanent magnet (3) and electrical winding (2).
Operation
Due to the passage of the phonic wheel teeth, the magnetic flux set up by magnet (3) undergoes fluctuations due to changes in the gap.
These fluctuations set up an electromotive force in winding (2) and a voltage is set up at the terminals that alternates between positive (tooth facing sensor) and negative (gap facing sensor).
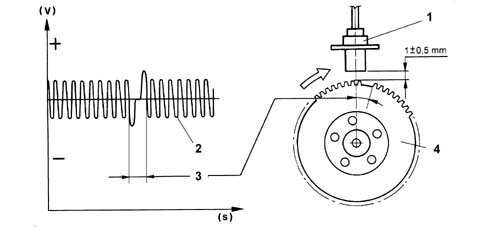
1, Sensor
2, Output signal
3, Signal corresponding to two missing teeth
4, Crankshaft pulley with phonic wheel
The sensor peak output voltage depends, all else being equal, on the distance between the sensor and the phonic wheel teeth (gap).
There are sixty teeth on the phonic wheel, two having been removed to produce a reference: the passing of the wheel therefore corresponds to an angle of 6° (360° divided by 60 teeth).
The synchronism point is recognised at the end of the first tooth following the gap left by the two missing teeth: when this passes beneath the sensor, the motor has piston pair 1-4 at 114° before TDC.
Electrical connections

Pin A, Signal +
Pin B, Signal -
TIMING SENSOR
Specifications
The Hall effect type timing sensor is used by the injection control unit in conjunction with the rpm and TDC signal to recognize the position of the cylinders and determine the injection and ignition point.
The timing sensor is located on the camshaft housing in the dedicated housing and is opposite the inlet side camshaft.

A current-carrying semiconductor layer immersed in a normal magnetic field (force lines at right angles to current direction) generates a potential difference known as a Hall voltage at its terminals.
If current intensity remains constant, the generated voltage depends on magnetic field intensity alone. Periodic changes in magnetic field intensity are sufficient to generate a modulated electrical signal with frequency proportional to the speed of magnetic field change.
The distance between the sensor and the flywheel on the inlet cam axis is altered to produce this change and the reference mark for the timing is used in the process.
Electrical properties
Supply voltage: 5V +/- 10%
Maximum voltage: 16V
The sensor receives a direct power supply from the injection control unit.
Electrical connections
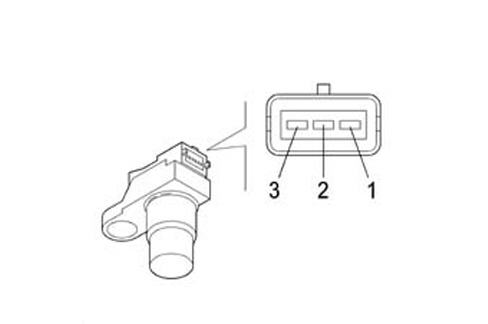
Pin 1, Earth
Pin 2, Signal
Pin 3, 5V Power supply
ACCELERATOR PEDAL POTENTIOMETER
Specifications
The accelerator pedal is equipped with two built-in potentiometers:
- a main potentiometer
- a safety potentiometer.
The injection control unit implements the following recovery strategies under the following conditions:
- if one of the two potentiometers fails, the control unit uses the remaining track without restricting the torque and checks the plausibility with the brake switch.
- if both potentiometers fail completely, throttle opening is prevented.
Operation
The sensor consists of a case secured to the accelerator pedal mounting. This contains an axially-located shaft connected to a dual-track potentiometer.
A coil spring on the shaft ensures the correct amount of resistance to pressure while a second spring ensures return following release.
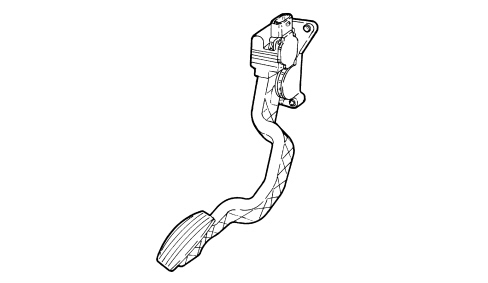
Electrical connections

Pin 1, 5V power supply potentiometer 2
Pin 2, 5V power supply potentiometer 1
Pin 3, Potentiometer earth 1
Pin 4, Potentiometer signal 1
Pin 5, Potentiometer earth 2
Pin 6, Potentiometer signal 2
THROTTLE BODY
Specifications
This is fitted on the intake chamber and regulates the amount of air taken in by the engine.
According to the signal received from the accelerator pedal potentiometer, the injection control unit controls the throttle opening by means of a direct current motor built into the throttle body.
Throttle opening takes place from 0° to 80°, i.e. including idle speed adjustment range.
The throttle body is equipped with two built-in potentiometers, each of which controls the other.
If both potentiometers should fail or in the case of a power cut, the control unit reduces drive torque on the basis of accelerator pedal position:
- with the pedal fully depressed, it cuts off fuel to one or more pistons until a maximum speed of 2500 rpm is reached
- in the intermediate positions, it cuts off the supply to one or more pistons until a speed of less than 2500 rpm is reached.
Replacement of the injection control unit or the throttle body requires the self-learning procedure to be run.
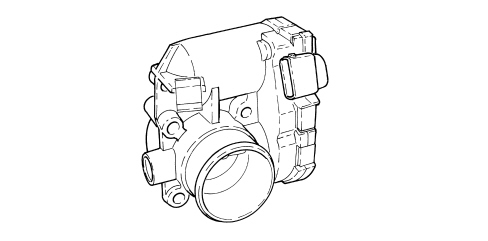
Operation
The injection control unit operates the motorised throttle according to accelerator pedal requests; a potentiometer connected to it sends a voltage signal to the control unit where it is processed and opening laws are produced.
Electrical connections

Pin 1, Throttle opening motor earth
Pin 2, TPS1 and TPS2 potentiometers earth
Pin 3, TPS1 and TPS2 potentiometers 5V positive
Pin 4, Throttle opening motor positive
Pin 5, TPS2 Potentiometer signal
Pin 6, TPS1 Potentiometer signal
INTAKE AIR TEMPERATURE AND PRESSURE SENSOR
Specifications
The pressure and intake air temperature sensor is an integral component which is designed to measure the air pressure and temperature inside the intake manifold.
Both pieces of information are used by the injection control unit in defining the quantity of air drawn in by the engine and are then used for calculating the injection time and the ignition point.
The sensor is fitted to the air chamber
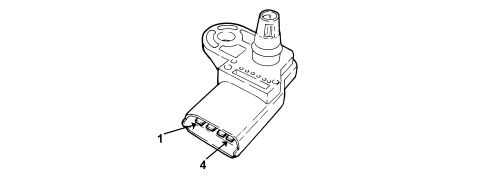
Composition
The air temperature sensor consists of an NTC thermistor (Negative Temperature Coefficient). The sensor resistance decreases as the temperature increases.
The control unit input circuit shares the 5 Volt reference voltage between the sensor resistance and a fixed reference value, producing a voltage that is proportional to the resistance and consequently to the temperature.
The sensitive element of the pressure sensor is made up of a Wheatstone bridge screen-printed onto a ceramic diaphragm. On one side of the diaphragm is the absolute reference vacuum, while on the other side is the vacuum from the intake manifold.
The (piezoresistant) signal, coming from the distortion suffered by the diaphragm, before being sent to the engine management control unit, is amplified by an electronic circuit contained in the mounting that houses the ceramic diaphragm.
With the engine off, the diaphragm bends according to atmospheric pressure. Exact reference information on altitude can therefore be obtained with the key on.
During engine operation, the vacuum exerts a mechanical action on the sensor diaphragm, which bends to alter the resistance value.
Because the power supply from the control unit is maintained strictly constant (5V), the output voltage changes when the resistance value is altered.
Electrical properties
The electrical properties of the sensor are illustrated in the diagram below.
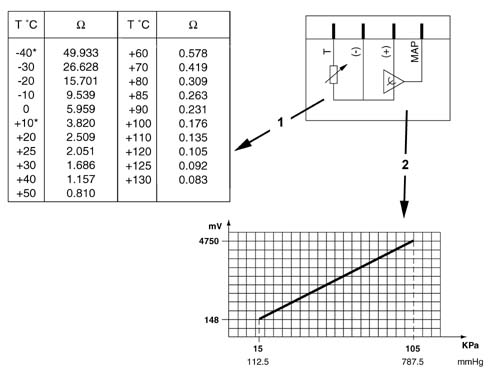
1, Air temperature sensor
2, Intake air pressure sensor
Electrical connections

Pin 1, Earth
Pin 2, Air temperature sensor signal
Pin 3, 5V Power supply
Pin 4, Air pressure signal on intake manifolds
IGNITION COILS
Composition
The coils are connected directly to the spark plugs and are the "PLUG TOP" type comprising a magnetic internal core made up of a silicon steel pack arranged along the axis of the coil and secondary and primary coils which contain the electrical windings, coaxial to the magnetic core.
The windings are housed in a pressed plastic container which has the low voltage connector and the fastening bush on the cylinder head and they are insulated through immersion in an epoxide resin which has excellent dielectric, mechanical and also thermal properties, as the coils are exposed to high temperatures. The proximity of the primary winding to the magnetic core reduces the magnetic flux losses, ensuring the maximum coupling on the secondary winding.
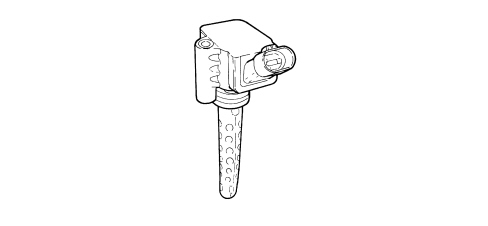
The coil head is connected to the spark plug via a silicone rubber cap that contains a spring allowing transfer of high voltage from the secondary winding to the spark plug terminal.
The coils are directly controlled by the injection control unit in sequential timed mode.
The control unit earths the primary coil power supply circuit, so creating a strong magnetic field on the primary coil. When the primary coil circuit is open, high voltage on the secondary coil is generated by induction.
The high voltage is discharged to the engine earth via the spark plug electrodes, generating the spark that ignites the air-fuel mixture.
Electrical specifications:
Primary circuit resistance: 0.53 Ω ± 5% at 23°C
Secondary circuit resistance: 8100 Ω ± 5% at 23°C.
Nominal current on primary coil: 7.3 A
Voltage on secondary: 27 kW
Electrical connections

Pin 1, Connection to engine earth secondary circuit
Pin 2, Power supply + 12V primary circuit
Pin 3, Control to earth from primary control unit
Vehicle speed sensor
Specifications
The vehicle speed signal is produced by the ABS control unit and sent to the engine management control unit via the CAN.
TURBO PRESSURE SENSOR
Specifications
The turbo pressure sensor consists of a Wheatstone bridge screen-printed onto a ceramic diaphragm and is used by the control unit to detect the turbocharging pressure downstream of the intercooler.

The sensor is fitted to the rigid intake pipe located before the motorised throttle valve.
The control unit uses the signal from the sensor to manage the turbocharging pressure and to calculate the amount of air needed for the new fuel dosage.
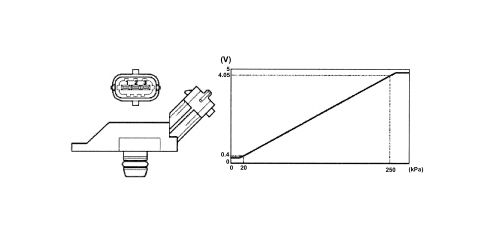
Pin 1, 5V Power supply
Pin 2, Earth signal
Pin 3, Turbo pressure signal
SHUT-OFF SOLENOID
Specifications
It is a by-pass valve that integrates an On/Off valve; this is a solenoid controlled directly from the control unit.
The shut-off solenoid allows excess pressure in the duct downstream of the compressor to be limited according to sudden throttle closure following a release manoeuvre.
This excess pressure can create deceleration of the turbocharger impeller, causing a decline in performance and leading to strong vibrations and noise.
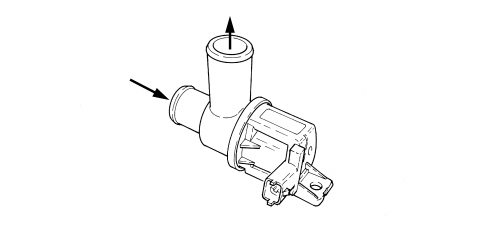
The shut-off solenoid is fitted on the special housing close to the throttle body.
Operation
The solenoid consists of a body that encloses a diaphragm mechanical valve (1) equipped with a return spring (2) and an electromagnet (3) powered by the injection control unit.
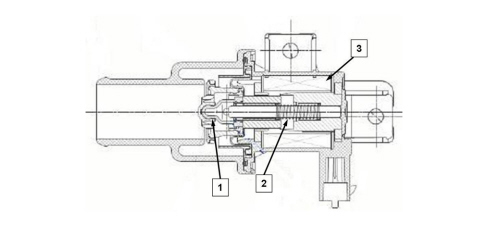
During overrun, the injection control unit powers the electromagnet (3) that attracts the mechanical valve (1), which opens a by-pass and discharges - upstream of the turbocharger - the excess pressure from the intake tube.
Electrical properties
Supply voltage: 12V
Operating voltage: 8V - 16V
Current absorption: 1.4A (at 13V and 25 °C)
Electrical connections
Pin 1, Power supply + 12V
Pin 2, Control to earth from injection control unit
WASTEGATE SOLENOID
Specifications
The Waste-Gate solenoid is used by the injection control unit to manage the turbo pressure with a direct action via pneumatic connections with an actuator on the turbocharger.
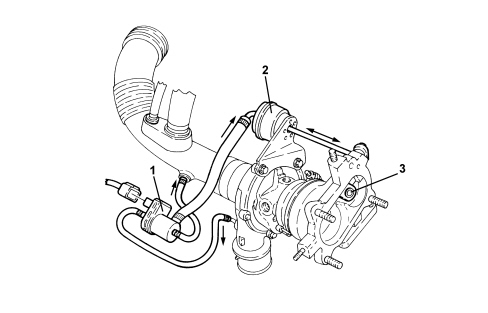
1. Solenoid valve
2. Actuator
3. Waste gate valve
The solenoid valve comprises a plastic casing that encloses a shutter and an electromagnet.
It is connected, via flexible pipes, to:
- turbocharger outlet (high pressure intake)
- waste gate valve actuator
- turbocharger air intake pipe (excess air pressure discharge).
The injection control unit measures the supercharging pressure in all engine operating ranges through the turbo pressure sensor. If this pressure exceeds the preset values, the control unit intervenes on the solenoid valve supplying the electromagnet which attracts a shutter towards it and frees the passage of the high pressure to the actuator thereby allowing the opening of the waste gate valve.
Once the regulation action is over, the electromagnet is no longer supplied and the high pressure is discharged upstream of the turbocharger.
Electrical properties
Electromagnet winding resistance: 30 Ohms +/- 10% at 20 °C
Electrical connections
Pin 1, Control to earth from control unit
Pin 2, Power supply + 12V
Parts & tools for this job For 2007 Fiat Bravo
- PARTFuel filterSearch: Fiat Bravo 2007 fuel filter
- TOOLFuel pressure test kitSearch: fuel pressure test kit
- TOOLFuel line disconnect toolSearch: fuel line disconnect tool
Links open Amazon search results in a new tab. As an Amazon Associate I earn from qualifying purchases.