
Refitting (page 2 of 2)
- Make
- Fiat
- Model
- Seicento Factory Service Manual
- Year
- 1998–2010
- Section
- External lighting
‹ Prev RefittingNext › 5540c18 - headlight/light cluster beam adjustment motor control switch - r.r.
55 Electrical equipmentRefitting · page 2 of 2
(Op. 5540C14 continued)
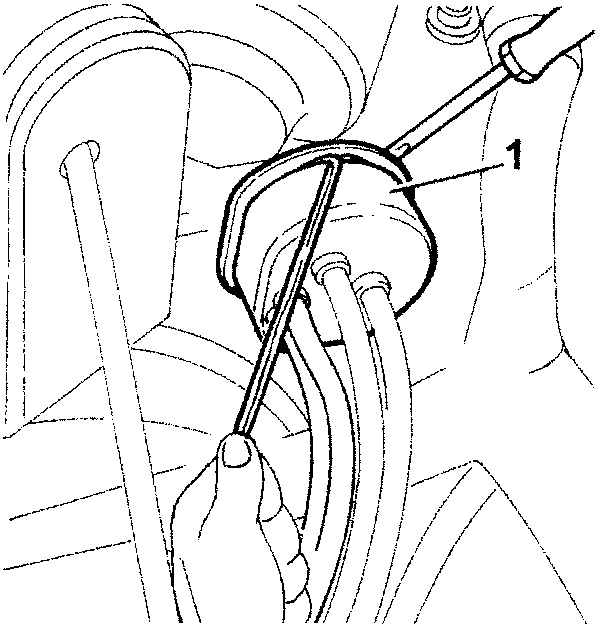
- Tie a string to the clock pad and pull it into the engine compartment. With the help of a screw-driver, take the pad to its seat.
- Reposition the control device on the dashboard. Fit the tab and the knob.
- Stop the hydraulic actuator pipes with a clip to the steering control support.
- Complete with Op. 5510B20 - CLIMATE CONTROL UNIT PANEL - Fitting.
- Complete with Op. 5510B23 - CLIMATE CONTROL UNIT PANEL SEAL - r.r.
- Reconnect the rear window washer pipe to the fitting.
- Reconnect the bonnet lock opening device to the lock.
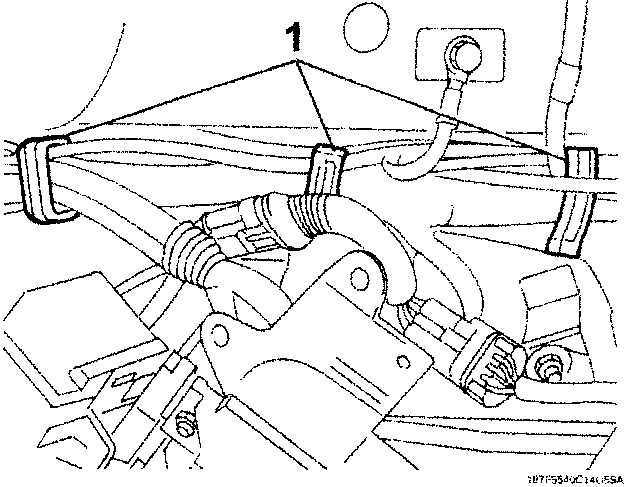
- Reposition the pipes and close the three plastic fastenings on the left-hand strut.
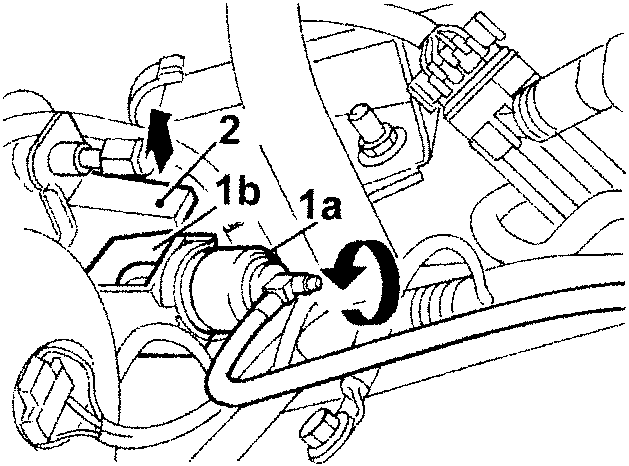
- Position the left-hand hydraulic actuator (1a) on the actuator. Turn it anti-clockwise and fit it in its seat (1b).
- Fasten the actuator to the mechanism by means of the headlight lever.
- Refit the left-hand headlight (see Op. 5540B10 - HEADLIGHT, LH or RH - r.r.).
- Reposition the pipes in the three fastenings on the front crossmember.
- Reposition the injection ECU, with support brackets and screw the three fastening screws.
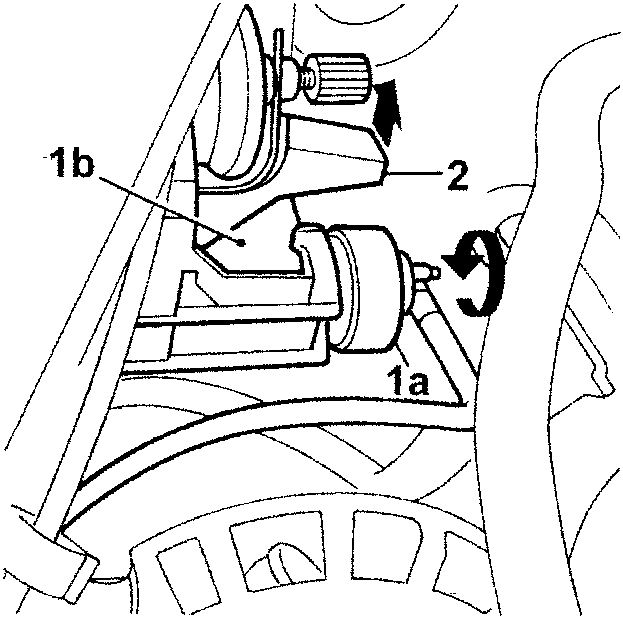
- Position the right-hand hydraulic actuator (1a) on the actuator. Turn it anti-clockwise and fit it in its seat (1b).
- Fasten the actuator to the mechanism by means of the headlight lever.
-- Refit the air cleaner cover (see Op. 1048A10 - COMPLETE AIR CLEANER - R.R.).
‹ Prev RefittingNext › 5540c18 - headlight/light cluster beam adjustment motor control switch - r.r.
Parts & tools for this job For 1998 Fiat Seicento
- PARTReplacement bulbsSearch: Fiat Seicento 1998 bulbs
- TOOLDigital multimeterSearch: automotive digital multimeter
Links open Amazon search results in a new tab. As an Amazon Associate I earn from qualifying purchases.