
Gearbox and transfer box assembly (page 3 of 3)
- Make
- Land Rover
- Model
- Defender 90 Workshop Manual (NAS)
- Section
- Repair
Automatic gearboxGearbox and transfer box assembly · page 3 of 3
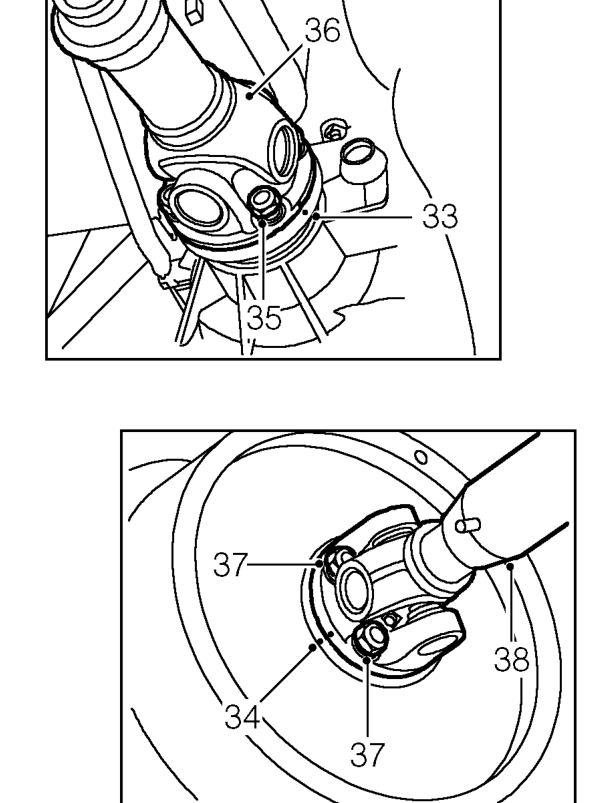
- Mark relationship between converter and drive
- Using a centre punch, mark relationship between front propeller shaft to transfer box flanges.
- Rotate crankshaft to access drive plate to
- Using a centre punch, mark relationship between rear propeller shaft to brake drum flanges.
- Remove 4 nuts securing front propeller shaft to transfer box flange.
NOTE: Rotate propeller shaft to gain access to all fixing.
- Release propeller shaft from transfer box flange bolts and tie aside.
- Remove 4 nuts securing rear propeller shaft to brake drum flange.
NOTE: Rotate propeller shaft to gain access to all fixing.
- Release propeller shaft from brake drum bolts
- Remove 4 bolts securing drive plate to
and tie aside.
- Remove 7 bolts securing bell housing closing
- Fit suitable piece of wood through bell housing
plate and remove plate.
- Remove 3 bolts securing bell housing access plate and remove plate.
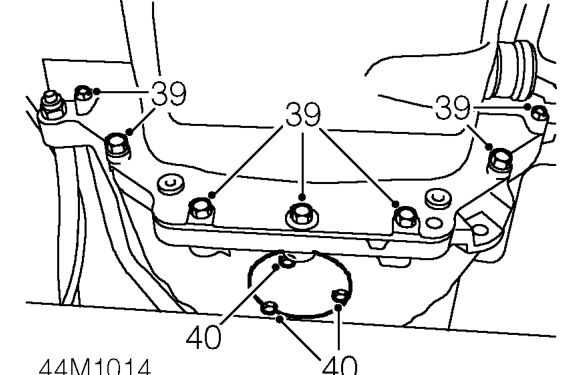
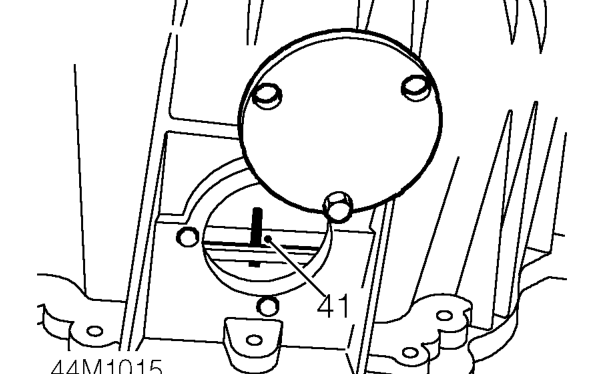
plate.
converter fixing.
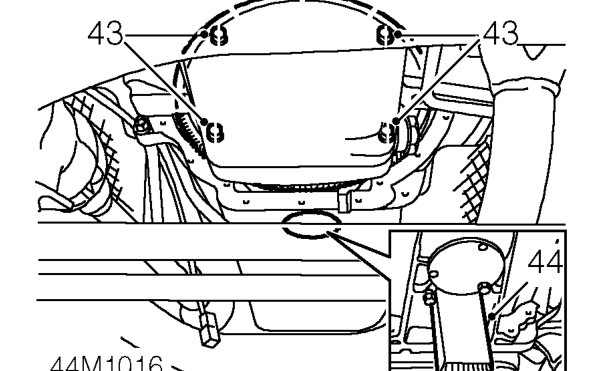
converter.
access hole to retain converter.
Parts & tools for this job For Land Rover Defender
- PARTTransmission filter kitSearch: Land Rover Defender transmission filter kit
- FLUIDAutomatic transmission fluidSearch: Land Rover automatic transmission fluid
- TOOLFluid transfer pumpSearch: fluid transfer pump
Links open Amazon search results in a new tab. As an Amazon Associate I earn from qualifying purchases.