
Gearbox and transfer box assembly (page 2 of 3)
- Make
- Land Rover
- Model
- Defender 90 Workshop Manual (NAS)
- Section
- Repair
Automatic gearboxGearbox and transfer box assembly · page 2 of 3
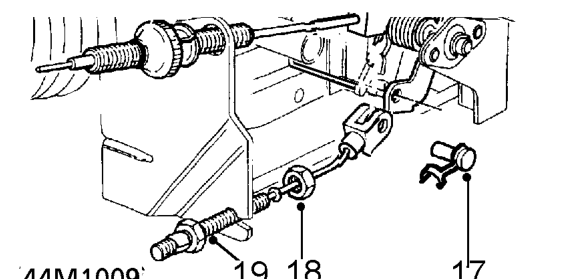
- Remove kick-down cable clevis pin.
- Release kick-down outer cable lock nut.
- Release kick-down outer cable from abutment bracket. 25. Remove 2 nuts securing intermediate pipe to tail
- Release kick-down outer cable from clip on rear of LH cylinder head. 26. Release intermediate pipe from tail pipe and
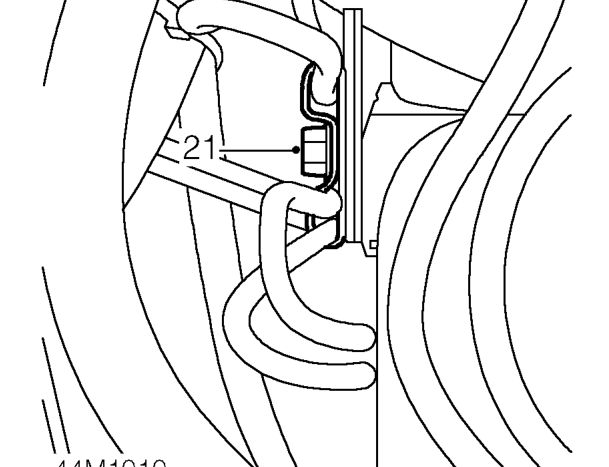
- Remove bolt securing 2 breather pipe ’P’ clips to rear of RH cylinder head. 27. Remove 8 bolts securing chassis crossmember.
- Remove 6 bell housing to engine bolts. 28. With assistance, and using a body jack between
- Raise vehicle.
- Remove exhaust front pipe. See EMISSION CONTROL, Repair, front pipe/catalytic 29. Remove crossmember. converter 30. Remove body jack.
- Remove bolt securing LH and RH catalyst heat
- Remove catalyst heat shields.
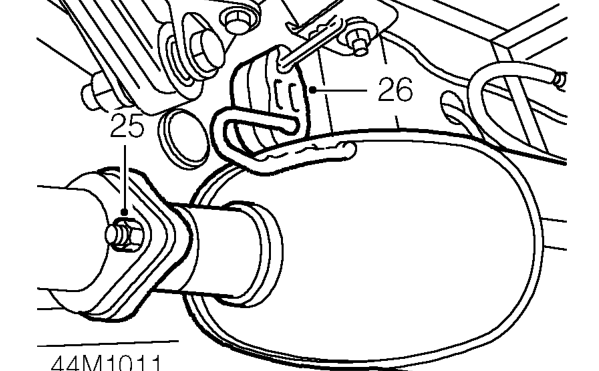
pipe.
remove from mounting.
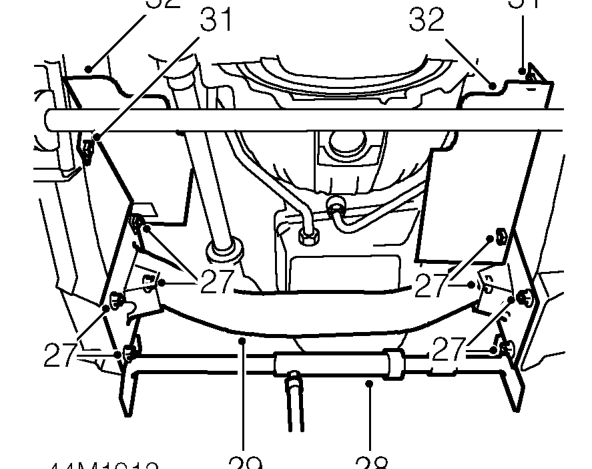
chassis longitudinals, jack chassis sufficiently to enable removal of crossmember.
shields to chassis.
Parts & tools for this job For Land Rover Defender
- PARTTransmission filter kitSearch: Land Rover Defender transmission filter kit
- FLUIDAutomatic transmission fluidSearch: Land Rover automatic transmission fluid
- TOOLFluid transfer pumpSearch: fluid transfer pump
Links open Amazon search results in a new tab. As an Amazon Associate I earn from qualifying purchases.