
Seat squab assembly
- Make
- MG
- Model
- TF Factory Workshop Manual
- Year
- 2002–2005
- Section
- Interior trim components › Seat squab assembly
BodySeat squab assembly · page 1 of 2
Refit
- Ensure harness lead does not become trapped under seat runner when fitting seat.
- Position seat belt strap to seat frame and tighten Torx screw to 30 Nm.
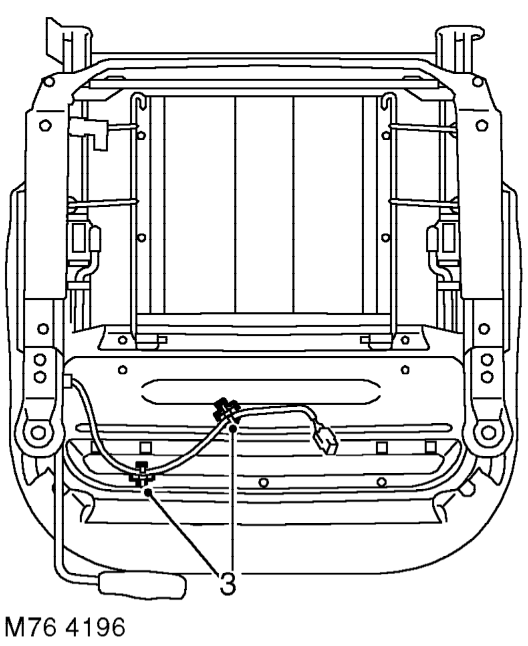
- Ensure that pre-tensioner lead is correctly clipped to seat base.
- Position seat and align runners to floor bolt holes.
- Connect pre-tensioner multiplug.
- Fit but do not tighten Torx screw securing rear of each seat runner.
- Lift seat adjuster, move seat rearwards.
- Fit Torx screw securing front of each seat runner and tighten to 45 Nm.
- Lift seat adjuster, move seat forwards.
- Tighten Torx screw securing rear of each seat runner to 45 Nm.
- Connect both battery leads, earth lead last.
- Carry out system check using TestBook.
SEAT SQUAB ASSEMBLY
Service repair no - 78.10.50/99
Remove
- Make SRS system safe. See GENERAL INFORMATION, SRS Precautions.
WARNING: Always remove the ignition key from the ignition switch, disconnect the vehicle battery and wait 10 minutes before commencing work on the SRS system.
- Remove front seat. See this section.
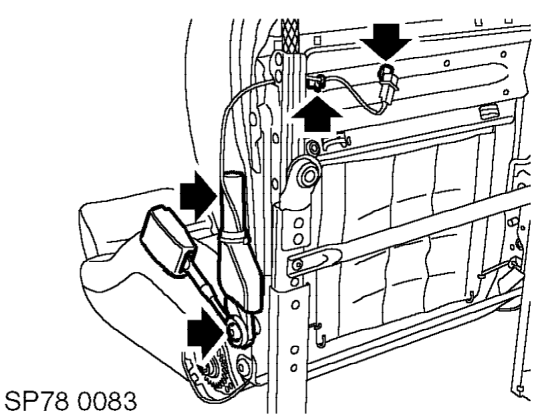
- Release 2 clips securing pre-tensioner harness to underside of seat.
- Remove Torx bolt securing pre-tensioner to seat and remove pre-tensioner.
Parts & tools for this job For 2002 MG TF
- TOOLTrim removal tool kitSearch: trim removal tool kit
- PARTTouch-up paintSearch: MG touch up paint
- PARTPanel clip assortmentSearch: MG panel clips assortment
Links open Amazon search results in a new tab. As an Amazon Associate I earn from qualifying purchases.