
Instrument panel
- Make
- Mini
- Model
- Mini Workshop Manual
- Year
- 1996–2000
- Section
- Repairs › Instrument panel
InstrumentsInstrument panel
INSTRUMENT PANEL
Service repair no - 88.20.01/99
Remove
- Remove fascia panel. See BODY, Interior trim components.
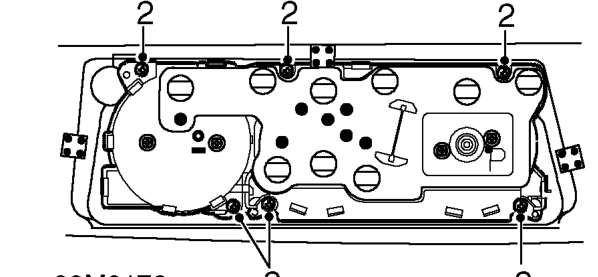
- Remove 6 screws and remove instrument panel from fascia panel.
Refit
- Position instrument panel to fascia panel and secure with screws.
- Fit fascia panel. See BODY, Interior trim components.
PRINTED CIRCUIT
Service repair no - 88.20.19
Remove
- Remove fascia panel. See BODY, Interior trim components.
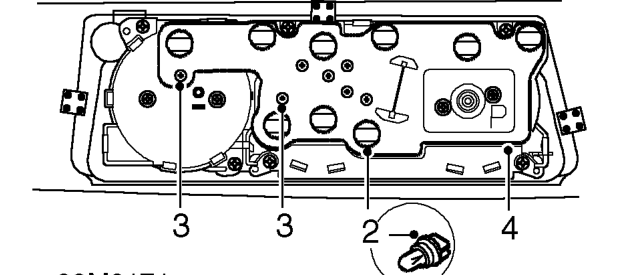
- Remove illumination and warning light bulbs from instrument pack. Note position of yellow bulbs.
- Remove 7 screws securing printed circuit to instrument pack, noting position of long screws.
- Release and remove printed circuit.
Refit
- Position printed circuit. Fit and tighten screws.
- Fit illumination and warning light bulbs.
- Fit fascia panel. See BODY, Interior trim components.
Parts & tools for this job For 1996 Mini Mini
- TOOLTorque wrenchSearch: 3/8 inch torque wrench
- TOOLSocket setSearch: socket set metric
- BOOKHaynes manualSearch: Haynes manual Mini Mini
Links open Amazon search results in a new tab. As an Amazon Associate I earn from qualifying purchases.