
Front bumper
- Make
- Rover
- Model
- 200 Workshop Manual
- Year
- 1995–1999
- Section
- Exterior fittings › Front bumper
BodyFront bumper
FRONT BUMPER
Service repair no - 76.22.08
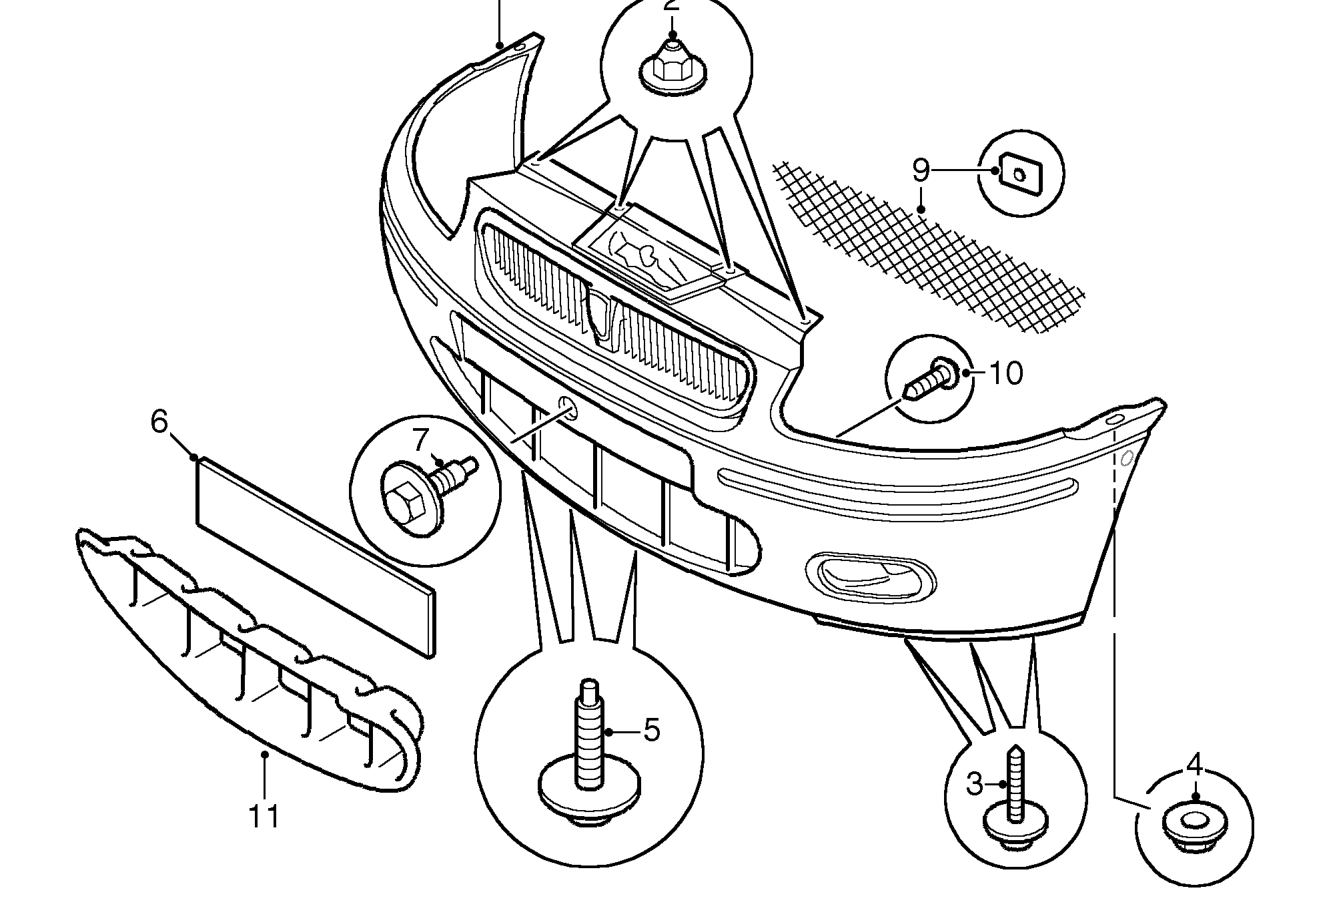
Remove
- Remove front fog lights - if fitted. See ELECTRICAL, Repairs.
- Remove 4 nuts securing bumper to bonnet locking platform.
- Remove 6 screws securing bottom edge of bumper to wheel arch liners.
- Move liners aside and remove flange nut securing each end of bumper to front wings.
- Remove 3 bolts securing lower edge of bumper to body.
- Remove number plate.
- Remove bolt securing centre of bumper to body.
- Remove bumper. Do not carry out further dismantling if component is removed for access only.
- Remove 6 clips securing air intake grille to bumper, remove grille.
BRM
- Remove 12 screws securing air intake moulding to bumper.
- Release adhesive tape securing air intake moulding to bumper, remove moulding.
Parts & tools for this job For 1995 Rover 200
- TOOLTrim removal tool kitSearch: trim removal tool kit
- PARTTouch-up paintSearch: Rover touch up paint
- PARTPanel clip assortmentSearch: Rover panel clips assortment
Links open Amazon search results in a new tab. As an Amazon Associate I earn from qualifying purchases.