
Rear brake pads (page 2 of 2)
- Make
- Rover
- Model
- 200 Workshop Manual
- Year
- 1995–1999
- Section
- Repairs
BrakesRear brake pads · page 2 of 2
- Rotate disc by hand and scape all scale and rust from around edge of disc.
- Clean rust from locating surfaces of
- Position bleed bottle and connect bleed bottle hose to bleed screw.
- Loosen bleed screw.
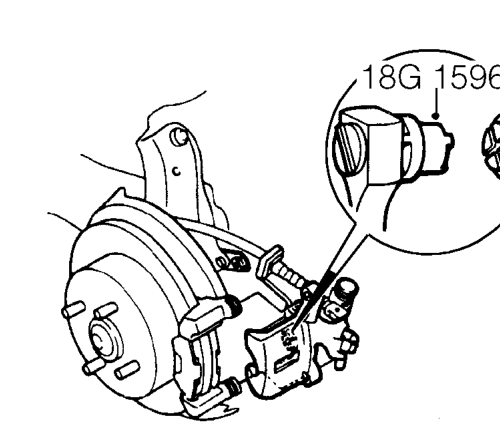
- Screw piston fully back into caliper using tool 18G 1596.
- Tighten bleed screw to 10 Nm, disconnect bleed hose and remove bleed bottle.
- Fit pad retainer springs to carrier.
- Apply Molykote M77 to both sides of pad shims and back of pads.
- Fit shims to pads and position pads to carrier.
- Untie caliper and position to carrier.
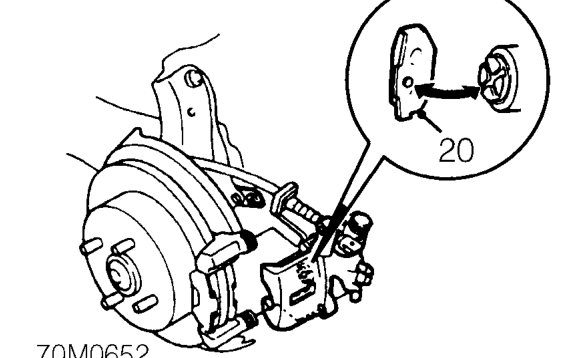
- Ensure that lug on brake pad locates in cruciform slot in piston.
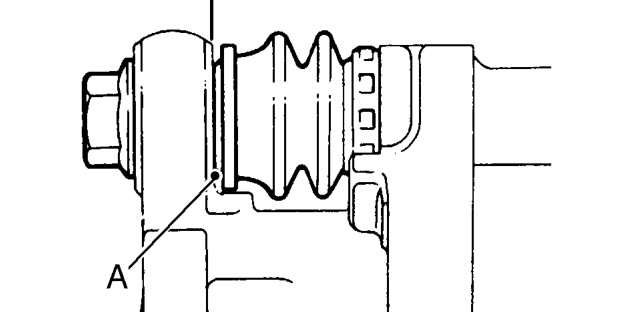
- Ensure flats ’A’ on guide pins locate with lugs on caliper housing.
- Fit guide pin bolts and tighten to 27 Nm.
- Repeat operations for other rear brake assembly.
- Check and top-up brake fluid. See INFORMATION, Capacities, fluids and lubricants.
- Fit road wheel(s) and tighten nuts to correct torque. See INFORMATION, Torque wrench settings.
- Adjust handbrake cable. See Adjustments.
- Remove stand(s) and lower vehicle.
Parts & tools for this job For 1995 Rover 200
- PARTRear brake padsSearch: Rover 200 1995 rear brake pads
- TOOLCaliper piston rewind toolSearch: brake caliper piston rewind tool
- FLUIDBrake fluidSearch: brake fluid
Links open Amazon search results in a new tab. As an Amazon Associate I earn from qualifying purchases.