
Exhaust camshaft front oil seal
- Make
- Rover
- Model
- 200 Workshop Manual
- Year
- 1995–1999
- Section
- Repairs › Exhaust camshaft front oil seal
Engine - K16 with VVCExhaust camshaft front oil seal
EXHAUST CAMSHAFT FRONT OIL SEAL
Service repair no - 12.13.07
Remove
- Remove and discard camshaft timing belt. See this section.
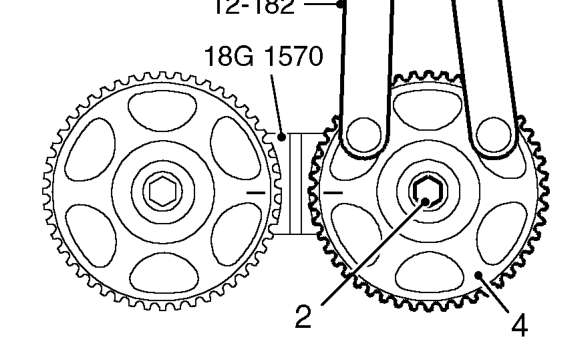
- Restrain exhaust camshaft gear using tool 12-182 and remove bolt and washer securing camshaft gear to camshaft.
- Remove tool 18G 1570.
- Remove camshaft gear.
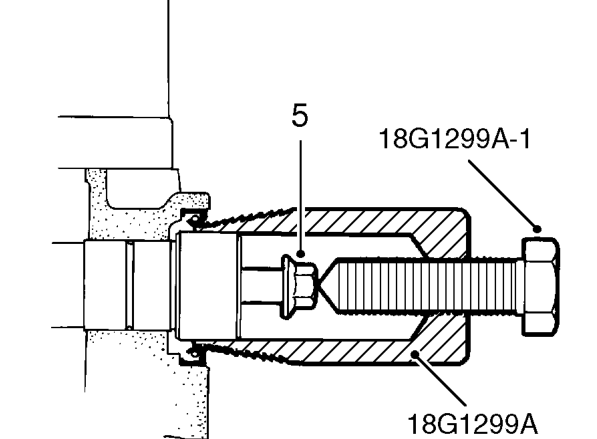
- Fit camshaft gear retaining bolt to camshaft.
- Screw tool 18G 1299A into camshaft oil seal.
- Remove oil seal by tightening centre bolt of tool 18G 1299A-1.
- Remove bolt from camshaft.
Refit
- Clean sealing area of head and camshaft, ensuring all traces of rubber are removed. DO NOT use a scraper as this may damage sealing surfaces.
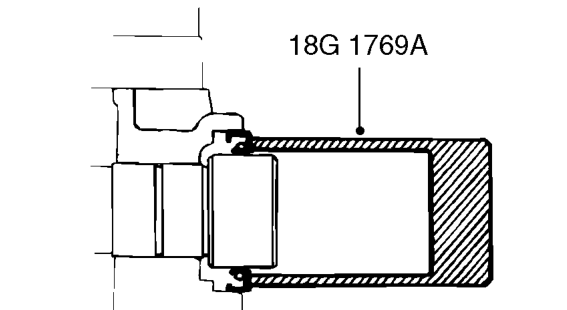
- Using tool 18G 1769A fit new camshaft oil seal.
NOTE: This oil seal is coloured BLACK.
CAUTION: Oil seal must be fitted dry. Do not use tool 18G 1769.
- Clean camshaft gear.
CAUTION: If the sintered gears have been subjected to prolonged oil contamination, they must be soaked in a solvent bath and thoroughly washed in clean solvent before refitment. Because of the porous construction of sintered material, oil impregnated in the gear will emerge and contaminate a new timing belt.
- Align camshaft gear timing marks and fit camshaft gear to camshaft.
- Fit tool 18G 1570 to camshaft gears.
- Fit bolt and washer securing camshaft gear to camshaft, restrain gear using tool 12-182 and tighten bolt to 65 Nm.
- Fit new camshaft timing belt. See this section.
Parts & tools for this job For 1995 Rover 200
- PARTExhaust gasketSearch: Rover 200 1995 exhaust gasket
- TOOLPenetrating oilSearch: penetrating oil
- TOOLOBD2 scannerSearch: OBD2 scanner
Links open Amazon search results in a new tab. As an Amazon Associate I earn from qualifying purchases.