
Replacement timing belt
- Make
- Rover
- Model
- 200 Workshop Manual
- Year
- 1995–1999
- Section
- Repairs › Replacement timing belt
Engine - K16 with VVCReplacement timing belt
Replacement timing belt
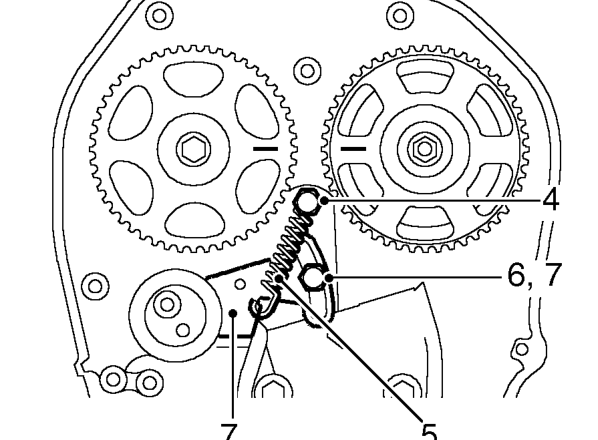
- Fit pillar bolt supplied with replacement belt to cylinder head.
- Connect spring supplied with replacement belt to pillar bolt and tensioner.
NOTE: This spring is not fitted with a sleeve.
- Slacken backplate bolt and ensure tensioner moves fully through its adjustment range and returns under spring tension.
- Push tensioner down to fully OFF position and tighten backplate bolt to 10 Nm.
All timing belts
- Using fingers only, fit timing belt over crankshaft gear and then over camshaft gears, keeping belt taut from crankshaft gear and between camshaft gears.
- Position belt using fingers only over tensioner and coolant pump drive gear.
CAUTION: If original belt is being refitted, ensure direction of rotation mark is facing correct way.
- Check that timing belt is positioned centrally around all gears and pulley.
- Fit timing belt lower cover. See this section.
NOTE: Do not fit timing belt upper cover at this stage.
- Raise engine to correct height.
- Fit bracket to engine mounting and finger tighten nut.
- Fit bolt securing bracket to engine and tighten to 160 Nm.
- Fit bolt securing bracket to tie bar and tighten to 80 Nm.
- Tighten nut securing bracket to engine mounting to 85 Nm.
- Remove jack.
- Remove camshaft gear locking tool 18G 1570.
Tensioning an existing camshaft timing belt
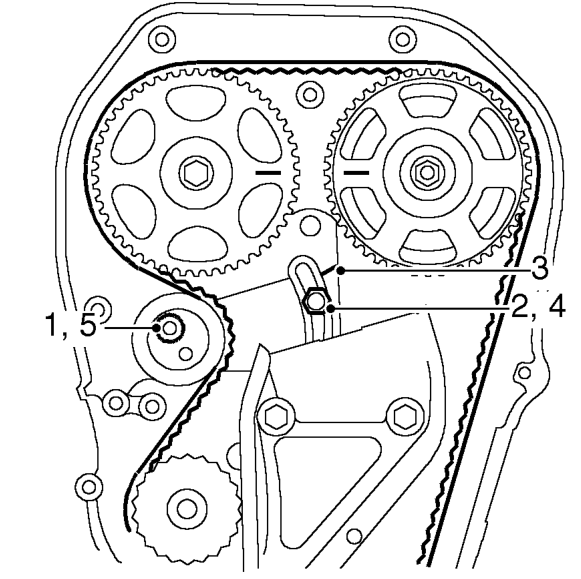
- Loosen tensioner pulley Allen screw11/2 turn.
- Loosen tensioner backplate bolt /2 turn.
- Position tensioner to align reference mark on backplate and cylinder head.
- Tighten tensioner backplate bolt to 10 Nm.
- Tighten tensioner pulley Allen screw to 45 Nm.
Parts & tools for this job For 1995 Rover 200
- PARTTiming belt kitSearch: Rover 200 1995 timing belt kit
- TOOLEngine timing tool setSearch: Rover engine timing tool set
- TOOLTorque wrenchSearch: 3/8 inch torque wrench
Links open Amazon search results in a new tab. As an Amazon Associate I earn from qualifying purchases.