
Engine and gearbox - models without air conditioning
- Make
- Rover
- Model
- 200 Workshop Manual
- Year
- 1995–1999
- Section
- Repairs › Engine and gearbox - models without air conditioning
Engine - K16 with VVCEngine and gearbox - models without air conditioning · page 1 of 10
ENGINE AND GEARBOX - MODELS WITHOUT AIR CONDITIONING
Service repair no - 12.37.01.99
Remove
- Disconnect battery earth lead.
- Drain engine oil. See MAINTENANCE.
- Fit new sealing washer to drain plug.
- Fit drain plug and tighten to 42 Nm.
- Drain cooling system. See COOLING SYSTEM - ’K’ SERIES, Adjustments.
- Drain gearbox oil. See MANUAL GEARBOX - ’PG1’, Repairs.
- Raise front of vehicle.
WARNING: Support on safety stands.
- Remove air cleaner. See ENGINE MANAGEMENT SYSTEM - MEMS, Repairs.
- Remove ECM. See ENGINE MANAGEMENT SYSTEM - MEMS, Repairs.
- Remove engine management relay module. See ENGINE MANAGEMENT SYSTEM - MEMS, Repairs.
- Release ABS fuse holder from battery tray.
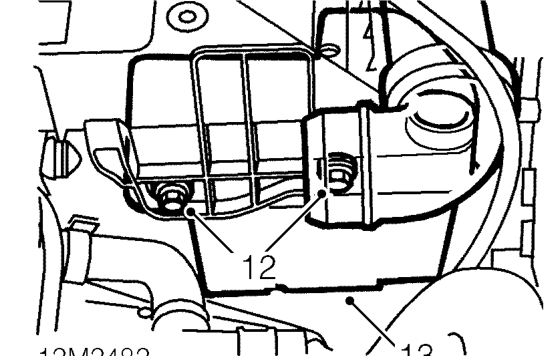
- Remove 2 bolts securing resonator to battery tray.
- Remove resonator.
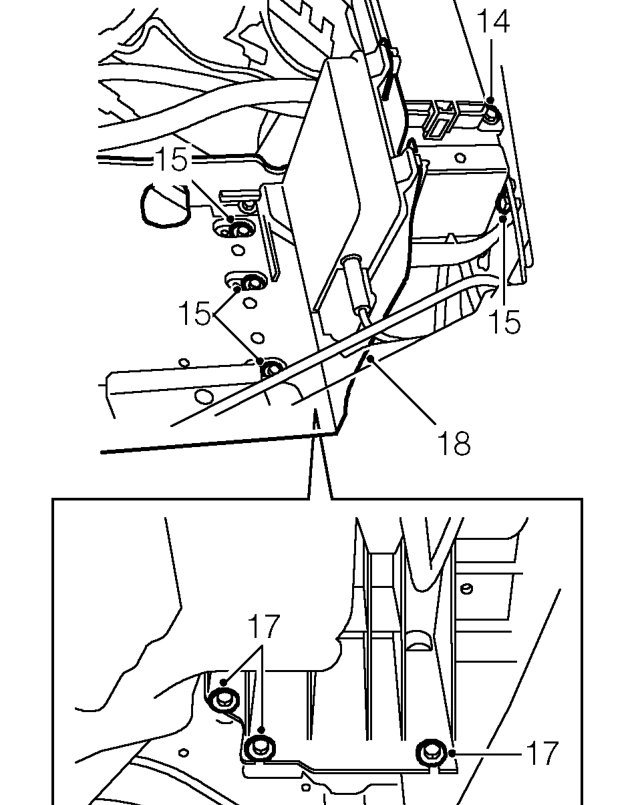
- Remove bolt securing engine compartment fuse box to battery tray.
- Remove 4 bolts securing battery tray to body.
- Remove bolt securing engine compartment fuse box to body and position fuse box aside.
- Loosen 3 bolts securing battery tray to body.
- Remove battery tray from vehicle.
Parts & tools for this job For 1995 Rover 200
- PARTEngine gasket setSearch: Rover 200 1995 engine gasket set
- TOOLTorque wrenchSearch: 3/8 inch torque wrench
- TOOLFeeler gauge setSearch: feeler gauge set
Links open Amazon search results in a new tab. As an Amazon Associate I earn from qualifying purchases.