
’H’ frame bush (page 2 of 2)
- Make
- Rover
- Model
- 200 Workshop Manual
- Year
- 1995–1999
- Section
- Repairs
Rear suspension’H’ frame bush · page 2 of 2
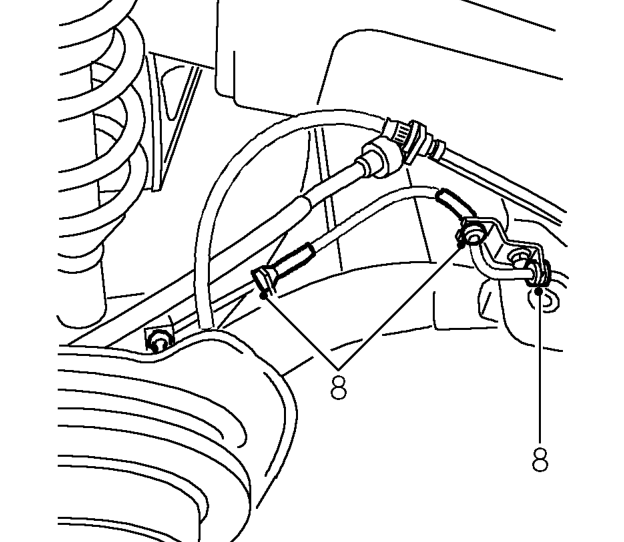
- Models with ABS: Release ABS harness from ’H’ frame.
- Lower ’H’ frame and release bush from mounting bracket.
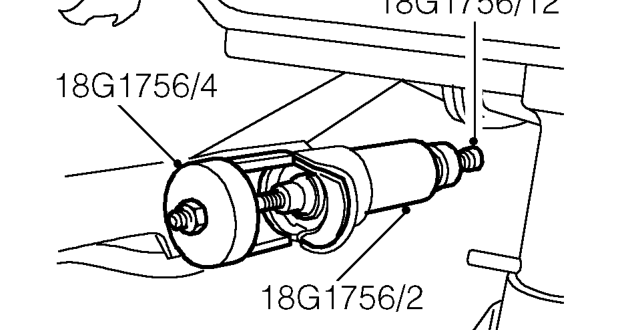
- Fit tools 18G 1756/12, 18G 1756/2, and 18G 1756/4 to bush as shown in illustration.
- Rotate handle of tool to withdraw bush.
Refit
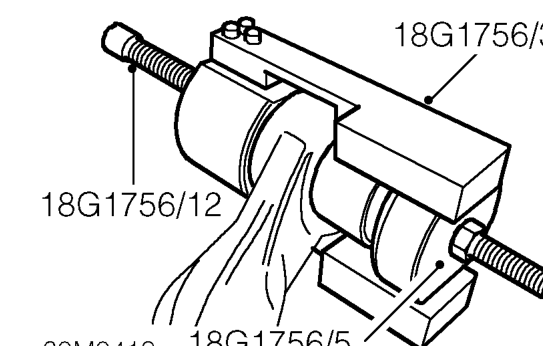
- Position bush to ’H’ frame and fit tools 18G 1756/12, 18G 1756/3, and 18G 1756/5 as shown in illustration.
- Rotate handle of tool to press bush into ’H’ frame.
- Raise ’H’ frame on jack and fit bolt securing damper assembly and tighten to 80 Nm.
- Position ’H’ frame and fit pivot bolt. Tighten bolt to 100 Nm.
- Position brake hose to ’H’ frame and secure with clip.
- Fit road wheel(s) and tighten nuts to correct torque. See INFORMATION, Torque wrench settings.
- Remove stand(s) and lower vehicle.
Parts & tools for this job For 1995 Rover 200
- TOOLCoil spring compressorSearch: coil spring compressor
- TOOLBall joint separatorSearch: ball joint separator
- PARTRear shock absorbersSearch: Rover 200 1995 rear shock absorbers
Links open Amazon search results in a new tab. As an Amazon Associate I earn from qualifying purchases.