
Models with ABS:
- Make
- Rover
- Model
- 200 Workshop Manual
- Year
- 1995–1999
- Section
- Repairs › Models with ABS:
Rear suspensionModels with ABS:
Models with ABS:
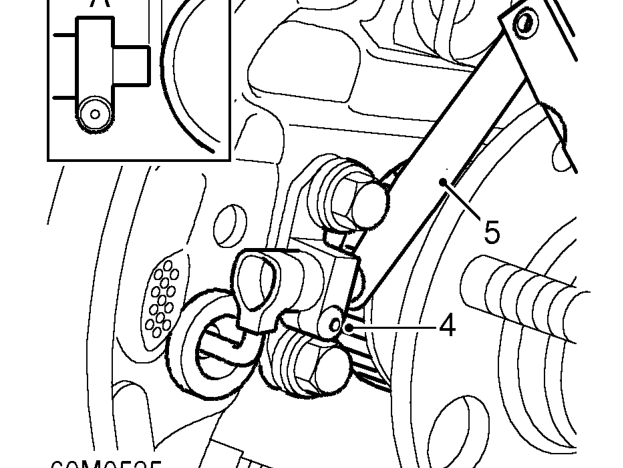
- Loosen ABS adapter clamp screw.
- Using a feeler gauge, set clearance ’A’ between sensor and reluctor ring. Clearance ’A’= 0.5 mm.
- Tighten adapter clamp screw to 0.5 Nm.
All models:
- Secure handbrake cable to backplate.
- Manoeuvre shoe assembly into position between hub and wheel cylinder and connect hand brake cable to brake shoe lever.
- Fit lower return spring to trailing shoe and connect spring to leading shoe.
- Remove elastic band from wheel cylinder.
- Engage leading shoe to wheel cylinder followed by trailing shoe and align both shoes to wheel cylinder.
NOTE: During this operation the adjuster may become extended, this is not important but it must be reset prior to fitting brake drum.
- Fit trailing shoe into abutment bracket followed by leading shoe.
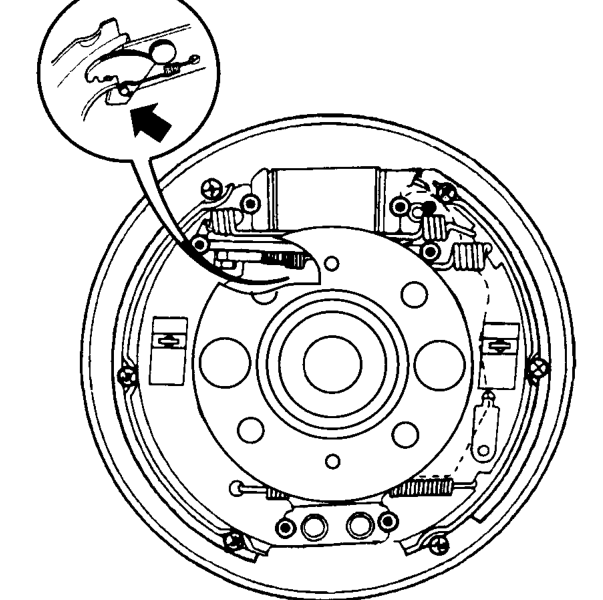
- Check adjuster cam and if necessary set to minimum adjustment position as follows: lever leading shoe away from wheel cylinder, move adjuster cam back fully and ease shoe back into position.
- Fit brake shoe retaining pins and clips.
- Fit rear brake drum. See BRAKES, Repairs.
- Bleed brakes. See BRAKES, Adjustments.
- Check handbrake operation, adjust if necessary. See BRAKES, Adjustments.
- Fit road wheel(s) and tighten nuts to correct torque. See INFORMATION, Torque wrench settings.
- Remove stand(s) and lower vehicle.
Models with ABS:
- To ensure correct operation, the system MUST be checked using TestBook.
Parts & tools for this job For 1995 Rover 200
- TOOLOBD2 scanner with ABSSearch: OBD2 scanner ABS SRS
- TOOLDigital multimeterSearch: automotive digital multimeter
Links open Amazon search results in a new tab. As an Amazon Associate I earn from qualifying purchases.