
Rear spring (page 2 of 2)
- Make
- Rover
- Model
- 200 Workshop Manual
- Year
- 1995–1999
- Section
- Repairs
Rear suspensionRear spring · page 2 of 2
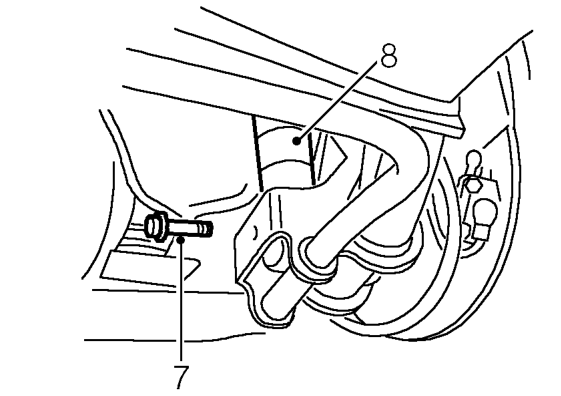
- Remove bolt securing damper to ’H’ frame.
- Release and remove spring and damper assembly.
Do not carry out further dismantling if component is removed for access only.
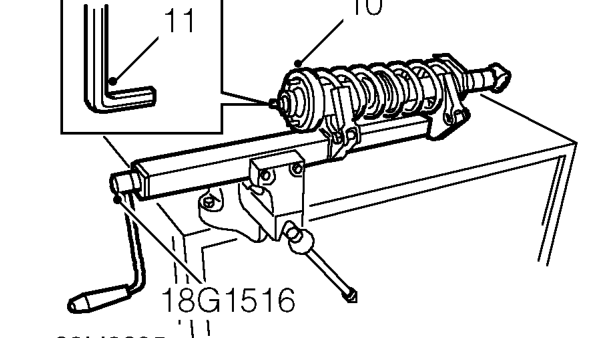
- Position spring compressor tool 18G 1516 in vice.
- Position spring and damper assembly to spring compressor with lower mounting and upper mounting studs vertical and spring stop to rear, as illustrated.
- Compress spring 2 - 3 cm, hold shaft with 5 mm Allen key and remove spring mounting plate nut. Discard nut.
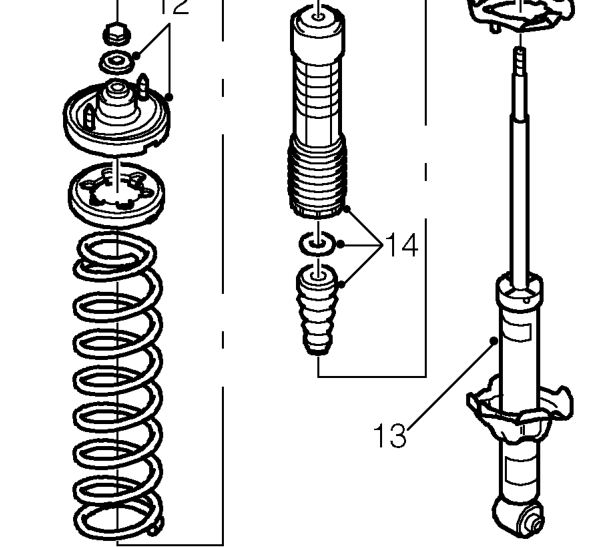
- Remove washer and mounting plate.
- Remove damper from spring.
- Remove bump stop plate, bump stop and dust cover.
- Inspect damper and spring mounting rubbers for deterioration and damage.
- Inspect dust cover for damage.
Parts & tools for this job For 1995 Rover 200
- TOOLCoil spring compressorSearch: coil spring compressor
- TOOLBall joint separatorSearch: ball joint separator
- PARTRear shock absorbersSearch: Rover 200 1995 rear shock absorbers
Links open Amazon search results in a new tab. As an Amazon Associate I earn from qualifying purchases.