
’A’ post finisher
- Make
- Rover
- Model
- 400 Workshop Manual
- Year
- 1995–2000
- Section
- Interior trim components › ’A’ post finisher
Body’A’ post finisher
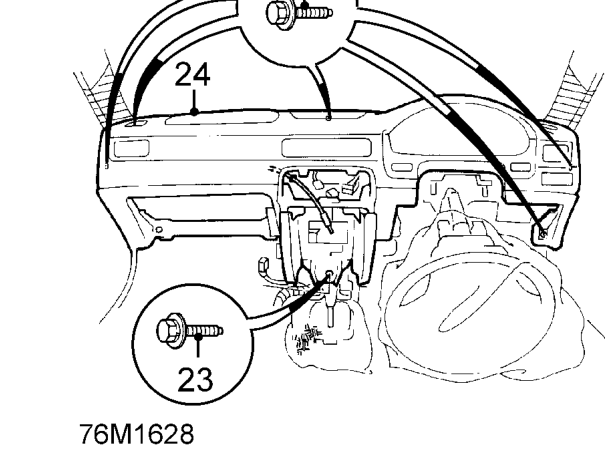
- Remove 6 bolts securing fascia to body.
CAUTION: Protect the gear lever surround from damage when removing fascia.
- With assistance, remove fascia assembly from vehicle.
Refit
- With assistance, position fascia to vehicle.
- Align fascia and tighten bolts to 9 Nm.
- Fit side access panels.
- Fit upper air vent.
- Connect fascia earth lead.
- Connect fascia harness multiplugs.
- Raise steering column and fit clamp.
- Tighten steering column clamp bolts to 22 Nm and column securing nuts to 16 Nm.
- Fit steering column lower cover.
- Connect multiplugs to alarm ECU and starter relay. Secure harness clips.
- Connect centre vent cable to heater.
- Position heater control panel, connect multiplugs and fit securing screws.
- Connect and adjust heater control cables, See HEATING & VENTILATION, Repairs.
- Position ash tray, connect multiplug and tighten securing screws.
- Fit passengers air bag. See RESTRAINT SYSTEMS, Repairs.
- Position fascia lower cover and tighten screws.
- Fit drivers pocket to lower cover.
- Fit front console. See this section.
- Connect battery leads.
’A’ POST FINISHER
Service repair no - 76.13.26
Remove
- Release door sealing rubber.
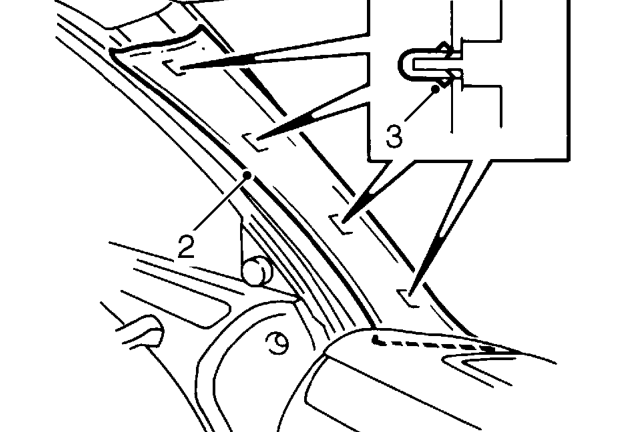
- Release trim finisher from ’A’ post.
- Remove securing clips from finisher.
Refit
- Fit securing clips to finisher.
- Position finisher to ’A’ post, locate clips and push into position.
- Fit door sealing rubber.
Parts & tools for this job For 1995 Rover 400
- TOOLTrim removal tool kitSearch: trim removal tool kit
- PARTTouch-up paintSearch: Rover touch up paint
- PARTPanel clip assortmentSearch: Rover panel clips assortment
Links open Amazon search results in a new tab. As an Amazon Associate I earn from qualifying purchases.