
Repair Techniques
- Make
- Rover
- Model
- 600 Rover 600 Repair Manual - Volumes 1 and 2 - 2nd Edition
- Section
- Information › Repair Techniques
Repair Techniques
Preparing the wire
Disconnect the battery.
Begin by cutting as little off the length of wire as possible. You may need the extra length of wire later if you decide to change the location of your repair. You may have to adjust the repair location to make certain that your repair is at least 40mm away from other repairs, connectors or splices.
Note: Strip 7mm of insulation from the wire. Check the stripped ends of the wire for nicks and cuts in the strands If the wire is damaged, repeat the procedure on a new section of wire. The two stripped wire ends should be equal in length.
When replacing a section of wire, use a wire that is the same gauge as the original or larger. If you are not sure of the wire gauge use a pair of wire strippers as a 'gauge by starting with the largest opening and working downwards until you get a completely clean strip of insulation.
Making the repair
Using "Duraseals" heatshrink connectors crimp each wire end into place. Using a hot air blower whilst slowly rotating the joint, ensure shrinking of the insulation is uniform and connector ends are sealed to the wires.
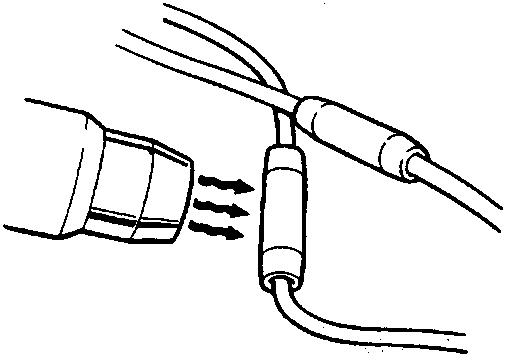
CAUTION: Extreme care must be taken when using a hot air blower. Deflect heat away from interior trim, carpets, etc. Do not touch the nozzle of the hot air blower or heatshrink connector until sufficiently cooled.
After allowing time for the repair to cool refit the wire into the harness. Re – tape the wiring harness ensuring the repair does not interfere with the fit of the harness or any components nearby.
Completing the repair
Reconnect the battery, check repaired circuit for correct operation ,and all related circuits. Always confirm that your diagnosis and repair is complete by verifying the complaint and symptom.
Parts & tools for this job For Rover 600
- TOOLDigital multimeterSearch: automotive digital multimeter
- PARTAssorted fuse kitSearch: car fuse assortment kit
- TOOLWire crimper and connector kitSearch: wire crimper connector kit
Links open Amazon search results in a new tab. As an Amazon Associate I earn from qualifying purchases.