
Remove
- Make
- Rover
- Model
- 600 Rover 600 Repair Manual - Volumes 1 and 2 - 2nd Edition
- Section
- Repairs › Remove
SuspensionRemove · page 1 of 2
Remove
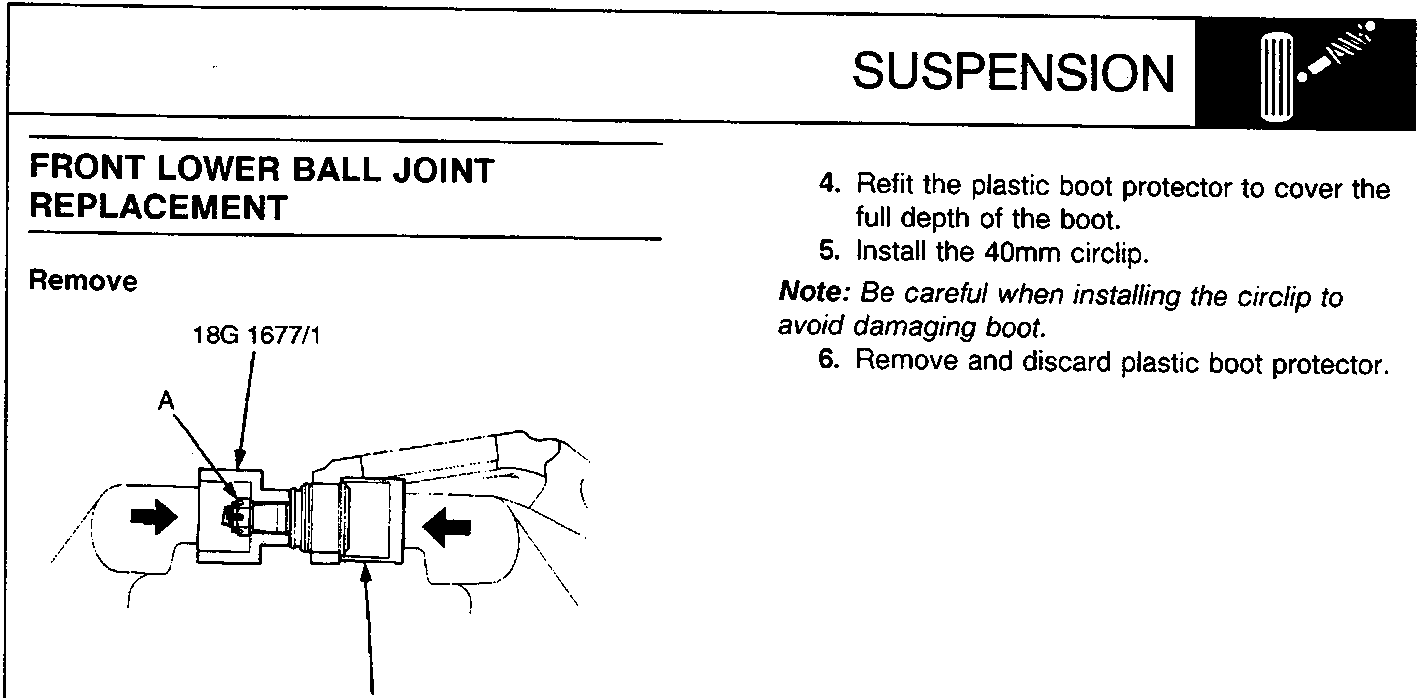
A Ball joint nut
- Remove the knuckle, then remove the hub unit from the knuckle.
- Remove the boot by prying the set ring off.
- Remove the 40mm circlip.
- Install the special tool on the ball joint and tighten the ball joint nut.
- Position the special tool over the ball joint, then set the assembly in a vice. Press the ball joint out of the knuckle.
- Refit the plastic boot protector to cover the full depth of the boot.
- Install the 40mm circlip.
Note: Be careful when installing the circlip to avoid damaging boot.
- Remove and discard plastic boot protector.
Refit
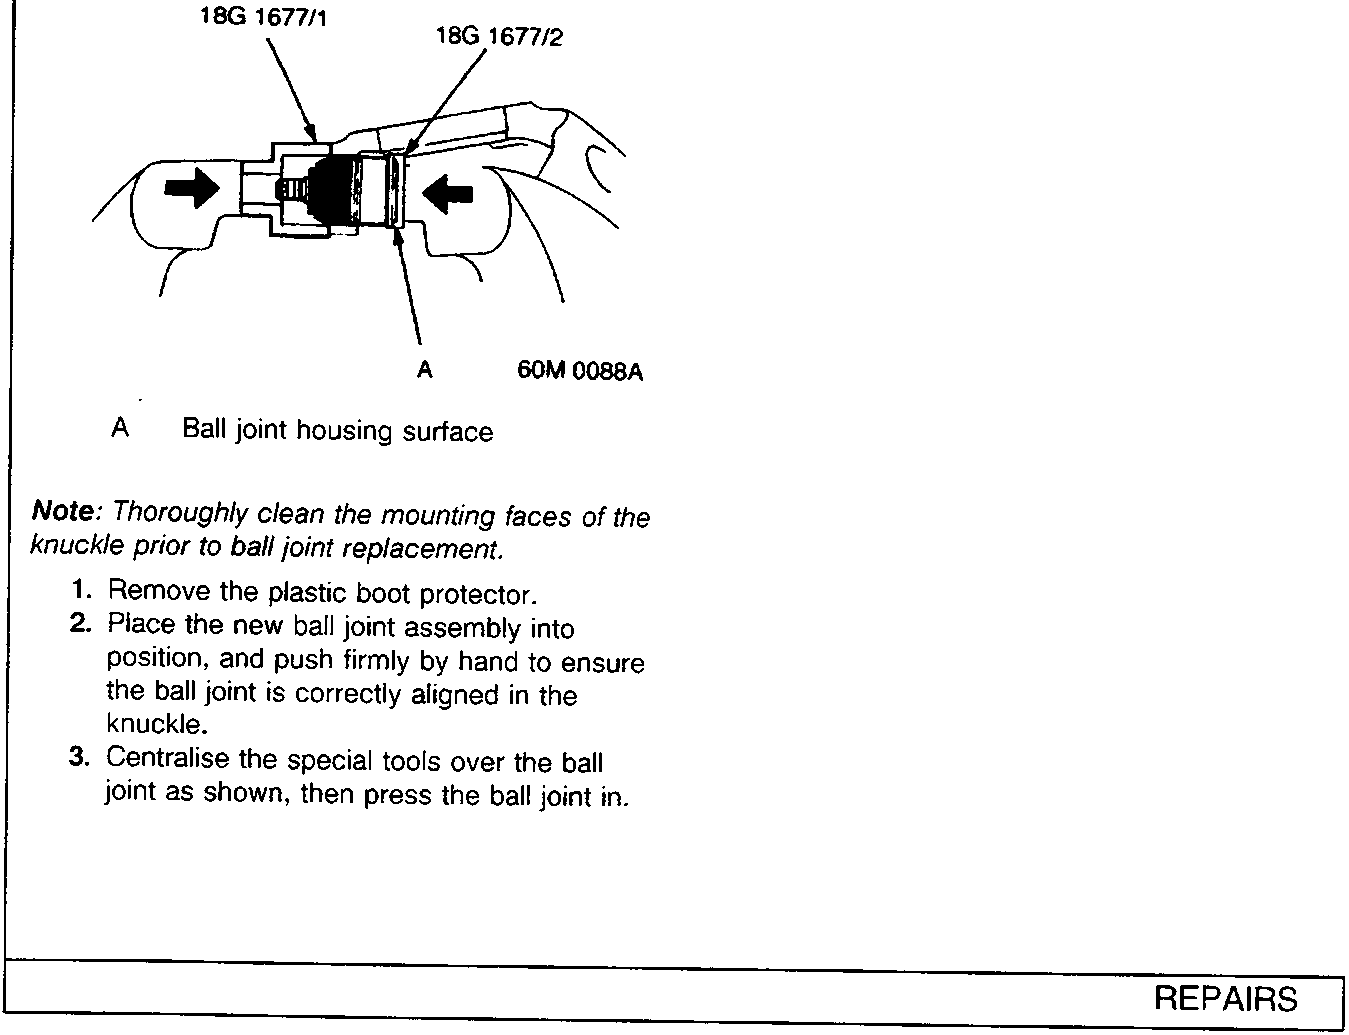
A Ball joint housing surface
Note: Thoroughly clean the mounting faces of the knuckle prior to ball joint replacement.
- Remove the plastic boot protector.
- Place the new ball joint assembly into position, and push firmly by hand to ensure the ball joint is correctly aligned in the knuckle.
- Centralise the special tools over the ball joint as shown, then press the ball joint in.
Parts & tools for this job For Rover 600
- TOOLCoil spring compressorSearch: coil spring compressor
- TOOLBall joint separatorSearch: ball joint separator
- PARTShock absorbersSearch: Rover 600 shock absorbers
Links open Amazon search results in a new tab. As an Amazon Associate I earn from qualifying purchases.