
Front lower arm bushing replacement
- Make
- Rover
- Model
- 600 Rover 600 Repair Manual - Volumes 1 and 2 - 2nd Edition
- Section
- Repairs › Front lower arm bushing replacement
SuspensionFront lower arm bushing replacement · page 1 of 8
FRONT LOWER ARM BUSHING REPLACEMENT
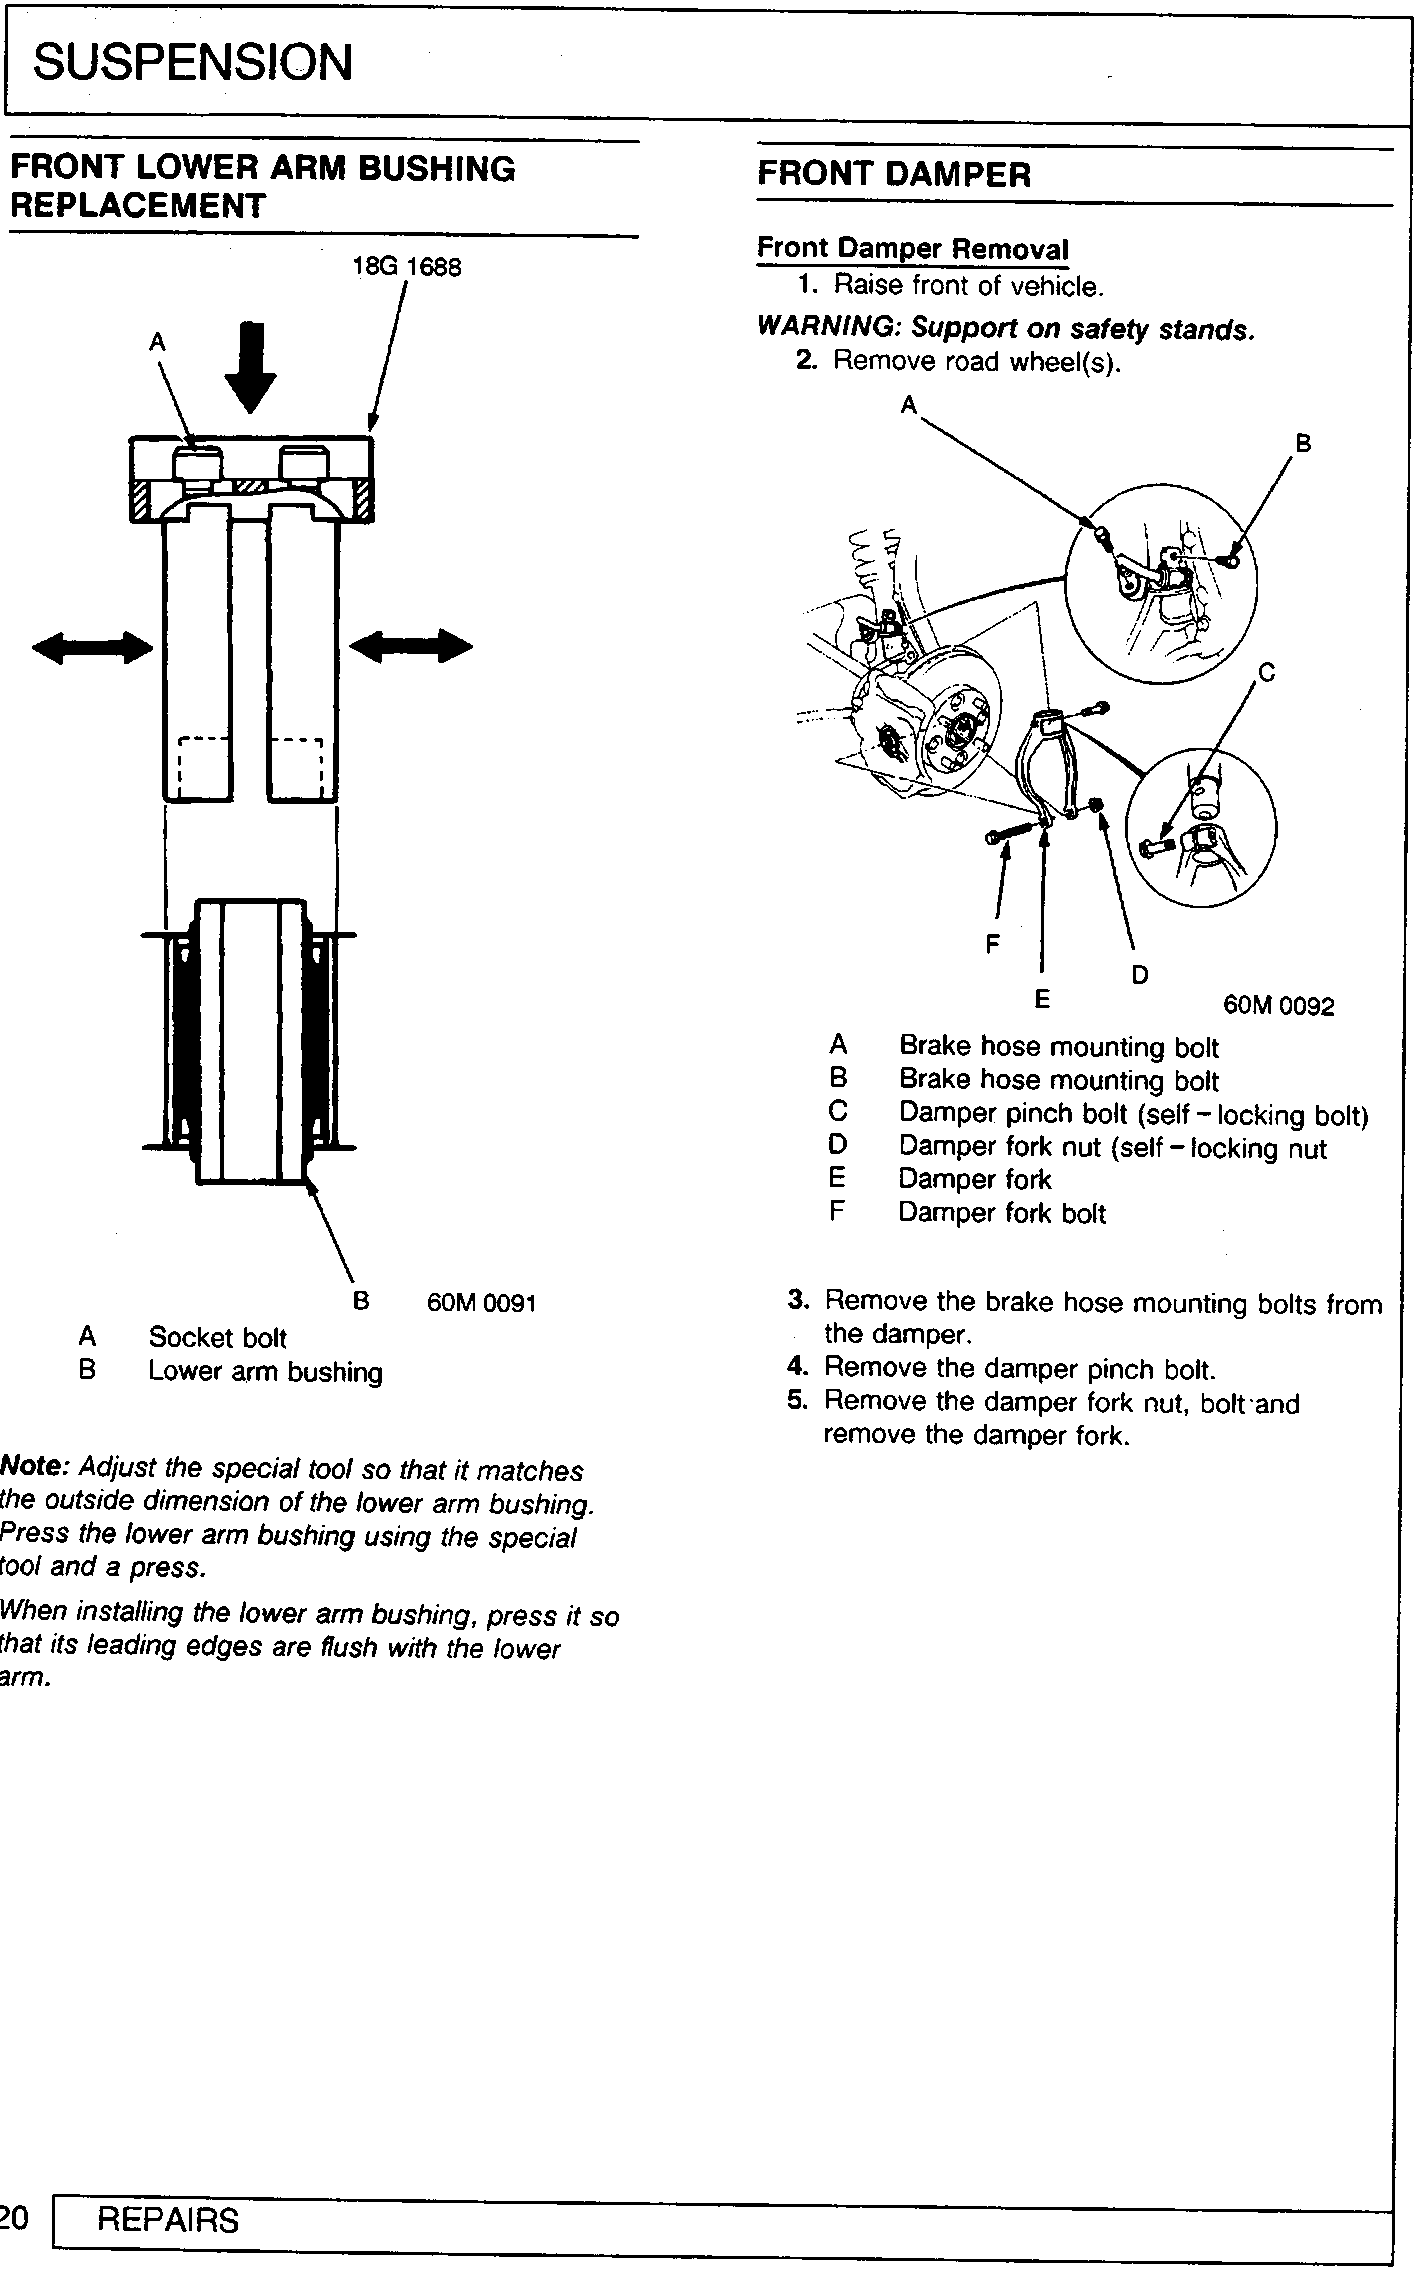
A Socket bolt
B Lower arm bushing
Note: Adjust the special tool so that it matches the outside dimension of the lower arm bushing. Press the lower arm bushing using the special tool and a press.
When installing the lower arm bushing, press it so that its leading edges are flush with the lower arm.
FRONT DAMPER
Front Damper Removal
- Raise front of vehicle.
WARNING: Support on safety stands.
- Remove road wheel(s).
| A | Brake hose mounting bolt |
| B | Brake hose mounting bolt |
| C | Damper pinch bolt (self – locking bolt) |
| D | Damper fork nut (self – locking nut |
| E | Damper fork |
| F | Damper fork bolt |
- Remove the brake hose mounting bolts from the damper.
- Remove the damper pinch bolt.
- Remove the damper fork nut, bolt and remove the damper fork.
Parts & tools for this job For Rover 600
- TOOLCoil spring compressorSearch: coil spring compressor
- TOOLBall joint separatorSearch: ball joint separator
- PARTFront shock absorbersSearch: Rover 600 front shock absorbers
Links open Amazon search results in a new tab. As an Amazon Associate I earn from qualifying purchases.