
Remove
- Make
- Rover
- Model
- Coupé, Cabriolet & Tourer 200/400 Coupé, Cabriolet & Tourer Workshop Manual
- Section
- Repairs › Remove
Air conditioningRemove
Service Repair No. 82.25.20
Remove
- Recover refrigerant from air conditioning system, see Adjustments.
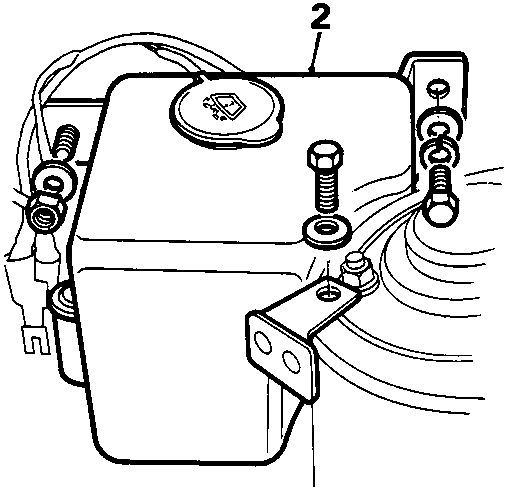
8RM 1629
- Release washer reservoir from bulkhead, see WIPERS & WASHERS – Repairs.
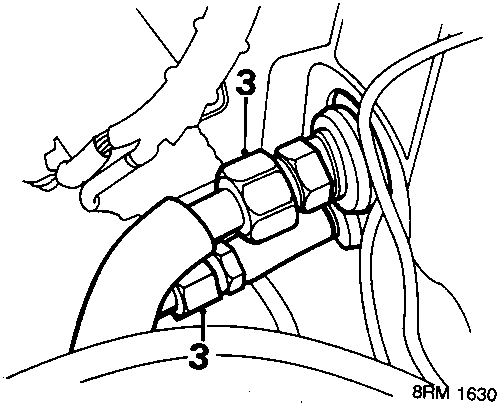
8RM 1630
- Disconnect pipe unions, cap unions.
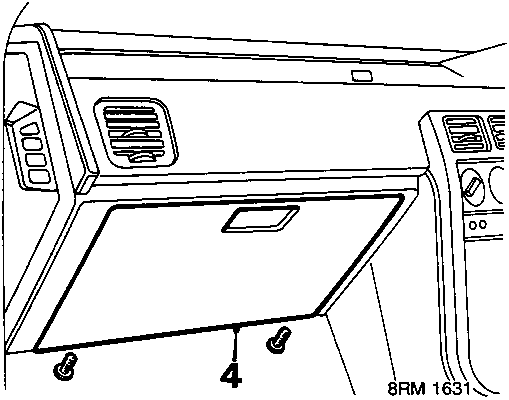
8RM 1631
- Remove glove box lid, see BODY – Repairs.
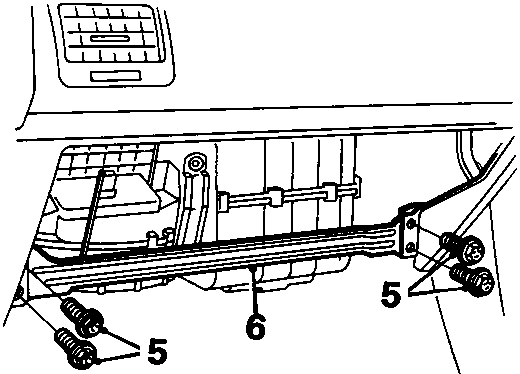
8RM 1632
- Remove 4 bolts securing glove box rail.
- Remove rail.
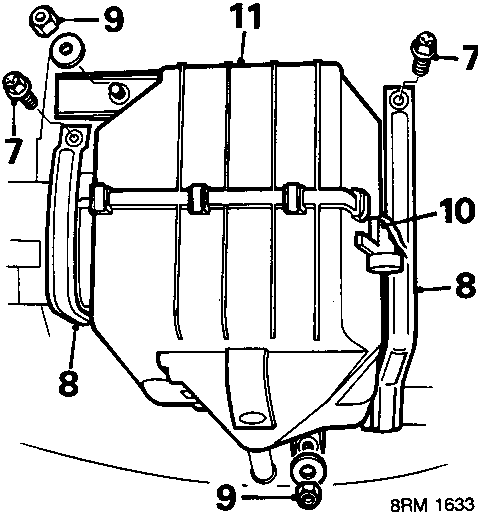
8RM 1633
- Remove 2 bolts securing brackets on evaporator.
- Remove 2 brackets.
- Remove 2 nuts securing evaporator.
- Disconnect multiplug.
- Remove evaporator.
Refit
- Position evaporator assembly.
- Locate pipes through body grommet.
- Locate evaporator onto fixing studs.
- Fit and tighten 2 nuts.
- Connect multiplug.
- Position brackets.
- Fit and tighten 2 bolts securing brackets to evaporator.
- Position glove box rail.
- Fit and tighten 4 bolts.
- Fit glove box lid, see BODY – Repairs.
- Remove sealing caps from unions.
- Remove sealing rings from unions.
- Lubricate new 'O' rings with refrigerant oil.
- Fit 'O' rings to unions.
- Connect and tighten unions to:
inlet union from receiver drier 17 Nm
outlet union 33 Nm. - Fit washer reservoir to bulkhead, see WIPERS & WASHERS – Repairs.
- Recharge with refrigerant, see Adjustments.
Parts & tools for this job For Rover Coupé, Cabriolet & Tourer
- TOOLA/C manifold gauge setSearch: AC manifold gauge set
- TOOLUV leak detection kitSearch: AC UV leak detection kit
- PARTCabin filterSearch: Rover Coupé, Cabriolet & Tourer cabin filter
Links open Amazon search results in a new tab. As an Amazon Associate I earn from qualifying purchases.