
Regulator - rear screen
- Make
- Land Rover
- Model
- Freelander Workshop Manual
- Year
- 1998–2000
- Section
- Doors › Regulator - rear screen
BodyRegulator - rear screen
REGULATOR - REAR SCREEN
Service repair no - 76.31.65
Remove
- Remove rear screen. See this section.
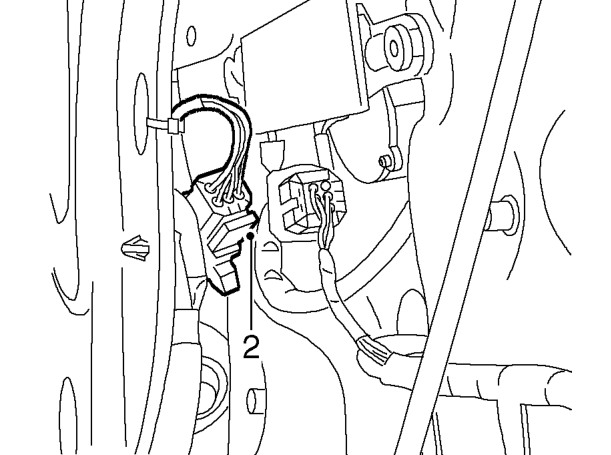
- Disconnect multiplug from regulator motor.
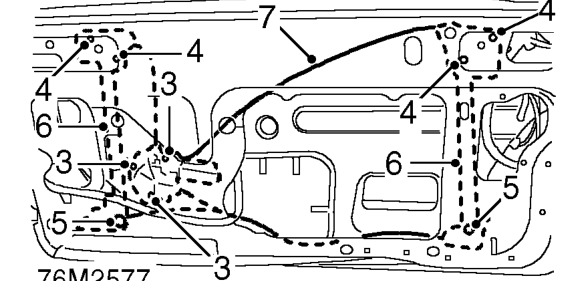
- Slacken 3 nuts securing regulator motor and rotate motor to release from door.
- Slacken 4 nuts securing top of cable guides and release guides from door.
- Remove 2 nuts securing pre-load adjusters and rotate adjusters fully clockwise to improve access.
- Release regulator from door and detach electrical harness from LH glass clamp.
- Remove regulator from door.
Refit
- Position regulator to door and unclip motor transit package from rail.
- Connect multiplug to regulator motor.
- Connect harness clip and align regulator to door.
- Fit nuts to pre-load adjusters, but do not tighten at this stage.
- Position tops of cable guides to door, leaving fixings finger tight.
- Tighten regulator motor fixings.
- Fit rear screen and secure centrally within clamps, but do not adjust fully at this stage. See this section.
- Fully lower glass and tighten top cable guide fixings to 8 Nm.
NOTE: Ensure that glass is raised and lowered at least twice before making final adjustments. Failure to do so could prevent smooth operation of the glass mechanism.
- Complete the glass fitting and adjustment procedure. See this section.
Parts & tools for this job For 1998 Land Rover Freelander
- TOOLTrim removal tool kitSearch: trim removal tool kit
- PARTTouch-up paintSearch: Land Rover touch up paint
- PARTPanel clip assortmentSearch: Land Rover panel clips assortment
Links open Amazon search results in a new tab. As an Amazon Associate I earn from qualifying purchases.