
Gearbox assembly (page 2 of 7)
- Make
- Rover
- Model
- 100 Repair Manual Supplement
- Year
- 1996–1998
- Section
- Repairs
Automatic gearboxGearbox assembly · page 2 of 7
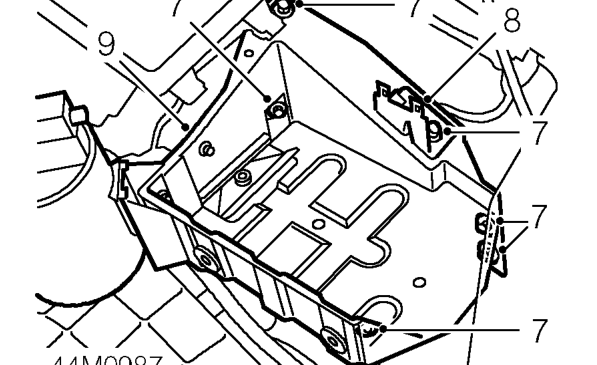
- Remove 5 bolts and 1 Torx screw securing battery tray.
- Collect fuse box bracket.
- Remove battery tray and charcoal canister assembly.
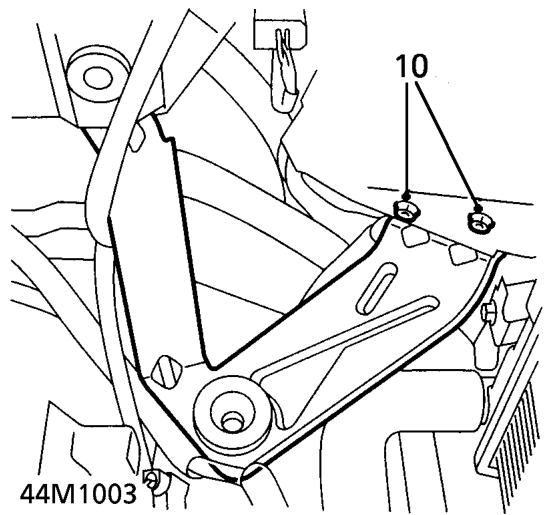
- Remove 2 nuts securing air cleaner support bracket and remove bracket.
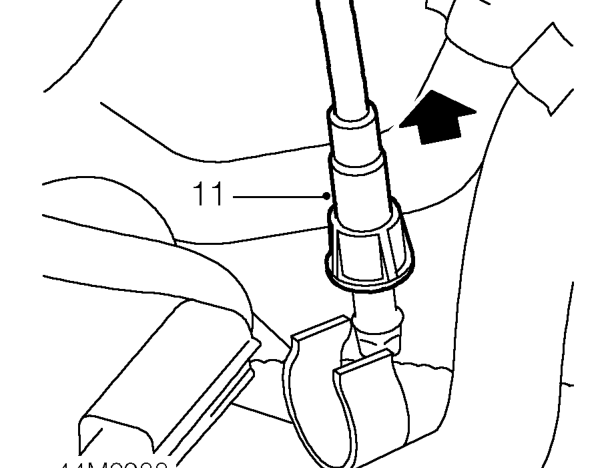
- Release clip securing speedo cable joint and separate upper from lower cable.
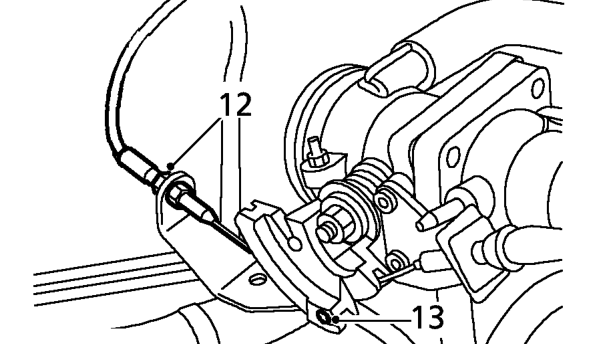
- Loosen kickdown cable locknut and adjusting nut.
- Release kickdown inner cable from throttle cam.
- Release cable from abutment bracket.
- Drain cooling system. See REPAIR MANUAL - Maintenance.
Parts & tools for this job For 1996 Rover 100
- PARTTransmission filter kitSearch: Rover 100 1996 transmission filter kit
- FLUIDAutomatic transmission fluidSearch: Rover automatic transmission fluid
- TOOLFluid transfer pumpSearch: fluid transfer pump
Links open Amazon search results in a new tab. As an Amazon Associate I earn from qualifying purchases.