
Gearbox assembly (page 6 of 7)
- Make
- Rover
- Model
- 100 Repair Manual Supplement
- Year
- 1996–1998
- Section
- Repairs
Automatic gearboxGearbox assembly · page 6 of 7
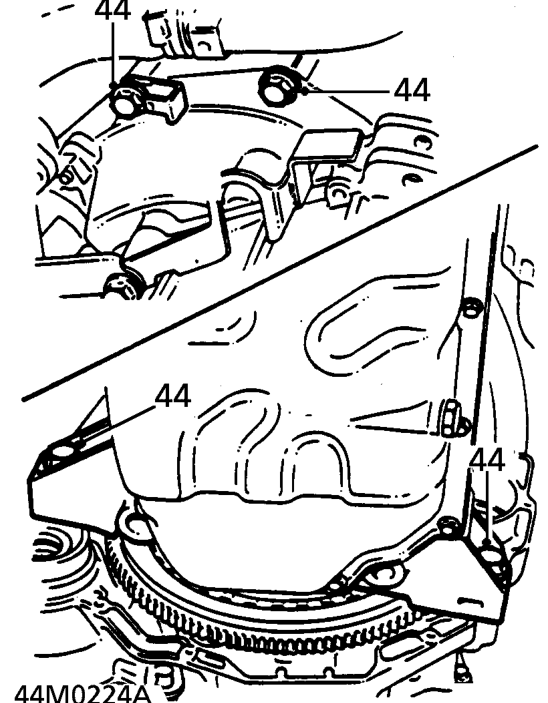
- Remove 4 bolts securing gearbox to engine.
- Release gearbox from engine, raise and manoeuvre gearbox clear of engine compartment.
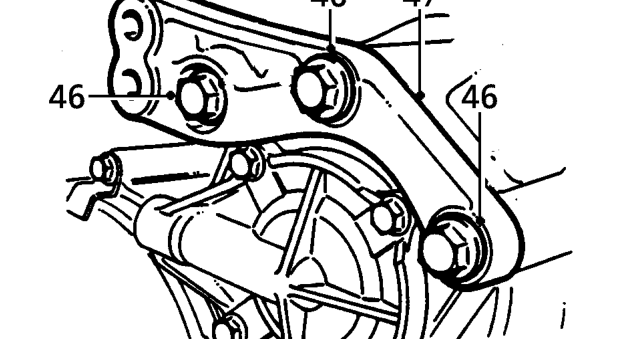
- Remove 3 bolts securing mounting bracket to gearbox.
- Remove mounting bracket.
Refit
- Position mounting bracket to gearbox,fit bolts and tighten to 45 Nm.
- Clean engine and gearbox mating faces.
- Wipe dowels and dowel holes
- Connect lifting equipment to gearbox.
- Lower gearbox into engine compartment and manoeuvure onto dowels.
CAUTION: Ensure gearbox input shaft is correctly engaged in drive plate.
- Fit bolts securing gearbox and tighten to 85 Nm.
- Position support member to subframe, fit bolts and tighten to 45 Nm.
- Adjust height of power unit to align mounting bracket to LH engine mounting, fit bolts and tighten to 45 Nm.
- Remove lifting equipment.
- Fit both drive shaft and hub assemblies. See REPAIR MANUAL - Automatic Gearbox - Differential Oil Seal.
- Position flywheel rear cover plate, fit bolts and tighten to 8 Nm.
- Position flywheel front cover plate, fit bolts and tighten to 8 Nm.
- Position flywheel lower cover plate, fit bolts and tighten to 8 Nm.
- Remove plugs from fluid cooler hose connections and from adaptors on gearbox.
- Clean unions, lubricate NEW ’O’ rings with clean gearbox fluid and fit to unions.
- Connect hoses to gearbox adaptors and tighten unions to 37 Nm.
- Position steady bar bracket to gearbox, fit bolts and tighten to 85 Nm.
- Align steady bar bracket to body, fit bolt and tighten to 45 Nm.
- Connect selector cable rod to selector lever.
- Adjust selector cable. See REPAIR MANUAL - Automatic Gearbox.
- Connect inhibitor switch multiplug.
- Secure inhibitor switch harness to clip on gearbox
Parts & tools for this job For 1996 Rover 100
- PARTTransmission filter kitSearch: Rover 100 1996 transmission filter kit
- FLUIDAutomatic transmission fluidSearch: Rover automatic transmission fluid
- TOOLFluid transfer pumpSearch: fluid transfer pump
Links open Amazon search results in a new tab. As an Amazon Associate I earn from qualifying purchases.