
Engine LH mounting
- Make
- Rover
- Model
- 200 Workshop Manual
- Year
- 1995–1999
- Section
- Repairs › Engine LH mounting
Engine - K8Engine LH mounting
ENGINE LH MOUNTING
Service repair no - 12.45.30
Remove
- Raise front of vehicle.
WARNING: Support on safety stands.
- Fit block to jack and position jack to support engine.
- Remove air cleaner. See ENGINE MANAGEMENT SYSTEM - MEMS, Repairs.
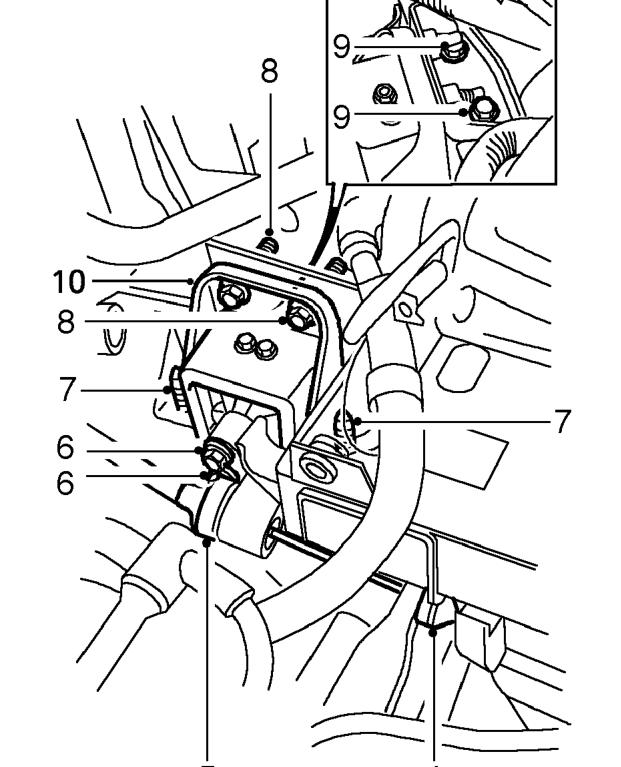
- Disconnect clutch cable from clutch release lever.
- Release clutch cable from abutment bracket on gearbox and position aside.
- Remove 2 bolts securing engine mounting to gearbox mounting bracket.
- Remove 2 bolts securing engine mounting to body.
- Remove 2 bolts securing engine mounting to mounting bracket
- Loosen 2 bolts securing engine mounting bracket to body.
- Carefully lower engine and remove engine mounting.
Refit
- Position engine mounting and raise engine and gearbox assembly.
- Fit bolts securing engine mounting to body and tighten to 55 Nm.
- Fit bolts securing engine mounting to bracket on body and tighten to 55 Nm.
- Align gearbox mounting bracket to engine mounting, fit bolts and tighten to 60 Nm.
- Tighten bolts securing bracket to body, to 55 Nm.
- Lower jack supporting engine, and remove from beneath vehicle.
- Feed clutch cable through abutment bracket and connect to clutch release lever.
- Fit air cleaner. See ENGINE MANAGEMENT SYSTEM - MEMS, Repairs.
- Fit road wheel(s) and tighten nuts to correct torque. See INFORMATION, Torque wrench settings.
- Remove stand(s) and lower vehicle.
Parts & tools for this job For 1995 Rover 200
- PARTEngine gasket setSearch: Rover 200 1995 engine gasket set
- TOOLTorque wrenchSearch: 3/8 inch torque wrench
- TOOLFeeler gauge setSearch: feeler gauge set
Links open Amazon search results in a new tab. As an Amazon Associate I earn from qualifying purchases.