
Cylinder head gasket
- Make
- Rover
- Model
- 200 Workshop Manual
- Year
- 1995–1999
- Section
- Repairs › Cylinder head gasket
Engine - K8Cylinder head gasket · page 1 of 5
CYLINDER HEAD GASKET
Service repair no - 12.29.02
Remove
- Disconnect battery earth lead.
- Drain cooling system. See COOLING SYSTEM - ’K’ SERIES, Repairs.
- Remove air cleaner. See ENGINE MANAGEMENT SYSTEM - MEMS, Repairs.
- Remove exhaust manifold. See MANIFOLD & EXHAUST SYSTEMS, Repairs.
- Remove and discard camshaft timing belt. See this section.
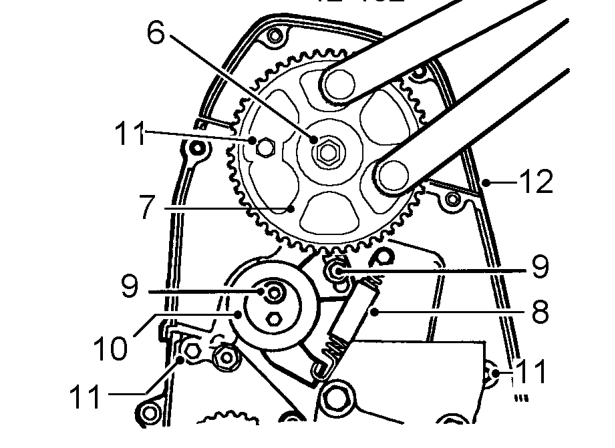
- Restrain camshaft gear using tool 12-182 and remove bolt and washer securing camshaft gear to camshaft.
- Remove camshaft gear.
- Remove camshaft timing belt tensioner spring.
- Remove timing belt tensioner centre Allen bolt and backplate screw.
- Remove camshaft timing belt tensioner.
- Remove 3 bolts securing camshaft timing belt rear cover.
- Remove camshaft timing belt rear cover.
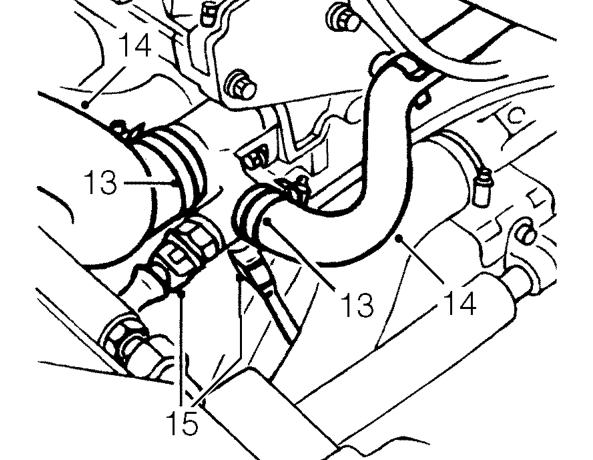
- Remove clips securing coolant hoses to coolant outlet elbow.
- Release coolant pipes from outlet elbow.
- Disconnect multiplugs from coolant sensors on outlet elbow.
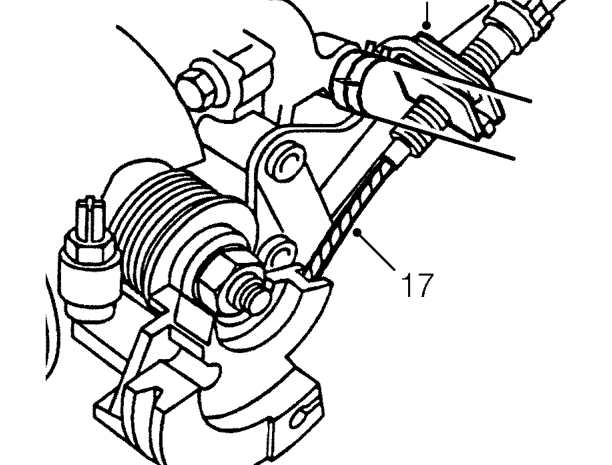
- Release throttle cable adjustment nut from abutment bracket.
- Release throttle cable from throttle cam.
Parts & tools for this job For 1995 Rover 200
- PARTEngine gasket setSearch: Rover 200 1995 engine gasket set
- TOOLTorque wrenchSearch: 3/8 inch torque wrench
- TOOLFeeler gauge setSearch: feeler gauge set
Links open Amazon search results in a new tab. As an Amazon Associate I earn from qualifying purchases.