
Compressor - ’t’ series
- Make
- Rover
- Model
- 400 Workshop Manual
- Year
- 1995–2000
- Section
- Repairs › Compressor - ’t’ series
Air conditioningCompressor - ’t’ series
COMPRESSOR - ’T’ SERIES
Service repair no - 82.10.20
Remove
- Recover refrigerant from air conditioning system. See Adjustments.
- Raise front of vehicle.
WARNING: Support on safety stands.
- Drain cooling system. See COOLING SYSTEM, Adjustments.
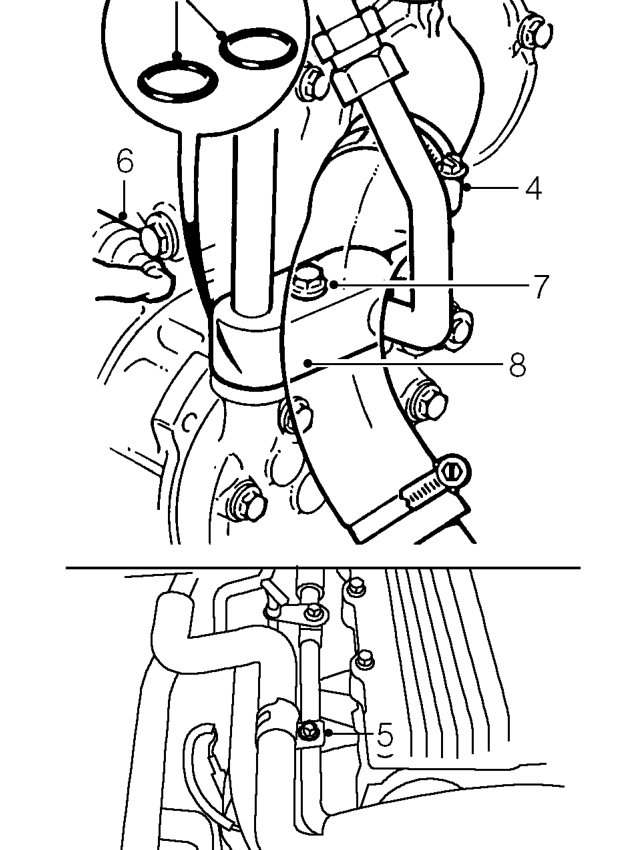
- Slacken clip and disconnect coolant hose from water pump.
CAUTION: Plug coolant hose and water pump.
- Remove bolt securing air conditioning pipe clip to coolant rail.
- Disconnect multiplug from air conditioning compressor.
- Remove bolt securing air conditioning pipes to compressor.
- Release air conditioning pipes from compressor.
- Remove and discard 2 ’O’ rings from compressor.
CAUTION: Immediately cap all air conditioning pipes to prevent ingress of dirt and moisture into the system.
- Remove drive belt tensioner. See ELECTRICAL, Repairs.
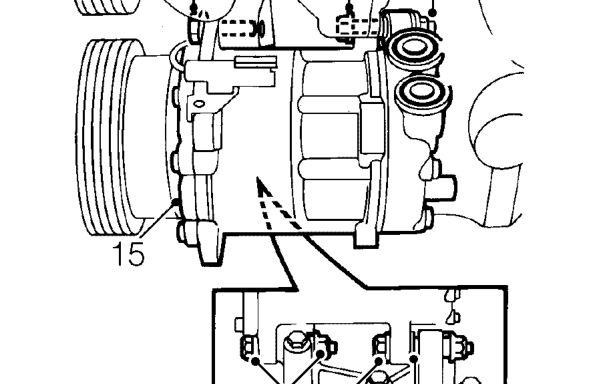
- Remove 2 lower through bolts and nuts securing compressor to engine.
- Collect flat washer.
- Remove upper bolt securing compressor
- Remove nut from second upper fixing and push bolt through mounting bracket.
- Remove compressor from mounting
- Remove bolt and flat washer.
Parts & tools for this job For 1995 Rover 400
- TOOLA/C manifold gauge setSearch: AC manifold gauge set
- TOOLUV leak detection kitSearch: AC UV leak detection kit
- PARTCabin filterSearch: Rover 400 1995 cabin filter
Links open Amazon search results in a new tab. As an Amazon Associate I earn from qualifying purchases.