
Trinary pressure switch (page 3 of 3)
- Make
- Rover
- Model
- 400 Workshop Manual
- Year
- 1995–2000
- Section
- Repairs
Air conditioningTrinary pressure switch · page 3 of 3
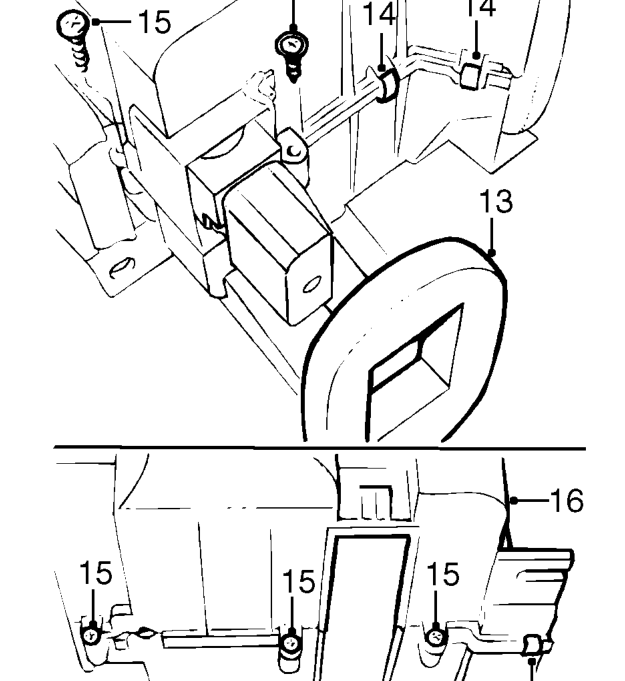
- Remove seal from expansion valve, lid from casing and air filter from casing.
- Remove 3 clips securing casing.
- Remove 5 screws securing casing, note position of longer 18 mm screw.
- Remove upper casing from evaporator.
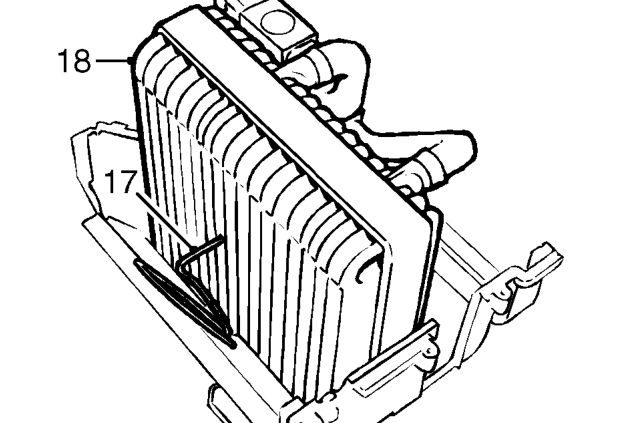
- Withdraw temperature sensor probe from evaporator.
- Remove evaporator assembly from lower casing.
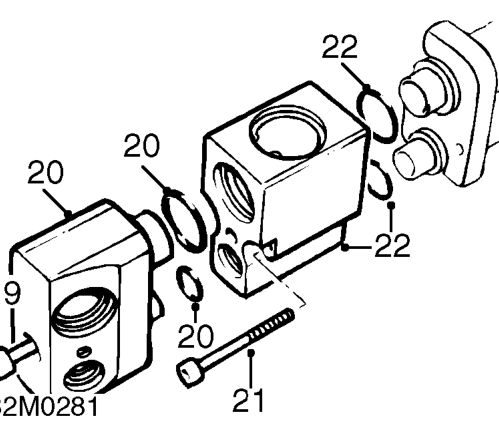
- Remove Allen screw securing adaptor to expansion valve.
- Remove adaptor from expansion valve and discard 2 ’O’ rings.
- Remove 2 Allen screws securing expansion valve to evaporator.
- Remove expansion valve from evaporator and discard 2 ’O’ rings.
Parts & tools for this job For 1995 Rover 400
- TOOLOBD2 scannerSearch: OBD2 scanner
- TOOLDigital multimeterSearch: automotive digital multimeter
- TOOLBack-probe test leadsSearch: back probe test leads
Links open Amazon search results in a new tab. As an Amazon Associate I earn from qualifying purchases.