
Front door trim casing
- Make
- Rover
- Model
- 400 Workshop Manual
- Year
- 1995–2000
- Section
- Doors › Front door trim casing
BodyFront door trim casing · page 1 of 2
FRONT DOOR TRIM CASING
Service repair no - 76.34.01.99 Service repair no - 76.34.01
Remove
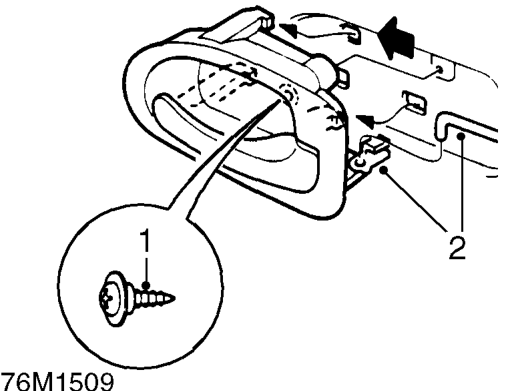
- Remove screw and slide lock remote release assembly forward to release from door panel.
- Release plastic clip and remove release assembly from control rod.
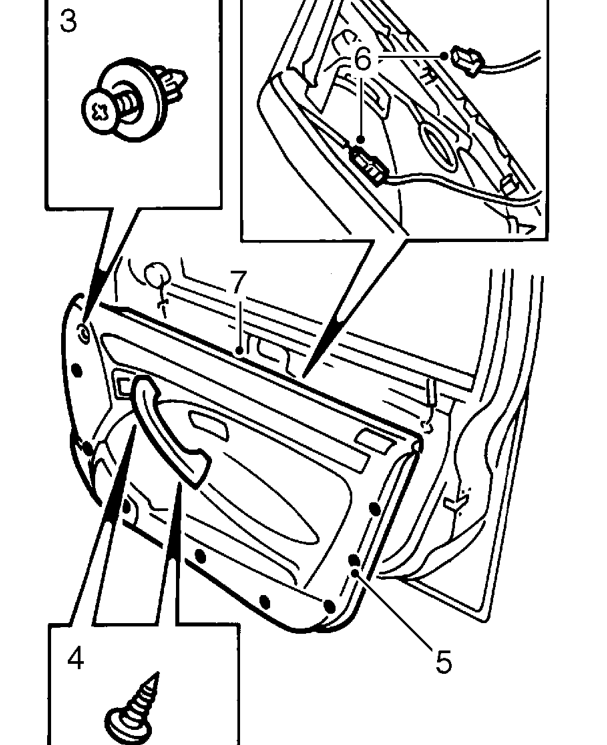
- Remove scrivet screw and scrivet securing casing to door.
- Remove 2 screws securing grab handle.
- Release 8 studs and remove trim casing from top edge of door.
- Disconnect window lift and lock indicator light multiplugs.
- Remove trim casing.
Parts & tools for this job For 1995 Rover 400
- TOOLTrim removal tool kitSearch: trim removal tool kit
- PARTTouch-up paintSearch: Rover touch up paint
- PARTPanel clip assortmentSearch: Rover panel clips assortment
Links open Amazon search results in a new tab. As an Amazon Associate I earn from qualifying purchases.