
Components (page 3 of 3)
- Make
- Rover
- Model
- 600 Rover 600 Repair Manual - Volumes 1 and 2 - 2nd Edition
- Section
- Repairs
SuspensionComponents · page 3 of 3
- Install a 10mm hex nut on the ball joint. Be sure that the hex nut is flush with the ball joint pin end to prevent damage to the threaded end of the ball joint.
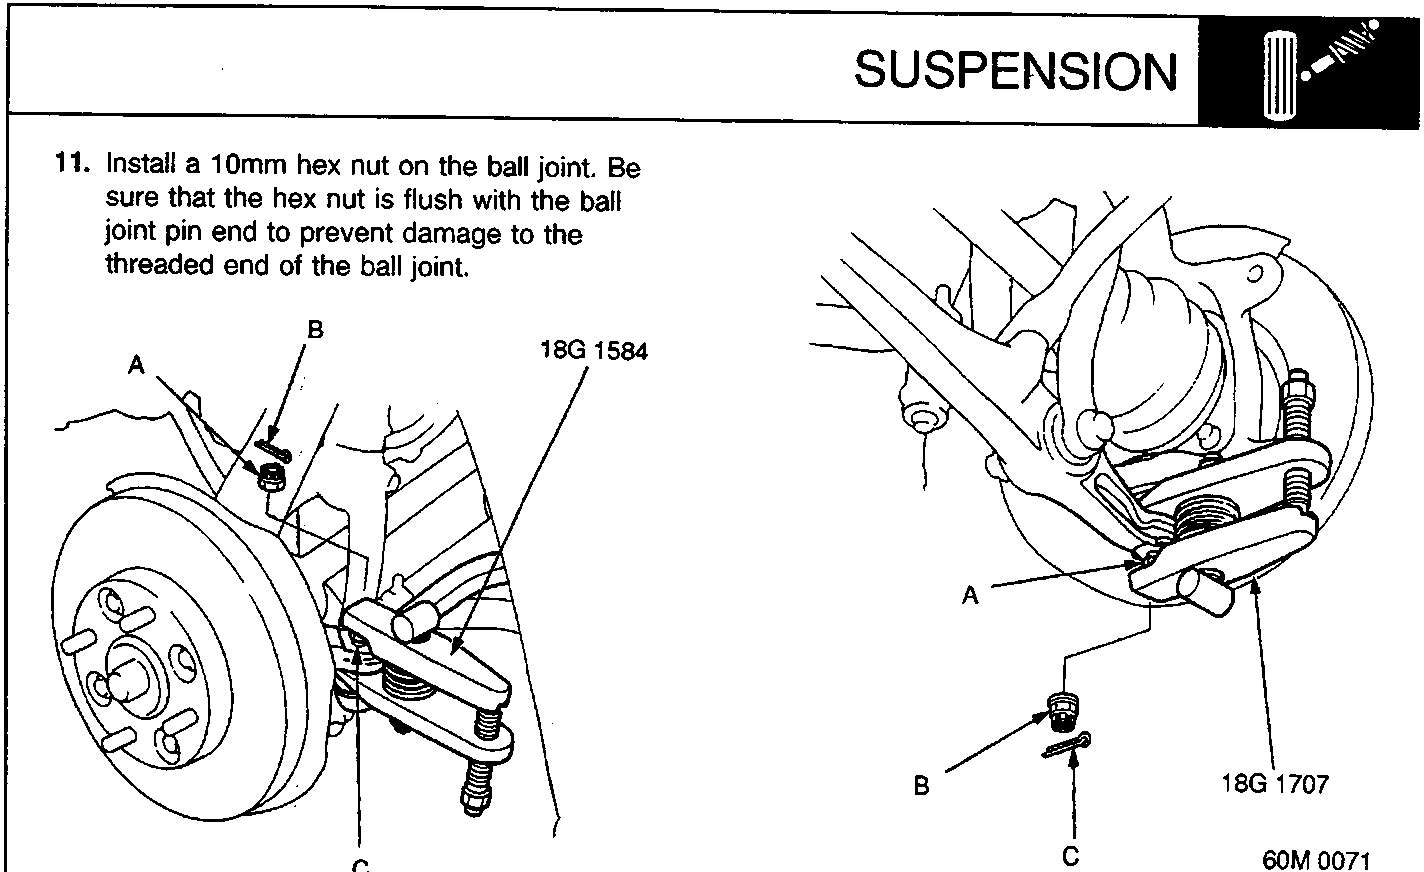
| A | Castle nut | A | 12 mm Hex nut |
| B | Cotter pin | B | Castle nut |
| C | 10 mm Hex nut | C | Cotter pin |
- Use special tool as shown.
CAUTION: Insert the jaws carefully, making sure you do not damage the ball joint boot.
Note: If necessary, apply penetrating type lubricant to loosen the ball joint.
- With a wrench, tighten the pressure bolt until the ball joint shaft is released from the steering arm.
- Remove the tool, then remove the nut from the end of the ball joint and pull the ball joint out of the steering/suspension arm. Inspect the ball joint boot and replace it if damaged.
- Remove the cotter pin and castle nut.
- Install a 12mm hex nut on the ball joint. Be sure that the hex nut is flush with the ball joint pin end, or the threaded section of the ball joint pin might be damaged by the ball joint remover.
- Use special tool as shown on steps 12 and 13 to separate the lower ball joint and lower arm.
CAUTION: Insert the jaws carefully, making sure you do not damage the ball joint boot.
Note: If necessary, apply penetrating type lubricant to loosen the ball joint.
Parts & tools for this job For Rover 600
- TOOLCoil spring compressorSearch: coil spring compressor
- TOOLBall joint separatorSearch: ball joint separator
- PARTShock absorbersSearch: Rover 600 shock absorbers
Links open Amazon search results in a new tab. As an Amazon Associate I earn from qualifying purchases.