
Evaporator
- Make
- Land Rover
- Model
- Defender 90 Workshop Manual (NAS)
- Section
- Repair › Evaporator
‹ Prev Expansion valve blower motor assemblyNext › See Adjustment, refrigerant recovery recycling recharging
Air conditioningEvaporator
Refit
- Clean sealant from blower flanges.
- Apply a bead of Silicone Sealant around each blower flange.
- Connect Lucars to resistor unit in correct order.
- Position blower flanges on evaporator casing and secure with screws.
- Connect Lucars (B and O wires) to blower motor.
- Fit evaporator. See evaporator
- Carry out system test. See Adjustment, System test
EVAPORATOR
Service repair no - 82.25.20
Remove
- Disconnect battery negative lead.
- Recovery refrigerant from air conditioning system. See Adjustment, Refrigerant recovery recycling recharging
- Remove fascia duct bezel. See fascia duct bezel
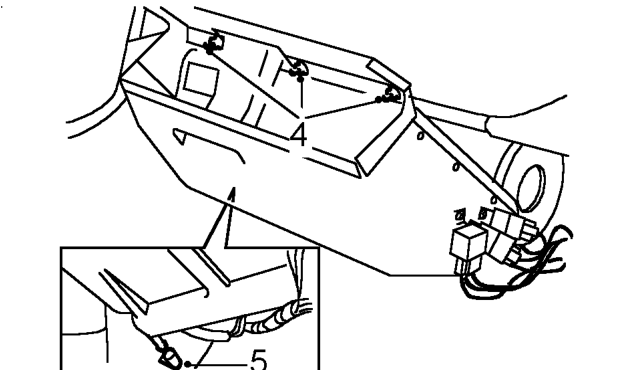
- Remove screw securing harness ’P’ clip to rear
- Remove 3 nuts securing evaporator casing to mounting bracket. 11. Disconnect Lucar (B wire) from motor.
- Disconnect drain tube from drain pipe on LH side 12. Disconnect Lucars (G, U, and R wires) from of casing.
- Position 2 heater hoses to side of air intake tube.
- WARNING: Wear eye and hand protection
- when disconnecting components
- containing refrigerant.
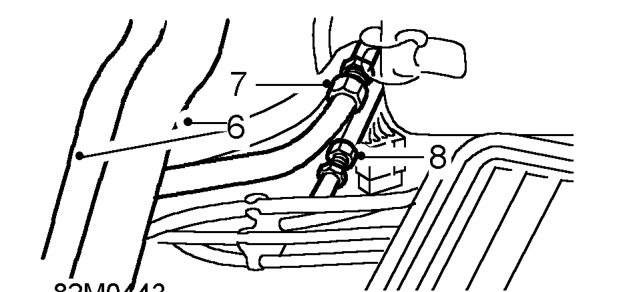
- Using a backing spanner, loosen union nut from evaporator return pipe and disconnect. Discard ’O’ ring.
- Using a backing spanner, loosen union nut from evaporator feed pipe and disconnect. Discard ’O’ ring.
CAUTION: Plug the connections.
- Ease 2 evaporator studs from their rubber bushes, release grommet from bulkhead, withdraw pipes from aperture and position evaporator unit on floor.
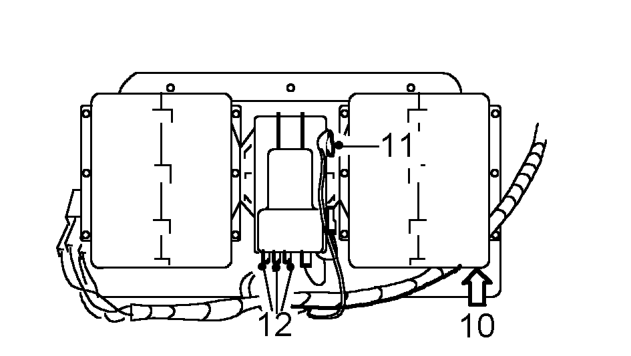
of casing.
resistor unit.
‹ Prev Expansion valve blower motor assemblyNext › See Adjustment, refrigerant recovery recycling recharging
Parts & tools for this job For Land Rover Defender
- TOOLA/C manifold gauge setSearch: AC manifold gauge set
- TOOLUV leak detection kitSearch: AC UV leak detection kit
- PARTCabin filterSearch: Land Rover Defender cabin filter
Links open Amazon search results in a new tab. As an Amazon Associate I earn from qualifying purchases.