
See Adjustment, refrigerant recovery recycling recharging
- Make
- Land Rover
- Model
- Defender 90 Workshop Manual (NAS)
- Section
- Repair › See Adjustment, refrigerant recovery recycling recharging
Air conditioningSee Adjustment, refrigerant recovery recycling recharging
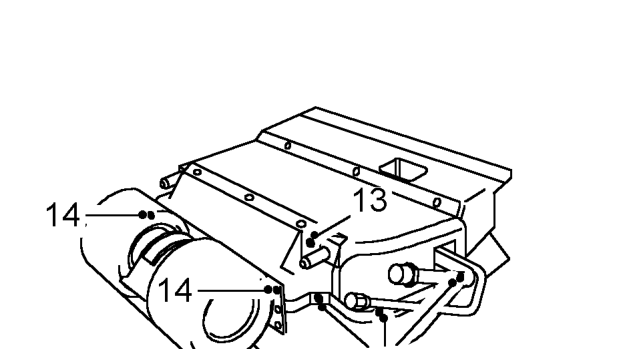
- Using a backing spanner, loosen union nut and
Refit
- Lubricate NEW ’O’ rings with refrigerant oil and
- Fit expansion valve to pipe, DO NOT tighten
- Connect capillary tube and tighten union nut.
- Position capillary tube coil on low pressure pipe
- Remove screw securing mounting bracket flange
- Wrap capillary coil and union with prestite tape.
to casing.
- Connect high pressure pipe to expansion valve,
- Remove screws securing each end of blower flanges to upper casing.
- Remove 6 screws securing upper to lower
- Tighten expansion valve union nut.
casing.
- Position evaporator unit in lower casing, align
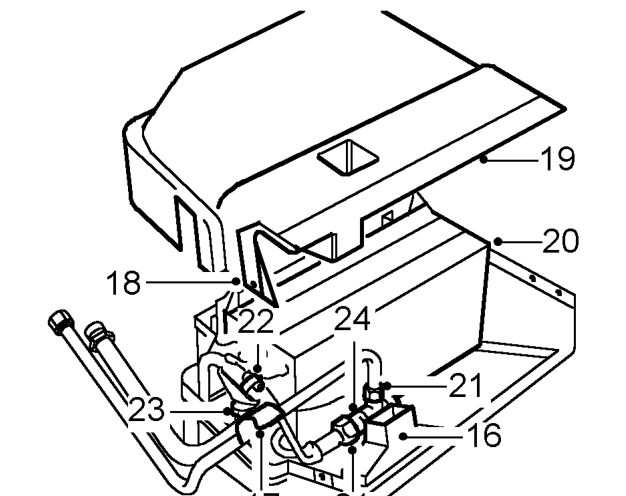
- Position upper casing, engage lower casing
- Tighten blower flange screws.
- Apply Silicone sealant to casing joint and
- Apply sealing tape around air duct joint.
- Position evaporator unit in footwell.
- Connect multiplugs to compressor relays and
- Connect Lucars (G, U, and R) to resistor unit
- Lift evaporator, insert pipes into aperture and
- Connect drain tube to pipe.
- Fit grommet into aperture.
- Remove tape sealing air duct inside casing. 43. Lubricate NEW ’O’ rings with refrigerant oil and
- Release tape sealing pipes to casing.
- Cut through sealant along casing joint and 44. Carry out a functional check. joints. gaskets. 45. Using a backing spanner, engage high pressure
- Ease upper from lower casing and remove upper casing. 46. Using a backing spanner, engage low pressure
- Lift evaporator unit from lower casing. Do not carry out further dismantling if component is 47. Fit nuts and secure evaporator casing to removed for access only.
- Using a backing spanner, loosen union nut from 48. Fit fascia duct bezel. pipe and remove high pressure pipe. Discard ’O’ 49. Evacuate and recharge air conditioning system. ring.
- Loosen clip and withdraw capillary tube coil from low pressure pipe and withdraw coil from pipe. 50. Reconnect battery negative lead.
- Loosen capillary tube union nut and disconnect 51. Perform leak test on disturbed joints from low pressure pipe.Discard ’O’ ring. 52. Carry out system test.
remove expansion valve from pipe. Discard ’O’ ring.
fit to pipe ends.
union nut.
and secure with clip.
carefully align with low pressure pipe and tighten union nut.
bracket and engage blower flange screws, DO NOT tighten.
flange and secure with screws. Ensure mounting bracket screw engages evaporator bracket.
insulating tape to seal pipes to casing.
secure harness ’P’ clip.
and (B) to motor.
engage mounting studs.
fit to
pipe and tighten union nut.
pipe and tighten union nut.
mounting bracket. See fascia duct bezel
See Adjustment, refrigerant recovery recycling recharging
See Adjustment, System test
Parts & tools for this job For Land Rover Defender
- TOOLA/C manifold gauge setSearch: AC manifold gauge set
- TOOLUV leak detection kitSearch: AC UV leak detection kit
- PARTCabin filterSearch: Land Rover Defender cabin filter
Links open Amazon search results in a new tab. As an Amazon Associate I earn from qualifying purchases.