
Trinary pressure switch relay - fan interlock
- Make
- Land Rover
- Model
- Defender 90 Workshop Manual (NAS)
- Section
- Repair › Trinary pressure switch relay - fan interlock
Air conditioningTrinary pressure switch relay - fan interlock
TRINARY PRESSURE SWITCH RELAY - FAN INTERLOCK
Service repair no - 82.20.04 Service repair no - 82.20.08
Remove Remove
- Disconnect battery negative lead.
- Recover refrigerant from system. See Adjustment, refrigerant recovery, recycling, recharging
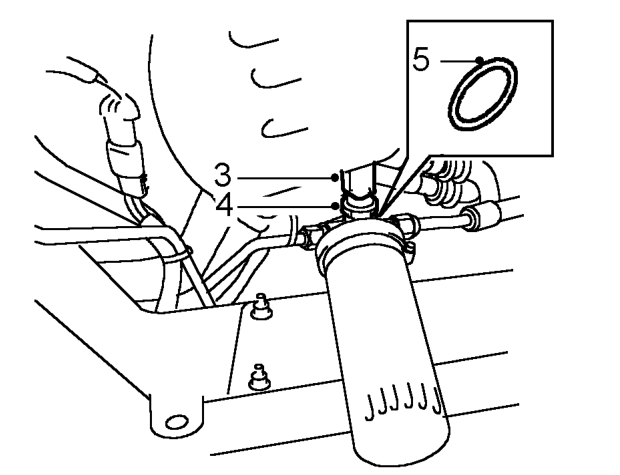
- Access below front RH of vehicle: Disconnect multiplug from switch.
- Remove switch from adaptor.
- WARNING: Wear eye and hand protection
- when disconnecting components
- containing refrigerant.
- Remove ’O’ ring from switch and discard.
Refit
- Lubricate NEW ’O’ ring with refrigerant oil and fit to switch.
- Fit switch to adaptor and tighten to 11 Nm, 8 lbf ft.
- Connect multiplug.
- Evacuate and recharge air conditioning system. See Adjustment, Refrigerant recovery, recycling, recharging
- Reconnect battery negative lead.
- Carry out system test. See Adjustment, System test
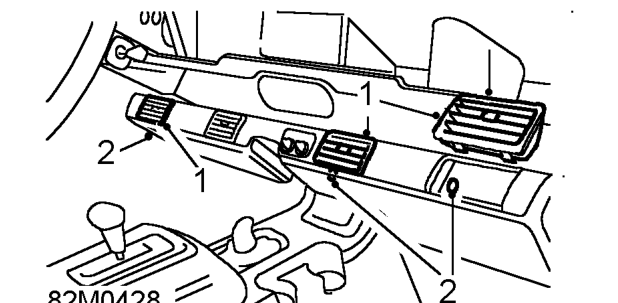
- Lever under each bottom corner and extract cold air vents from bezel, 1 from LH side and 2 from RH side.
- Remove screw securing underside of bezel to panel
- Remove 3 screws securing inside of bezel to panel
Parts & tools for this job For Land Rover Defender
- TOOLOBD2 scannerSearch: OBD2 scanner
- TOOLDigital multimeterSearch: automotive digital multimeter
- TOOLBack-probe test leadsSearch: back probe test leads
Links open Amazon search results in a new tab. As an Amazon Associate I earn from qualifying purchases.