
Tie-rod end
- Make
- Rover
- Model
- 400 Workshop Manual
- Year
- 1995–2000
- Section
- Repairs › Tie-rod end
SteeringTie-rod end
TIE-ROD END
Service repair no - 57.55.02
Remove
- Raise front of vehicle, one side.
WARNING: Support on safety stands.
- Remove road wheel(s).
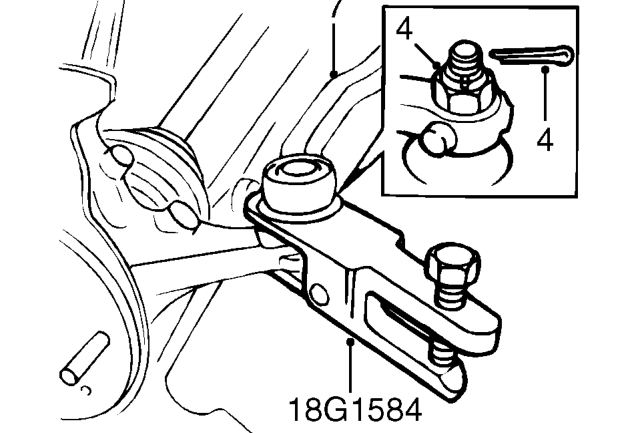
- Loosen tie-rod end locknut.
- Remove split pin and castle nut from ball pin.
- Fit M10 nut to ball pin, flush with end of pin.
- Use tool 18G 1584 and separate ball pin from knuckle arm.
- Unscrew tie-rod end from tie-rod.
NOTE: Retain tie-rod nut in position as refitting reference.
Refit
- Screw tie-rod end onto tie-rod and up to locknut, set ball pin downwards.
- Connect ball pin knuckle arm, fit castle nut and tighten to 39 Nm, tighten to align split pin hole and fit NEW split pin.
- Fit road wheel(s) and tighten nuts to correct torque. See INFORMATION, Torque wrench settings.
- Remove stand(s) and lower vehicle.
- Check and adjust front wheel alignment. See Adjustments.
Parts & tools for this job For 1995 Rover 400
- TOOLTie rod end toolSearch: tie rod end puller
- TOOLBall joint separatorSearch: ball joint separator
- FLUIDPower steering fluidSearch: Rover power steering fluid
Links open Amazon search results in a new tab. As an Amazon Associate I earn from qualifying purchases.