
Disassembly
- Make
- Rover
- Model
- 600 Rover 600 Repair Manual - Volumes 1 and 2 - 2nd Edition
- Section
- Brakes: repairs › Disassembly
Brakes and ABSDisassembly · page 1 of 2
Disassembly
WARNING: Never use an air hose or dry brush to clean brake assemblies.
Use a vacuum cleaner, to avoid breathing brake dust.
CAUTION: Do not allow brake fluid to come into contact with the paintwork as it will cause surface damage. If brake fluid is spilled on the paintwork, wash it off immediately with water.
To prevent spills, cover the hose joints with rags or shop towels.
Clean all parts in brake fluid and air dry; blow out all passages with compressed air.
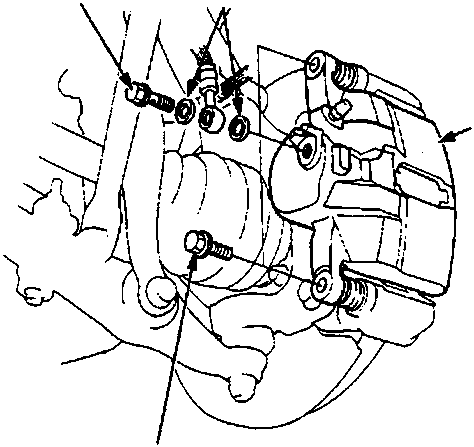
- A Banjo bolt
B Sealing washer
C Caliper
D Caliper bolt - Remove the banjo bolt and disconnect the brake hose from the caliper. Replace the sealing washers.
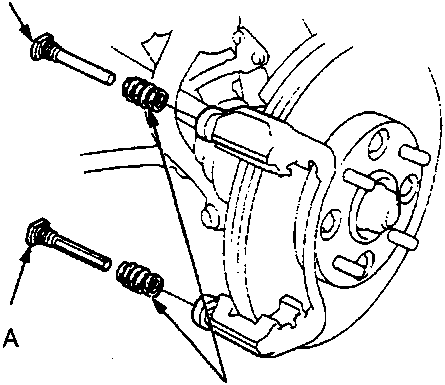
- A Pin A
B Pin B
C Pin boots - Remove the caliper bolts, then remove the caliper.
- Remove the pins and pin boots from the caliper bracket. replace the pin boots.
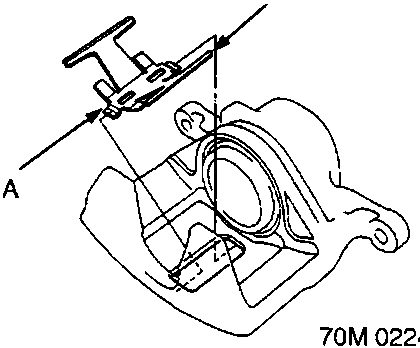
- A Pad spring
- A/T only: Remove the pad spring from the caliper body.
Parts & tools for this job For Rover 600
- PARTBrake padsSearch: Rover 600 brake pads
- TOOLBrake bleeder kitSearch: one man brake bleeder kit
- FLUIDBrake fluidSearch: brake fluid
Links open Amazon search results in a new tab. As an Amazon Associate I earn from qualifying purchases.