
Inspection and Replacement
- Make
- Rover
- Model
- 600 Rover 600 Repair Manual - Volumes 1 and 2 - 2nd Edition
- Section
- Brakes: repairs › Inspection and Replacement
Brakes and ABSInspection and Replacement · page 1 of 2
Inspection and Replacement
WARNING: Never use an air hose or dry brush to clean brake assemblies.
Use a vacuum cleaner, to avoid breathing brake dust.
- Raise front of vehicle.
WARNING: Support on safety stands.
- Remove road wheel(s).
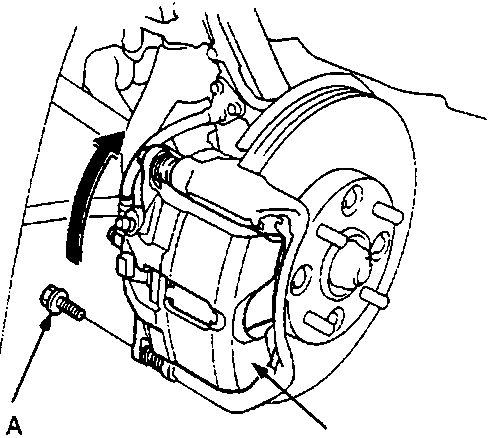
A Caliper bolt
B Caliper body
- Remove the caliper bolt and pivot the caliper body up out of the way.
Note: Check the hoses and pin boots for damage or deterioration.
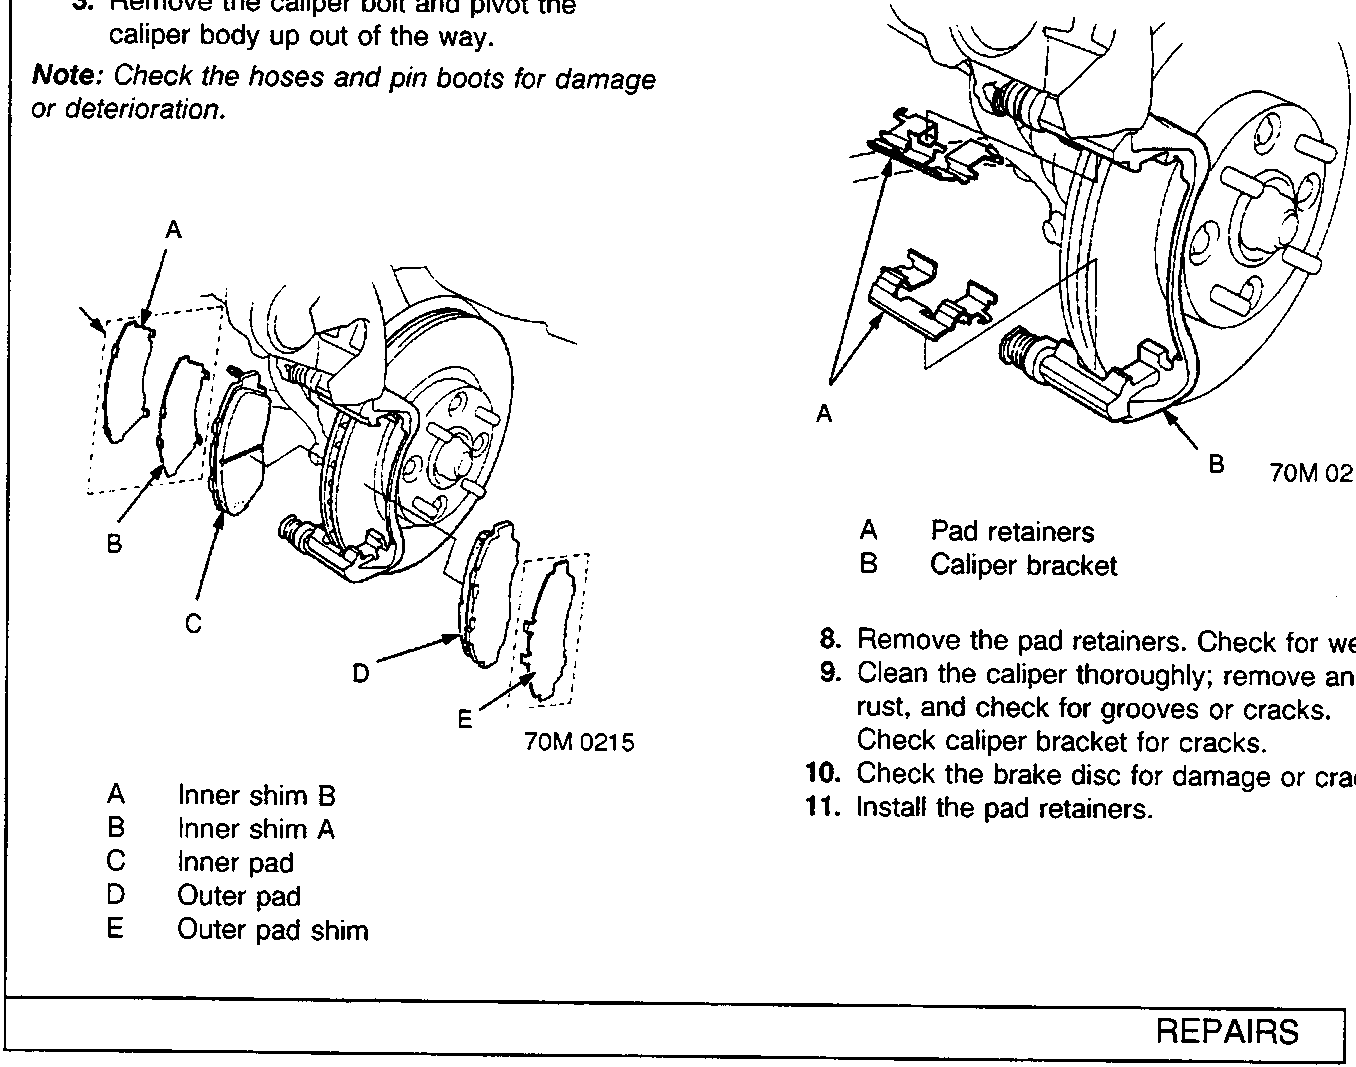
A Inner shim B
B Inner shim A
C Inner pad
D Outer pad
E Outer pad shim
- Remove the pad shims (M/T only), and inner and outer pads.
- Check pad shims for wear.
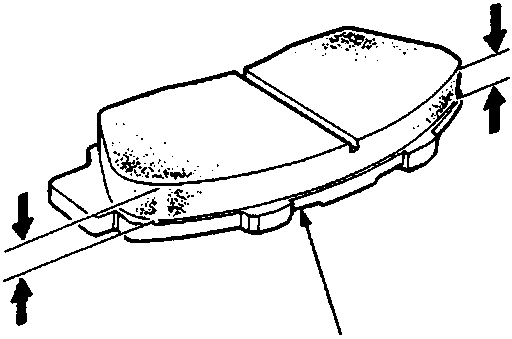
A Backing plate
- Using vernier calipers, measure the thickness of each brake pad lining.
Brake Pad Thickness:
Standard: A/T: 11.0mm (0.43 in)
M/T: 12.5mm (0.49 in)
Service Limit: 1.6mm (0.06 in)
Note: Measurement does not include pad backing plate thickness.
- If the brake pad thickness is less than service limit, replace the front pads as a set.
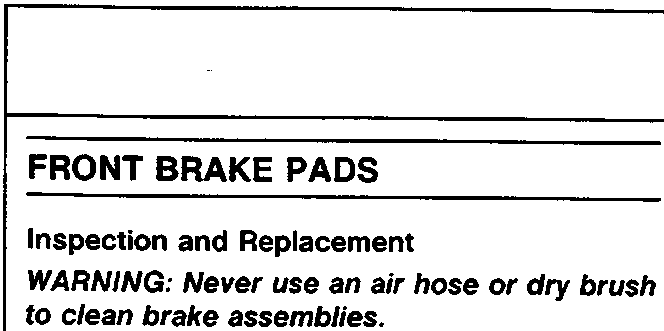
A Pad retainers
B Caliper bracket
- Remove the pad retainers. Check for wear.
- Clean the caliper thoroughly; remove any rust, and check for grooves or cracks. Check caliper bracket for cracks.
- Check the brake disc for damage or cracks.
- Install the pad retainers.
Parts & tools for this job For Rover 600
- PARTBrake padsSearch: Rover 600 brake pads
- TOOLBrake bleeder kitSearch: one man brake bleeder kit
- FLUIDBrake fluidSearch: brake fluid
Links open Amazon search results in a new tab. As an Amazon Associate I earn from qualifying purchases.