
Master cylinder
- Make
- Rover
- Model
- 600 Rover 600 Repair Manual - Volumes 1 and 2 - 2nd Edition
- Section
- Brakes: repairs › Master cylinder
Brakes and ABSMaster cylinder · page 1 of 5
- Insert the pin A and pin B into the caliper bracket.
- Install the pin boots into the groove in pins.
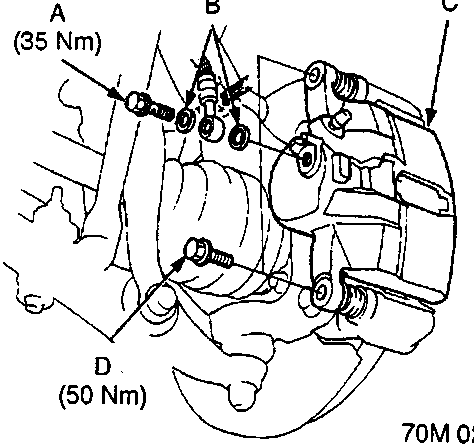
- A Banjo bolt
- B Sealing washers
- C Caliper
- D Caliper bolt
- Install the brake pad retainers and brake pads in their original positions. Ensure that inner pad if fitted with its wear indicator upward.
- Install the caliper on the caliper bracket and tighten the caliper bolts.
- Connect the brake hose to the caliper with new sealing washers and tighten the banjo bolt.
- Fill the brake reservoir up and bleed the brake system.
- After installation, check for leaks at hose and line joints or connection, and retighten if necessary.
MASTER CYLINDER
Removal
CAUTION: Be careful not to bend or damage the brake pipes when removing master cylinder or booster.
Do not allow brake fluid to come into contact with the paintwork as it will cause surface damage. If brake fluid is spilled on the paintwork, wash it off immediately with water.
To prevent spills, cover the hose joints with rags or cloth.
- Drain the brake fluid from the master cylinder.
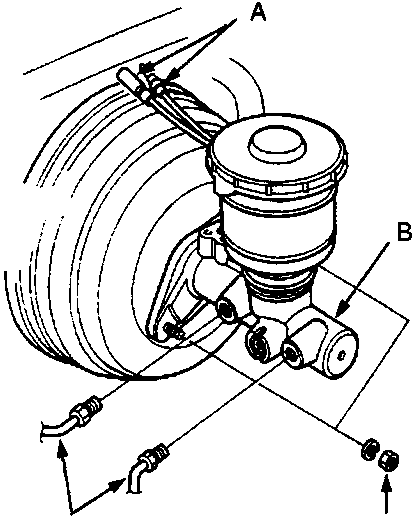
- A Wires
- B Master cylinder
- C Mounting nuts
- D Brake pipes
- Disconnect the brake fluid level switch wires.
- Disconnect the brake pipes from the master cylinder.
- Remove the master cylinder mounting nuts and the master cylinder.
Parts & tools for this job For Rover 600
- TOOLBrake bleeder kitSearch: one man brake bleeder kit
- FLUIDBrake fluidSearch: brake fluid
- TOOLBrake line flaring toolSearch: brake line flaring tool
Links open Amazon search results in a new tab. As an Amazon Associate I earn from qualifying purchases.