
Replacement
- Make
- Rover
- Model
- 600 Rover 600 Repair Manual - Volumes 1 and 2 - 2nd Edition
- Section
- Repairs › Replacement
Heating and ventilationReplacement
Replacement
- Disconnect the negative cable from the battery.
- Discharge the refrigerant.
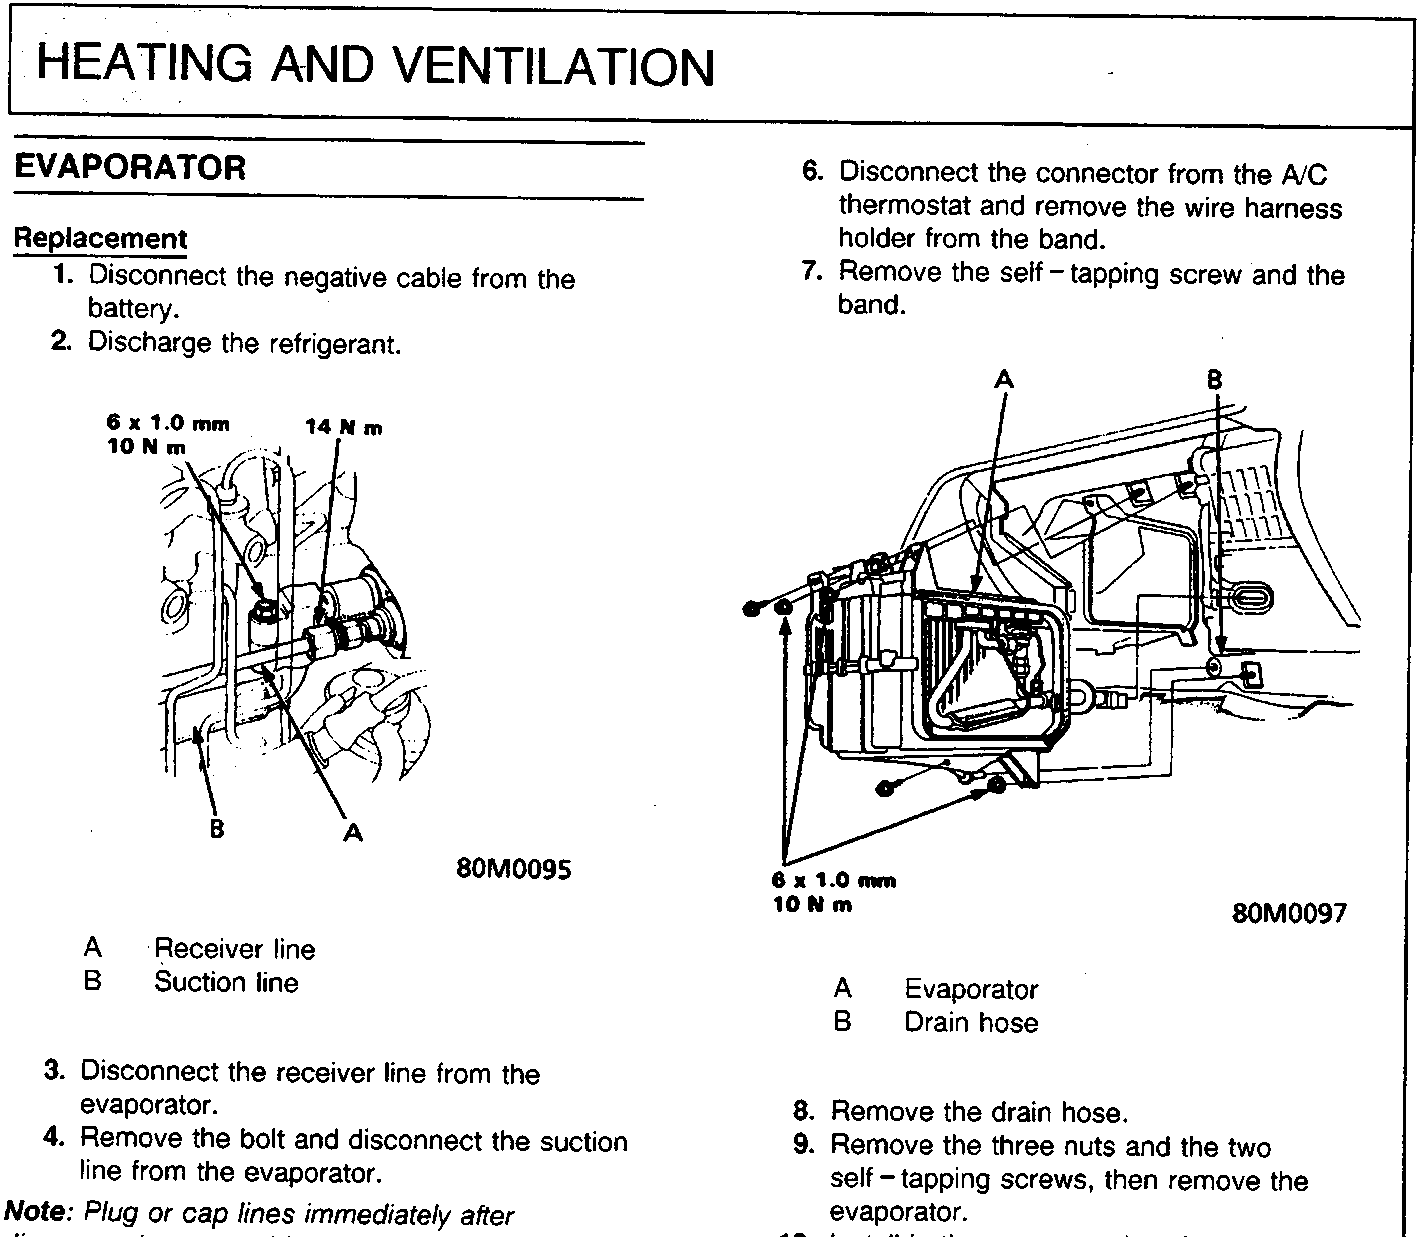
A Receiver line
B Suction line
- Disconnect the receiver line from the evaporator.
- Remove the bolt and disconnect the suction line from the evaporator.
Note: Plug or cap lines immediately after disconnecting, to avoid moisture and dust contamination into the system
- Remove the glove box and the glove box frame.
- Disconnect the connector from the A/C thermostat and remove the wire harness holder from the band.
- Remove the self – tapping screw and the band.
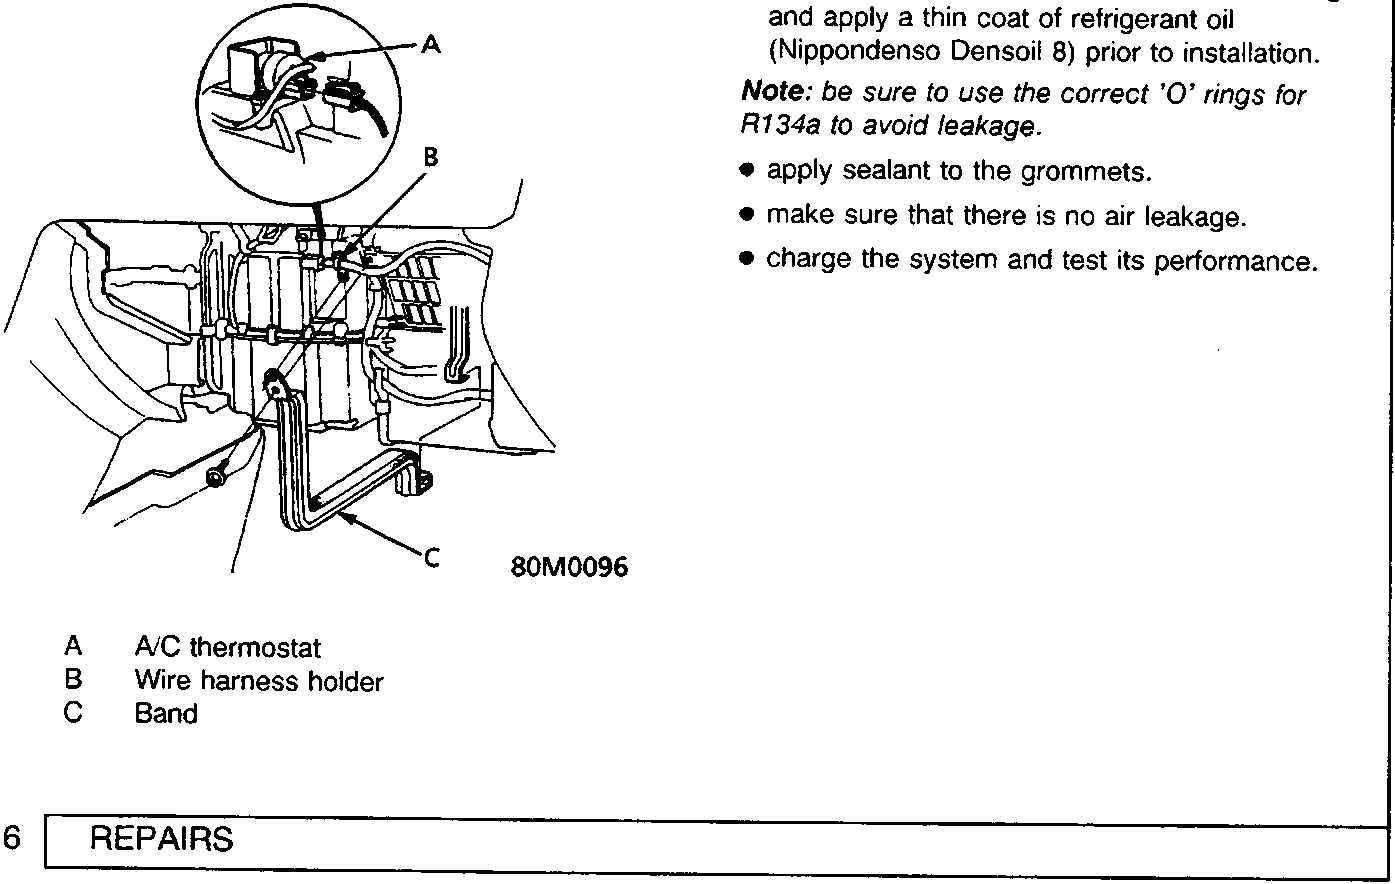
A A/C thermostat
B Wire harness holder
C Band
A Evaporator
B Drain hose
- Remove the drain hose.
- Remove the three nuts and the two self – tapping screws, then remove the evaporator.
- Install in the reverse order of removal, and:
- if installing a new evaporator, add refrigerant oil (Nippondenso Densoil 8).
- replace 'O' rings with new ones at each fitting and apply a thin coat of refrigerant oil (Nippondenso Densoil 8) prior to installation.
Note: be sure to use the correct 'O' rings for R134a to avoid leakage.
- apply sealant to the grommets.
- make sure that there is no air leakage.
- charge the system and test its performance.
Parts & tools for this job For Rover 600
- TOOLA/C manifold gauge setSearch: AC manifold gauge set
- TOOLUV leak detection kitSearch: AC UV leak detection kit
- PARTCabin filterSearch: Rover 600 cabin filter
Links open Amazon search results in a new tab. As an Amazon Associate I earn from qualifying purchases.