
Rear number plate lamp - bulb renewal rear number plate lamp
- Make
- Land Rover
- Model
- Defender 90 Workshop Manual (NAS)
- Section
- Repair › Rear number plate lamp - bulb renewal rear number plate lamp
‹ Prev Headlamp beam alignment side, tail and indicator lampsNext › Interior lamp - bulb removal interior lamp
ElectricalRear number plate lamp - bulb renewal rear number plate lamp
REAR NUMBER PLATE LAMP - BULB RENEWAL REAR NUMBER PLATE LAMP
Service repair no - 86.40.85 Service repair no - 86.40.86
Remove Remove
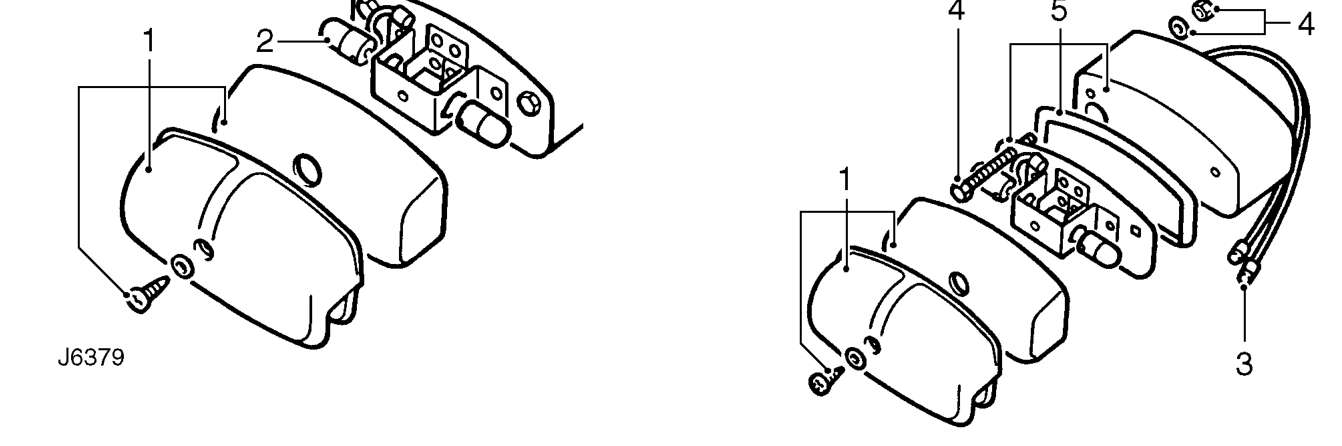
- Remove single screw securing lamp cover and lens to bulb holder.
- Remove bulb/s from holder.
Refit
- Fit new bulb/s.
- Fit lamp lens and cover.
Refit
- Remove single screw and remove lamp cover and lens.
- Remove rear speaker. See CHASSIS AND BODY, Repair, Radio speaker - rear
- Through speaker aperture, disconnect lamps leads from harness.
- Remove 2 bolts, nuts and washers securing lamp to vehicle body.
- Remove bulb holder, complete with rubber seal and mounting plinth.
- Feed lamp unit leads through vehicle body and secure bulb holder, seal and plinth.
- Fit lamp leads to harness connectors.
- Fit radio speaker. See CHASSIS AND BODY, Repair, Radio speaker - rear
- Fit lens and lamp cover.
‹ Prev Headlamp beam alignment side, tail and indicator lampsNext › Interior lamp - bulb removal interior lamp
Parts & tools for this job For Land Rover Defender
- PARTReplacement bulbsSearch: Land Rover Defender bulbs
- TOOLDigital multimeterSearch: automotive digital multimeter
Links open Amazon search results in a new tab. As an Amazon Associate I earn from qualifying purchases.