
Heated oxygen sensor (ho2s) - rear refit
- Make
- Land Rover
- Model
- Defender 90 Workshop Manual (NAS)
- Section
- Repair › Heated oxygen sensor (ho2s) - rear refit
Fuel systemHeated oxygen sensor (ho2s) - rear refit
HEATED OXYGEN SENSOR (HO2S) - REAR Refit
Service repair no - 19.22.17
Remove
CAUTION: The sensor must only be removed when the exhaust pipe is cold. washer and apply anti-seize compound to threads.
- Position vehicle on ramp [hoist].
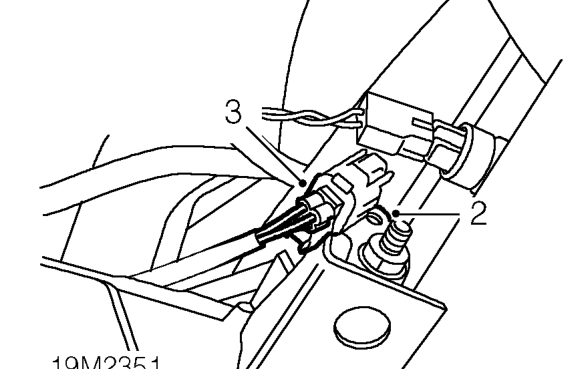
- Lower ramp [hoist].
- Release sensor multiplug from bracket.
- Disconnect multiplug.
- Raise ramp [hoist].
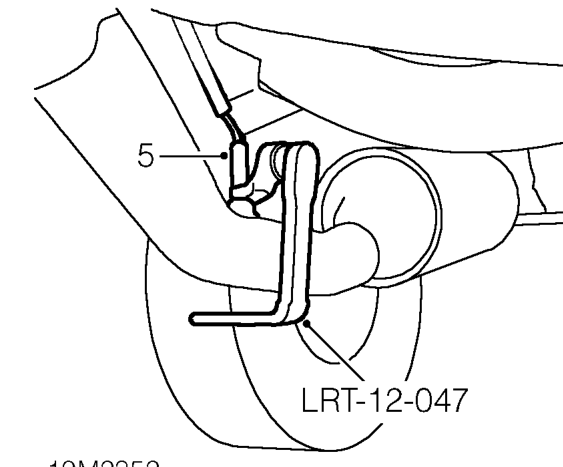
- Remove sensor using tool LRT-12-047.
- Remove and discard sealing washer.
- Clean sensor mating face on exhaust pipe.
- NOTE: The new sensor thread is
- pre-treated with an anti-seize compound. If
- refitting old sensor, fit NEW sealing
- CAUTION: Do not allow anti-seize
- compound to come into contact with the
- sensor nose or enter the exhaust system.
- Fit sealing washer to sensor and fit sensor. Tighten sensor to 20 Nm, 15 lbf ft.
- Connect multiplug and secure to bracket.
Parts & tools for this job For Land Rover Defender
- PARTOxygen sensorSearch: Land Rover Defender oxygen sensor
- TOOLOxygen sensor socketSearch: oxygen sensor socket
- TOOLOBD2 scannerSearch: OBD2 scanner
Links open Amazon search results in a new tab. As an Amazon Associate I earn from qualifying purchases.