
Injector - models without intercooler
- Make
- Rover
- Model
- 200 Workshop Manual
- Year
- 1995–1999
- Section
- Repairs › Injector - models without intercooler
Engine management system - EDCInjector - models without intercooler · page 1 of 2
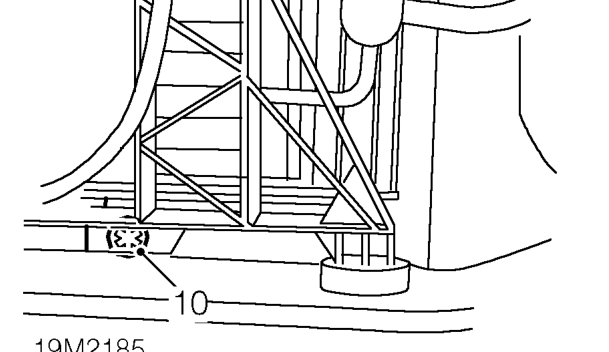
- Raise radiator and intercooler to gain access to bottom Torx screw.
- Remove Torx screw and nut securing intercooler to radiator.
- Release intercooler from bottom fixing and remove intercooler.
Refit
- Fit intercooler and align to radiator.
- Loosely fit top Torx bolt.
- Raise radiator and intercooler and fit Torx bolt and nut.
- Tighten Torx bolts to 25 Nm.
- Ensure radiator and intercooler are located in bottom mountings and fit top mounting bracket to intercooler.
- Tighten top mounting brackets to 9 Nm.
- Position bottom hose to intercooler and secure with clip.
- Fit top hose to intercooler and turbocharger pipe and tighten clips.
- Fit air cleaner. See this section.
- Fit front bumper. See BODY, Exterior fittings.
INJECTOR - MODELS WITHOUT INTERCOOLER
Service repair no - 19.60.10
Remove
NOTE: No. 1 injector incorporates the needle lift sensor and is covered in a separate procedure.
- Disconnect battery earth lead.
- Remove engine acoustic cover. See BODY, Exterior fittings.
- Position absorbent cloth around fuel injector to catch any fuel spillages.
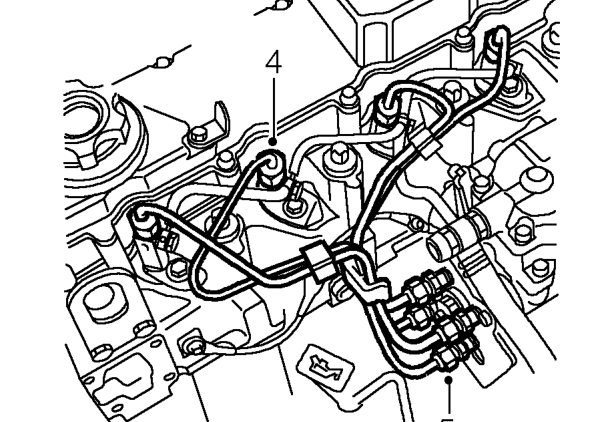
- Loosen injector pipe union at injector.
- Disconnect injector pipe from injector and move aside.
CAUTION: To prevent damage to fuel system pipes or components, use two spanners when loosening or tightening unions.
Parts & tools for this job For 1995 Rover 200
- PARTFuel filterSearch: Rover 200 1995 fuel filter
- TOOLFuel pressure test kitSearch: fuel pressure test kit
- TOOLFuel line disconnect toolSearch: fuel line disconnect tool
Links open Amazon search results in a new tab. As an Amazon Associate I earn from qualifying purchases.