
Defrost Door Adjustment (page 3 of 3)
- Make
- Rover
- Model
- 600 Rover 600 Repair Manual - Volumes 1 and 2 - 2nd Edition
- Section
- Repairs
Heating and ventilationDefrost Door Adjustment · page 3 of 3
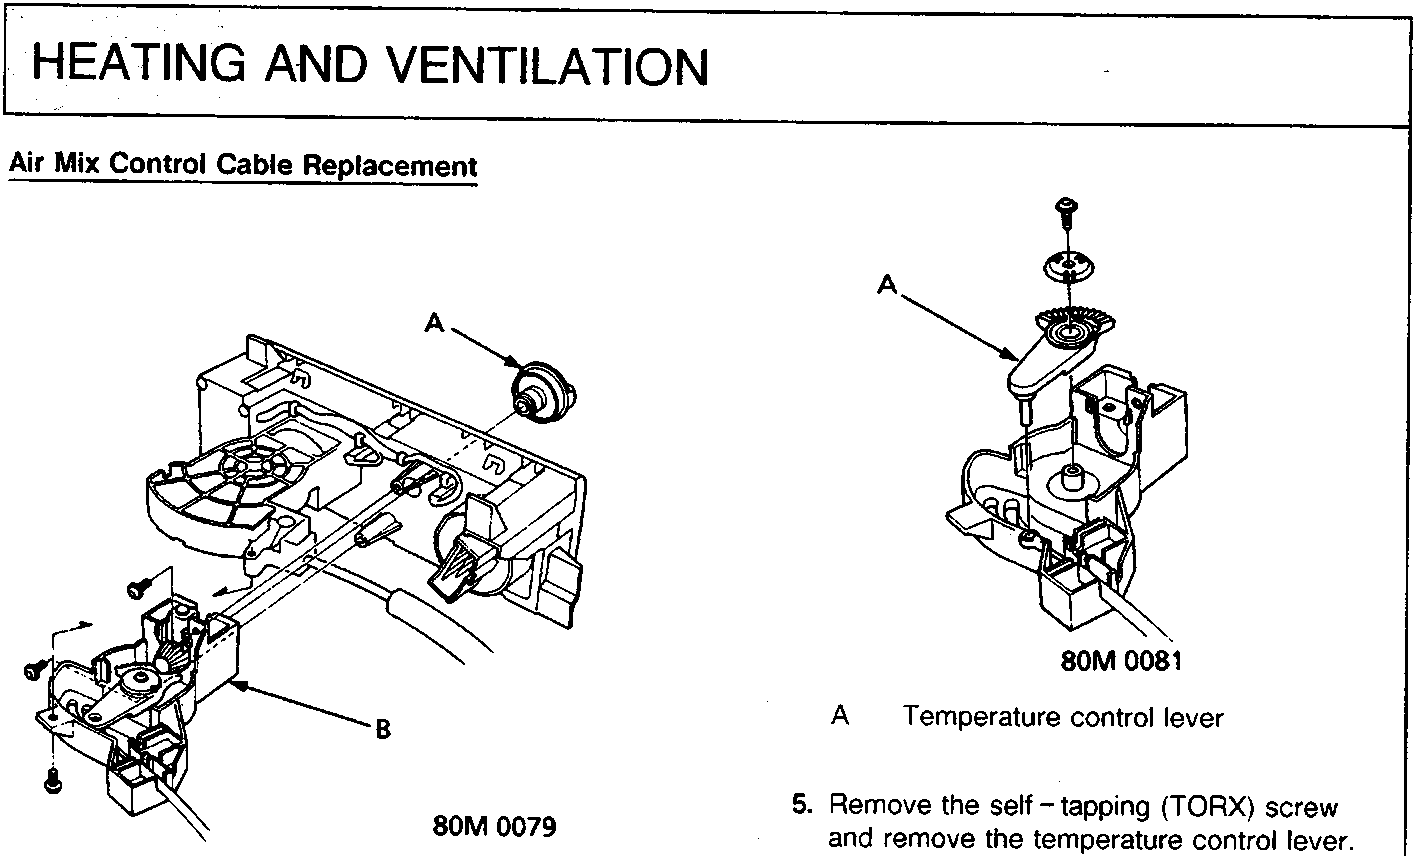
80M 0079
- A Temperature control knob
- B Temperature control assembly
- Pull out the temperature control knob.
- Remove the three self – tapping (TORX) screws and remove the temperature control assembly.
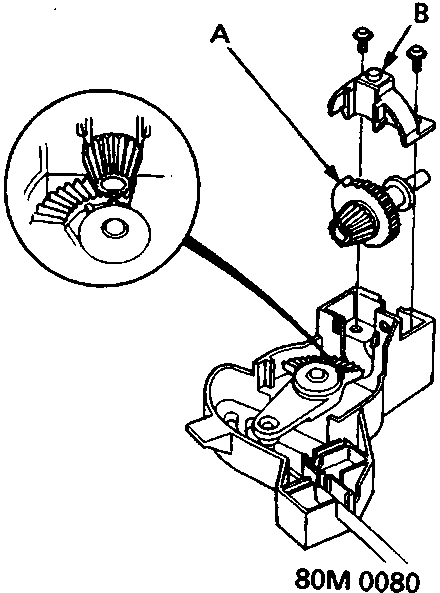
80M 0080
- A Temperature control shaft
- B Lower base
- Remove the two self – tapping (TORX) screws and remove the lower base.
- Remove the temperature control shaft.
80M 0081
- A Temperature control lever
- Remove the self – tapping (TORX) screw and remove the temperature control lever.
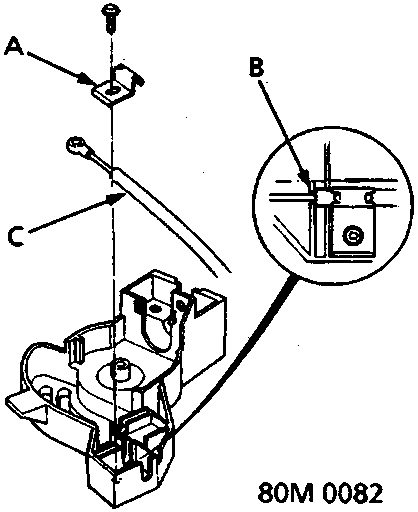
80M 0082
- A Clamp
- B Stop
- C Air mix control cable
- Remove the self – tapping (TORX) screw and the clamp, then remove the air mix control cable.
- Install in the reverse order of removal, and:
- hold the end of the cable against the stop.
- apply grease to the sliding surfaces.
- when installing the temperature control shaft, make sure that the marks on the temperature control shaft and temperature control lever are aligned.
- after installing, make sure that the temperature control knob moves smoothly without binding.
Parts & tools for this job For Rover 600
- TOOLTrim removal tool kitSearch: trim removal tool kit
- PARTTouch-up paintSearch: Rover touch up paint
- PARTPanel clip assortmentSearch: Rover panel clips assortment
Links open Amazon search results in a new tab. As an Amazon Associate I earn from qualifying purchases.