
Suspension (page 5 of 7)
- Make
- Rover
- Model
- 600 Rover 600 Repair Manual - Volumes 1 and 2 - 2nd Edition
- Section
- Repairs
SuspensionSuspension · page 5 of 7
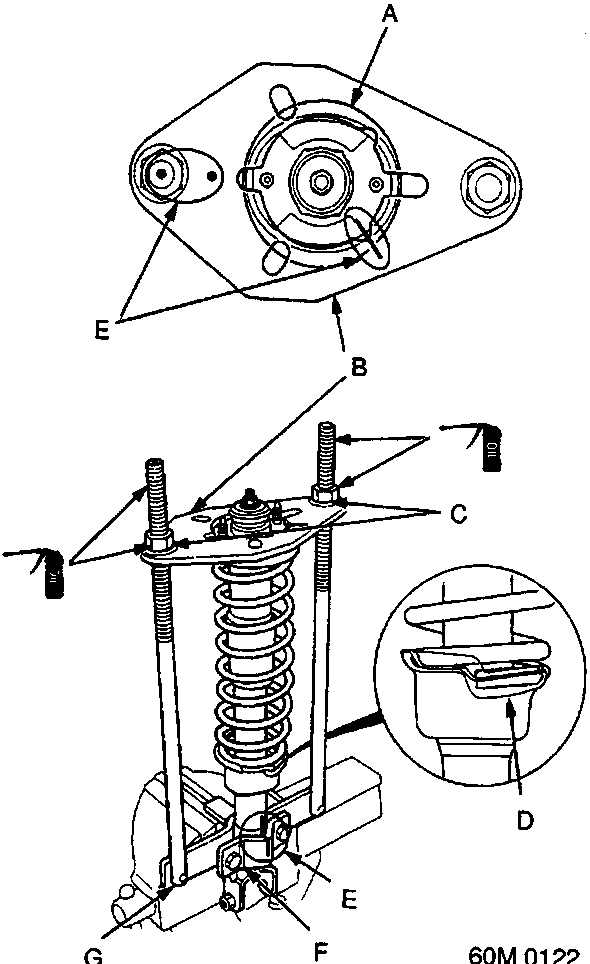
- A Damper mounting base
- B Suspension mount plate
- C Compressor nuts
- D Spring lower seat
- E Paint marks
- F Holder
- G Spring compressor
- Install the damper on the spring compressor by aligning the marks on the damper case and the spring compressor holder.
Note: If a new damper is to be installed, mark it in the same position as on the old damper.
- Reassemble the damper in reverse order of removal except the damper mounting washer and self – locking nut.
Note: Align the bottom of damper spring and spring lower seat as shown.
- Install the mount plate on the damper with the mark on the plate facing painted threads.
- Position the damper mounting base by aligning the marks on the damper mounting base and mount plate.
- Apply oil to the seating surfaces of the compressor nuts and threads of the spring compressor, then loosely install the nuts.
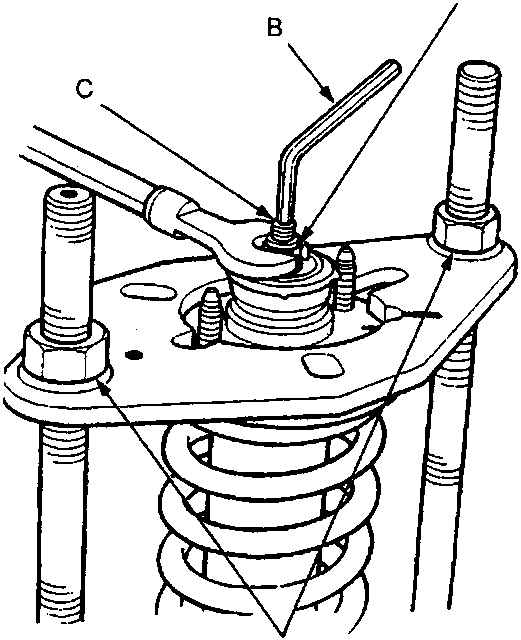
- A Self – locking nut
- B Hex wrench
- C Damper shaft
- D Compressor nuts
- Compress the damper spring by turning the compressor nuts.
Note: Turn each compressor nut gradually and equally.
- Install the damper mounting washer, then loosely install the new self – locking nut.
- Hold the damper shaft using a hex wrench and tighten the self – locking nut.
- Remove the damper from the spring compressor.
Parts & tools for this job For Rover 600
- TOOLCoil spring compressorSearch: coil spring compressor
- TOOLBall joint separatorSearch: ball joint separator
- PARTShock absorbersSearch: Rover 600 shock absorbers
Links open Amazon search results in a new tab. As an Amazon Associate I earn from qualifying purchases.