
Remove
- Make
- Rover
- Model
- Coupé, Cabriolet & Tourer 200/400 Coupé, Cabriolet & Tourer Workshop Manual
- Section
- Repairs › Remove
Modular engine management system - MPiRemove
Service Repair No. Distributor cap – 18.20.10
Service Repair No. Rotor arm – 18.20.23
Remove
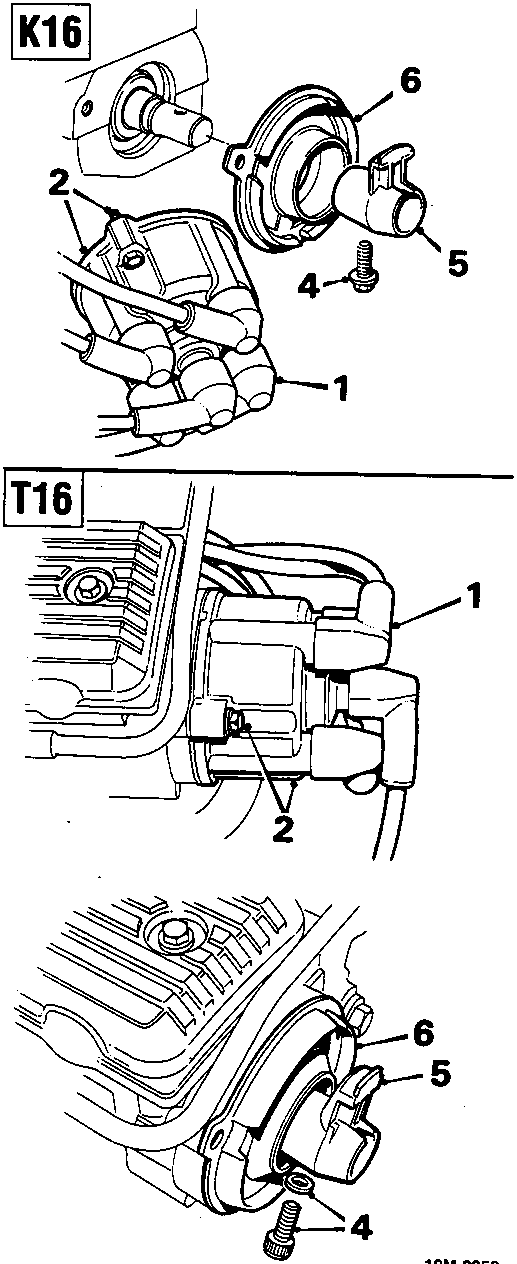
- Noting their fitted positions, disconnect 5 H.T. leads from distributor cap.
- Slacken 2 captive screws, remove distributor cap.
- Rotate engine to gain access to rotor arm screw.
- Remove screw securing rotor arm; discard screw.
- Remove rotor arm.
- Remove flash shield.
Refit
- Clean distributor cap, rotor arm and flash shield.
- Examine distributor cap and rotor arm for signs of damage or tracking; renew if necessary.
- Check that carbon brush in distributor cap is free to move.
- Fit flash shield.
- Position rotor arm to distributor shaft.
- Fit a new Patchlock screw to secure rotor arm and tighten to 8 Nm.
- Align screw holes in flash shield with holes in adapter.
- Fit distributor cap, tighten screws.
- Connect H.T. leads to distributor cap.
IGNITION COIL
Service Repair No. 18.20.32
Remove
- Disconnect both battery leads.
- Remove bolt and battery clamp; lift out battery.
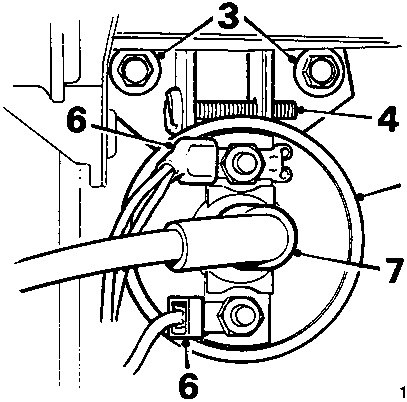
- Slacken but do not remove 2 screws securing coil bracket to body.
- Slacken but do not remove coil bracket clamp screw.
- Slide coil out of bracket.
- Noting their fitted positions, disconnect 2 L.T. leads from coil.
- Disconnect H.T. lead from coil.
Refit
- Connect L.T. leads to coil.
- Position coil in bracket; tighten clamp screw.
- Tighten bracket securing screws.
- Connect H.T. lead to coil.
- Fit battery into tray, fit clamp and tighten bolt; connect both battery leads.
Parts & tools for this job For Rover Coupé, Cabriolet & Tourer
- PARTEngine gasket setSearch: Rover Coupé, Cabriolet & Tourer engine gasket set
- TOOLTorque wrenchSearch: 3/8 inch torque wrench
- TOOLFeeler gauge setSearch: feeler gauge set
Links open Amazon search results in a new tab. As an Amazon Associate I earn from qualifying purchases.