
Refit
- Make
- Rover
- Model
- Coupé, Cabriolet & Tourer 200/400 Coupé, Cabriolet & Tourer Workshop Manual
- Section
- Repairs › Refit
SuspensionRefit
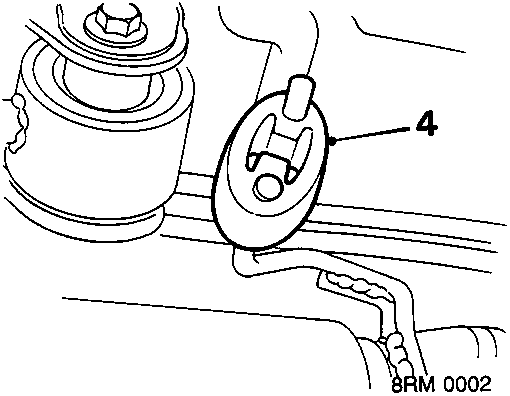
- 1.4 only: Release exhaust pipe from front mounting rubbers.
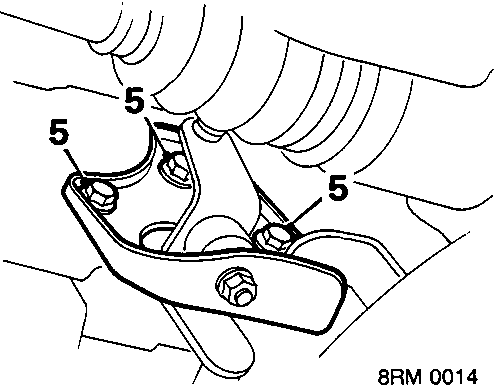
- 1.4 only: Remove 3 screws gear change bracket to sub frame and lower linkage on to exhaust.
- Remove nut and bolt anti – roll bar to both links.
- Remove both anti – roll bar bushes.
- Manoeuvre anti – roll bar over gear change linkage and exhaust and remove from R.H. side of vehicle.
Refit
- Manoeuvre anti – roll bar from R.H. side of vehicle, over gear change linkage and exhaust.
- Align anti – roll bar to both links, fit nuts, washers and bolts but do not tighten.
- Lubricate bush positions with soft soap.
- Fit anti – roll bar bushes and clamps. Fit bolts and tighten to 15 Nm.
- Tighten bolts anti – roll bar to link to 45 Nm.
- 1.4 only: Position gear change bracket to front sub – frame. Fit 3 screws and tighten to 55 Nm.
- Position gear change linkage rear mounting to body. Fit 2 screws and tighten to 25 Nm.
- 1.4 only: Connect exhaust pipe to front mounting rubbers.
- Fit road wheel and tighten nuts to 100 Nm.
- Remove stand(s) and lower vehicle.
FRONT LOWER ARM
Service Repair No. 60.35.02
Remove
- Raise front of vehicle.
WARNING: Support on safety stands.
- Remove road wheel(s).
- Remove bolt anti – roll bar link to lower arm.
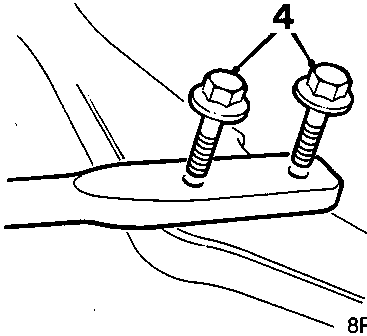
- Remove 2 bolts tie rod to lower arm.
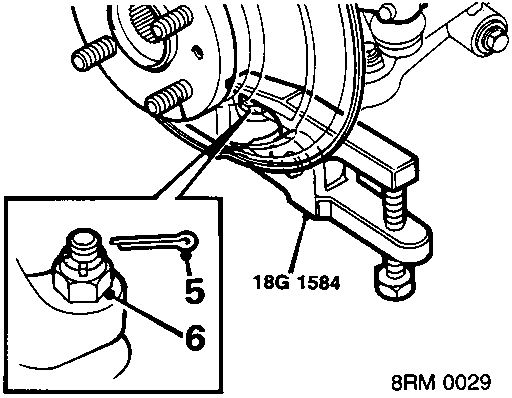
- Remove split pin from lower ball joint nut and discard.
- Remove nut from lower ball joint.
- Break taper joint using tool 18G 1584.
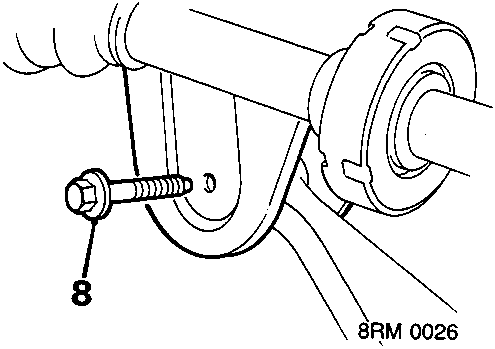
- Remove bolt lower arm to body
- Remove lower arm.
Parts & tools for this job For Rover Coupé, Cabriolet & Tourer
- TOOLCoil spring compressorSearch: coil spring compressor
- TOOLBall joint separatorSearch: ball joint separator
- PARTShock absorbersSearch: Rover Coupé, Cabriolet & Tourer shock absorbers
Links open Amazon search results in a new tab. As an Amazon Associate I earn from qualifying purchases.