
Remove Remove
- Make
- Land Rover
- Model
- Discovery II (UK)
- Section
- Repair › Remove Remove
Alarm system and hornRemove Remove
Receiver - alarm system - models with Receiver - alarm system - models sunroof without sunroof
$% 86.77.31 $% 86.77.31
Remove Remove
- Remove trim seal from rear sunroof.
- Release sunroof switch and remove screw securing headlining.
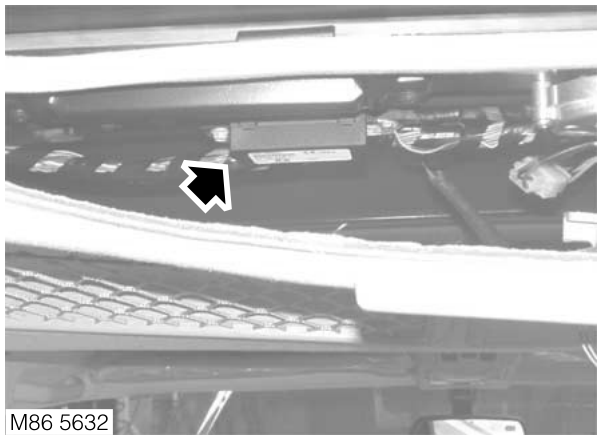
M86 5632
- Remove 2 nuts securing receiver to roof panel, disconnect multiplug and remove receiver.
Refit
- Connect multiplug to receiver, fit to roof panel, tighten nuts to 10 Nm (7 lbf.ft).
- Fit and tighten screw securing headlining.
- Fit sunroof switch
- Fit sunroof trim seal.
- Connect multiplug to receiver, fit to roof panel and secure with nuts tighten to 10 Nm (7 lbf.ft).
Refit
- Release rear door upper trim finisher.
- Remove 3 Torx bolts securing rear headrest, remove headrest. Repeat operation on opposite side.
- Remove both 'D' post trim casings. INTERIOR TRIM COMPONENTS, REPAIRS, Trim casing - 'D' post.
- Release rear interior light lens, remove 2 nuts to release light.
- Release 2 studs securing rear headlining, carefully lower lining.
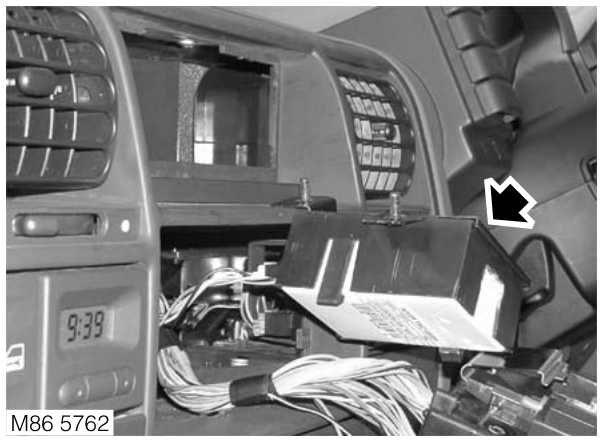
M86 5762
- Remove 2 studs securing alarm receiver.
- Disconnect multiplug from alarm receiver and remove receiver.
- Connect multiplug to receiver.
- Position receiver and secure with studs.
- Position rear end of headlining, secure with studs.
- Position interior light fit and tighten nuts.
- Fit interior light lens.
- Fit both 'D' post trim casings. INTERIOR TRIM COMPONENTS, REPAIRS, Trim casing - 'D' post.
- Fit 3 Torx bolts securing headrest and tighten to 25 Nm (18 lbf.ft). Repeat operation on opposite side.
- Fit rear door upper finisher
Parts & tools for this job For Land Rover Discovery
- PARTReplacement bulbsSearch: Land Rover Discovery bulbs
- TOOLDigital multimeterSearch: automotive digital multimeter
Links open Amazon search results in a new tab. As an Amazon Associate I earn from qualifying purchases.