
’H’ frame - models with drum brakes (page 2 of 5)
- Make
- Rover
- Model
- 200 Workshop Manual
- Year
- 1995–1999
- Section
- Repairs
Rear suspension’H’ frame - models with drum brakes · page 2 of 5
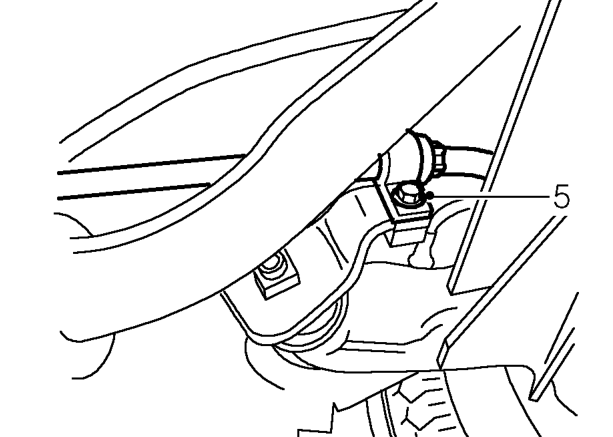
- Remove 2 bolts securing handbrake cables to ’H’ frame and release cables.
- Remove both rear drums. See BRAKES, Repairs.
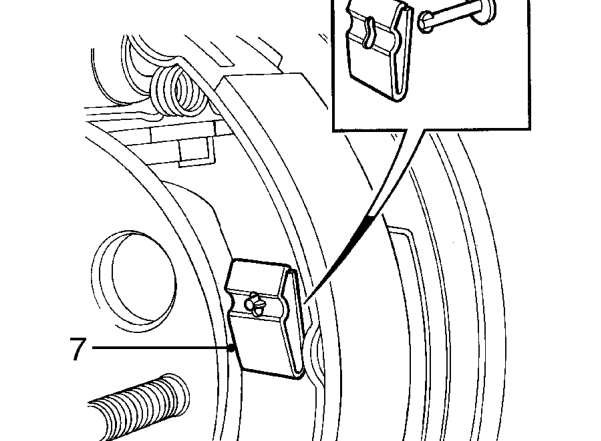
- Remove 4 clips and 4 pins retaining LH and RH brake shoe assemblies.
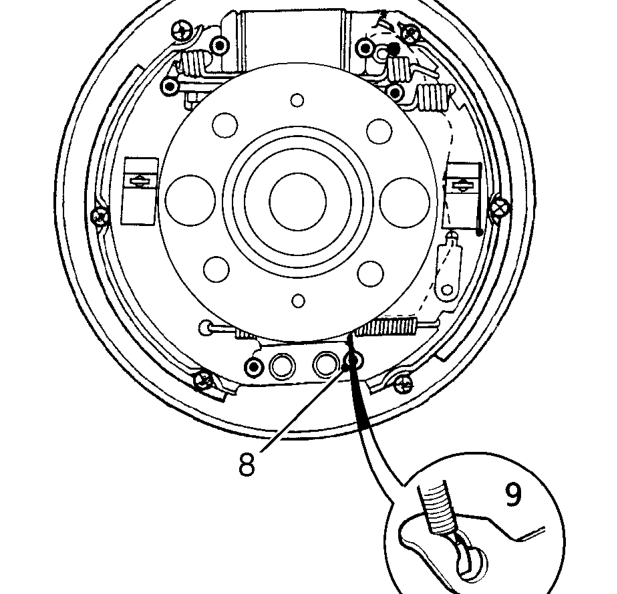
- Disconnect both trailing shoes from abutment brackets.
- Disconnect both handbrake cables from brake levers.
CAUTION: Ensure edges of brake shoes do not damage wheel cylinder dust covers.
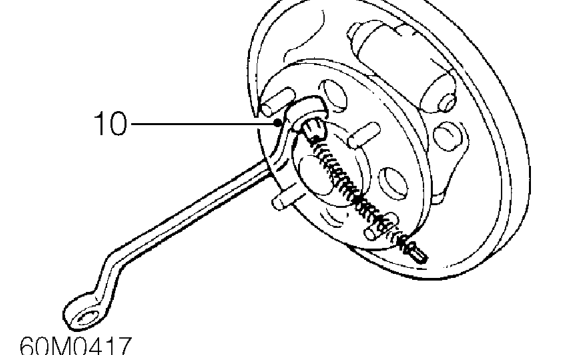
- Using a 12 mm ring spanner, release cables from backplates and withdraw cables.
- Position container to collect fluid spillage.
Parts & tools for this job For 1995 Rover 200
- PARTRear brake padsSearch: Rover 200 1995 rear brake pads
- TOOLCaliper piston rewind toolSearch: brake caliper piston rewind tool
- FLUIDBrake fluidSearch: brake fluid
Links open Amazon search results in a new tab. As an Amazon Associate I earn from qualifying purchases.