
Disassembly/Reassembly (page 3 of 3)
- Make
- Rover
- Model
- 600 Rover 600 Repair Manual - Volumes 1 and 2 - 2nd Edition
- Section
- Repairs
Manual gearboxDisassembly/Reassembly · page 3 of 3
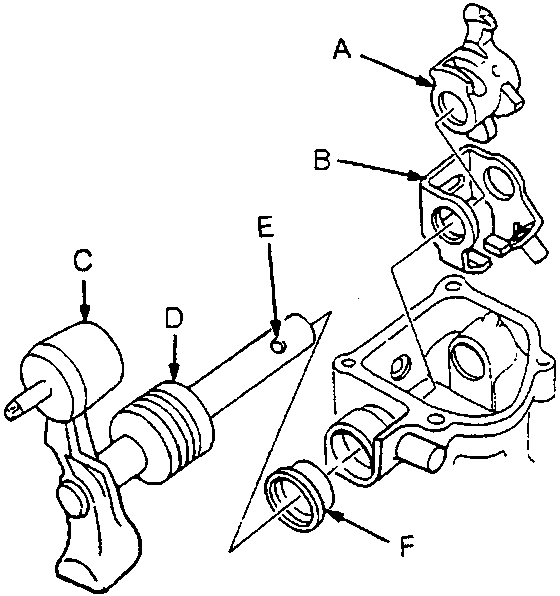
37M0220
- Seal the entire circumference of the bolt hole to prevent oil leakage.
- If 20 minutes have passed after applying liquid gasket, reapply it and assemble the housing and allow it to cure at least 30 minutes after assembly before filling gearbox with oil.
- Remove the shift lever, shift arm, and interlock. Replace the oil seal.
Note: Turn the boot so the hole is facing down.
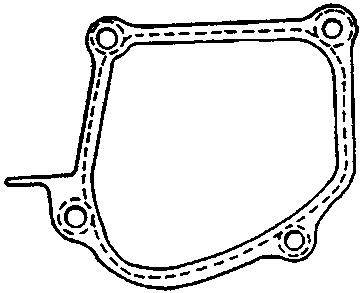
37M0221
- A Liquid gasket
- Install the shift arm assembly in the reverse order of removal.
Note:
- Apply liquid gasket to the shift arm cover mating surface of the gearbox housing.
- Use liquid gasket.
- Remove the dirt and oil from the sealing surface.
Parts & tools for this job For Rover 600
- PARTClutch kitSearch: Rover 600 clutch kit
- TOOLClutch alignment toolSearch: clutch alignment tool
- FLUIDGear oilSearch: Rover 600 manual gearbox oil
Links open Amazon search results in a new tab. As an Amazon Associate I earn from qualifying purchases.