
Evaporative emission canister
- Make
- Rover
- Model
- 800 Workshop Manual
- Year
- 1996–1999
- Section
- Repairs › Evaporative emission canister
Emission controlEvaporative emission canister
EVAPORATIVE EMISSION CANISTER
Service repair no - 17.15.13
Remove
- Disconnect battery earth lead.
- Raise front of vehicle.
WARNING: Support on safety stands.
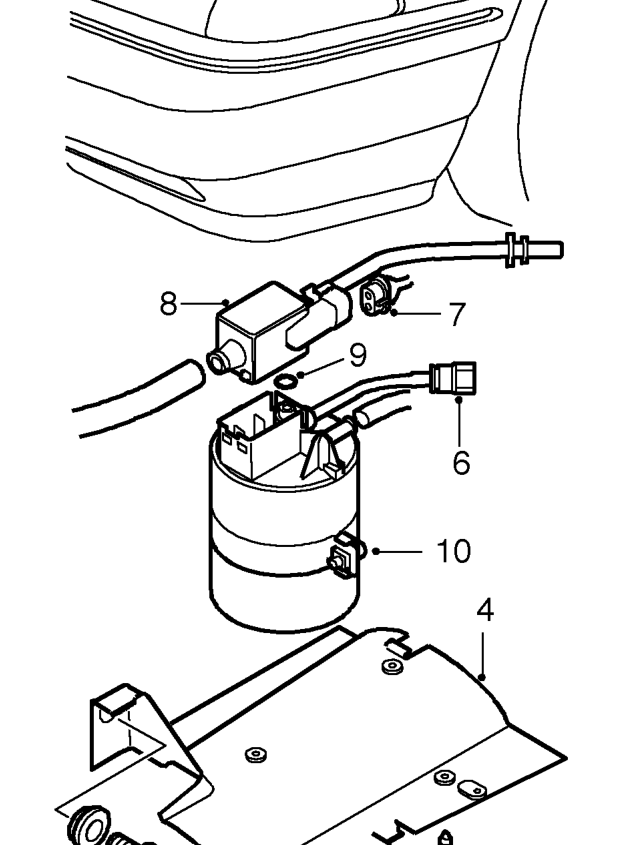
- Remove 2 screws securing access panel to front bumper LH edge.
- Remove bolt securing access panel to wing valance and remove panel.
- Release evaporative emission canister from mounting bracket.
- Depress RED tags on quick release connectors and disconnect pipes from evaporative emission canister.
- Disconnect multiplug from purge valve and remove evaporative emission canister. Do not carry out further dismantling if component is removed for access only.
- Release 4 clips and remove purge valve from evaporative emission canister.
- Remove ’O’ ring seal from purge valve.
- Loosen bolt and remove mounting strap from evaporative emission canister.
Refit
- Fit mounting strap to new evaporative emission canister and secure with bolt.
- Clean purge valve and fit new ’O’ ring.
- Position purge valve and secure to evaporative emission canister.
- Position evaporative emission canister and connect pipes. Connect multiplug to purge valve.
- Secure evaporative emission canister to mounting bracket.
- Fit access panel and secure with bolt and screws.
- Remove stand(s) and lower vehicle.
- Connect battery earth lead.
Parts & tools for this job For 1996 Rover 800
- PARTExhaust gasketSearch: Rover 800 1996 exhaust gasket
- TOOLPenetrating oilSearch: penetrating oil
- TOOLOBD2 scannerSearch: OBD2 scanner
Links open Amazon search results in a new tab. As an Amazon Associate I earn from qualifying purchases.