
Refit (page 2 of 2)
- Make
- Rover
- Model
- Coupé, Cabriolet & Tourer 200/400 Coupé, Cabriolet & Tourer Workshop Manual
- Section
- Repairs
SuspensionRefit · page 2 of 2
Service Repair No. Spring – 60.20.01
Service Repair No. Damper – 60.30.02
Remove
- Raise front of vehicle.
WARNING: Support on safety stands.
- Remove road wheel(s).
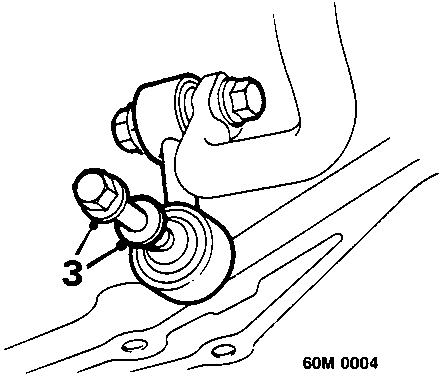
- Remove bolt, anti - roll bar link to lower arm.
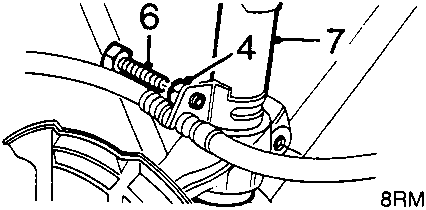
- Remove bolt, brake hose to bracket.
- ABS: Remove bolt, ABS sensor lead bracket to damper bracket.
- Remove bolt, hub to damper.
- Disconnect hub from damper.
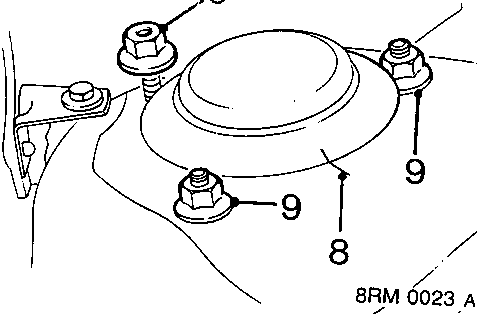
- Mark relationship, damper top mounting to body.
- Remove 3 nuts damper to wing valance.
- Remove damper and spring assembly from under wing.
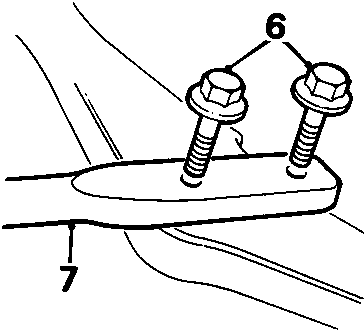
- Remove 2 bolts tie rod to lower arm.
- Remove tie rod.
- Remove remaining bush and flanged washer and spacer.
- Clean threads of tie rod bolts and holes in lower arm.
Refit
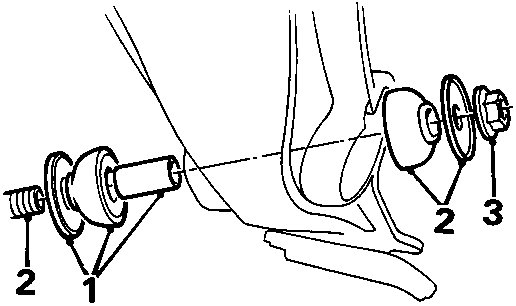
- Fit flanged washer with flange away from bush, bush and spacer to tie rod.
- Locate tie rod in front sub frame and fit remaining bush and flanged washer.
- Fit tie rod nut but do not tighten.
- Fit tie rod to lower arm bolts and tighten to 80 Nm.
- Tighten tie rod front mounting nut to 55 Nm.
- Fit underbelly panel, see BODY – Repairs.
- Fit road wheel and tighten nuts to 100 Nm.
- Remove stand(s) and lower vehicle.
Parts & tools for this job For Rover Coupé, Cabriolet & Tourer
- TOOLCoil spring compressorSearch: coil spring compressor
- TOOLBall joint separatorSearch: ball joint separator
- PARTShock absorbersSearch: Rover Coupé, Cabriolet & Tourer shock absorbers
Links open Amazon search results in a new tab. As an Amazon Associate I earn from qualifying purchases.