
Constant velocity joint - drive shaft
- Make
- Land Rover
- Model
- Discovery II (UK)
- Section
- Repairs › Constant velocity joint - drive shaft
Front axleConstant velocity joint - drive shaft
Constant velocity joint - drive shaft
$% 54.20.21
Remove
- Remove wheel hub. FRONT SUSPENSION, REPAIRS, Wheel hub.
- Place drive shaft in vice.
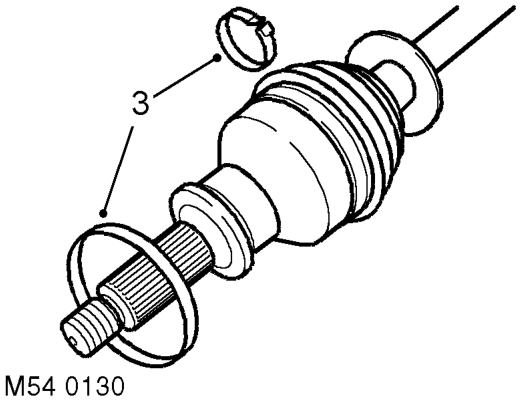
- Release both securing bands from gaiter and discard.
- Compress gaiter to gain access to joint.
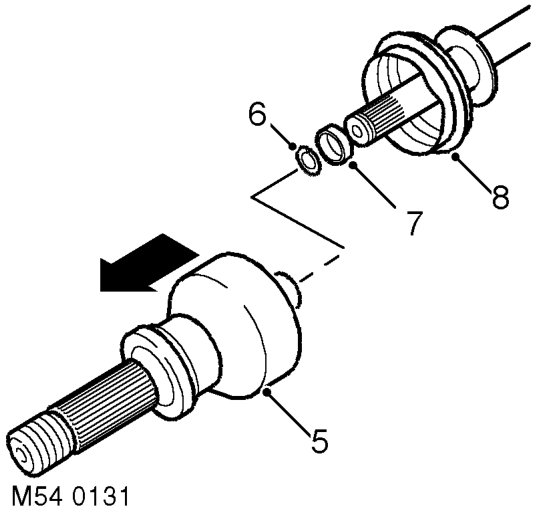
- Using a suitable drift against the inner part of the joint, remove joint from shaft.
- Remove circlip from shaft and discard.
- Remove spacer from shaft.
- Remove gaiter from shaft and inspect for damage. Renew if necessary.
Refit
- Clean drive shaft and gaiter.
- Clean spacer.
- Fit new inner securing band to gaiter.
- Fit gaiter to shaft.
- Fit spacer to shaft.
- Fit new circlip to shaft.
7. Position joint to shaft. Use a screwdriver to press circlip into its groove and push joint fully onto shaft.
- Apply grease from the sachet to the joint.
- Position gaiter to joint and fit new outer securing band.
- Use a Band-it thriftool to secure inner and outer securing bands.
- Fit wheel hub. FRONT SUSPENSION, REPAIRS, Wheel hub.
Parts & tools for this job For Land Rover Discovery
- PARTFront wheel bearingSearch: Land Rover Discovery front wheel bearing
- TOOLBearing puller kitSearch: wheel bearing puller kit
- PARTCV boot kitSearch: Land Rover Discovery cv boot kit
Links open Amazon search results in a new tab. As an Amazon Associate I earn from qualifying purchases.